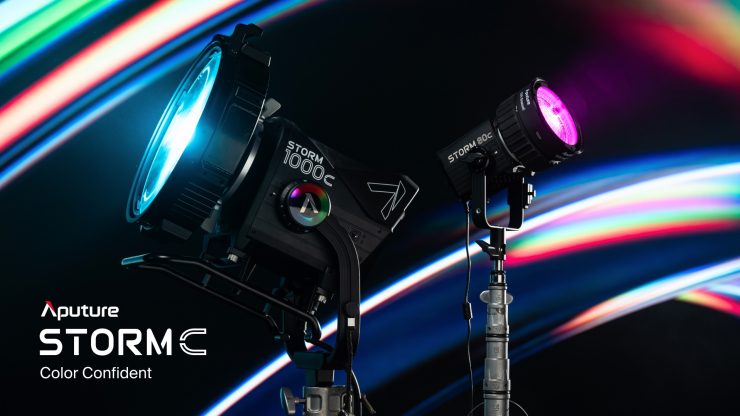
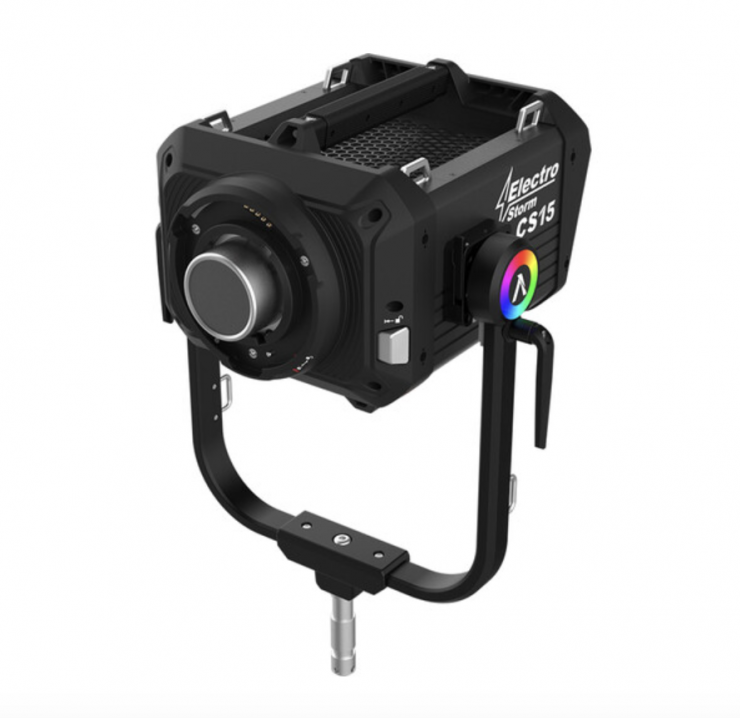
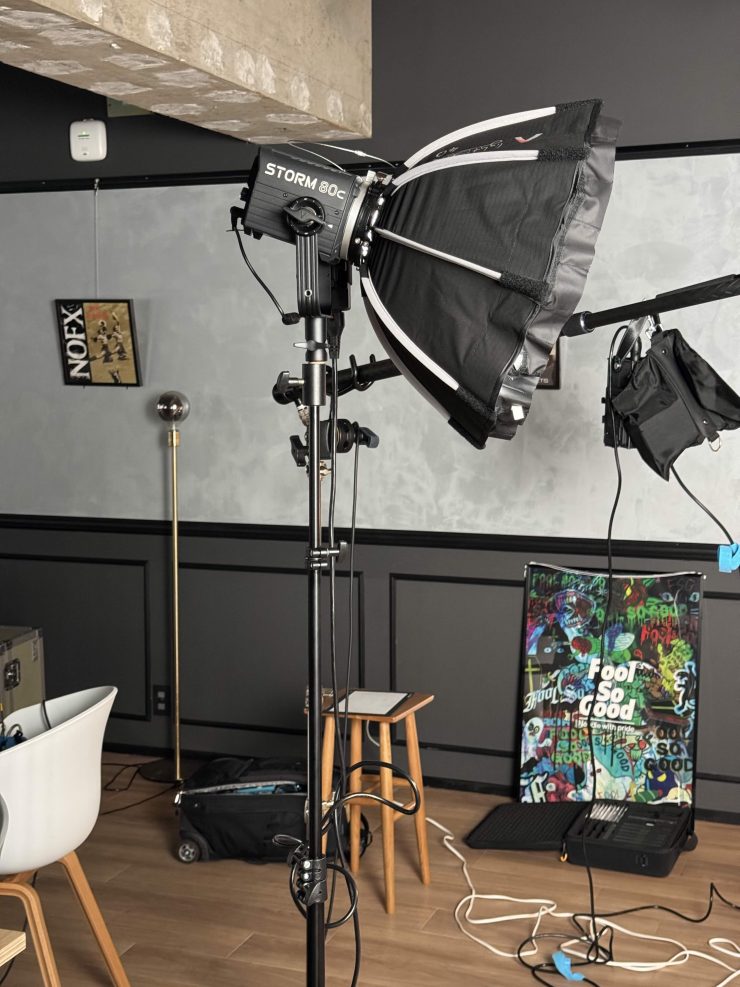
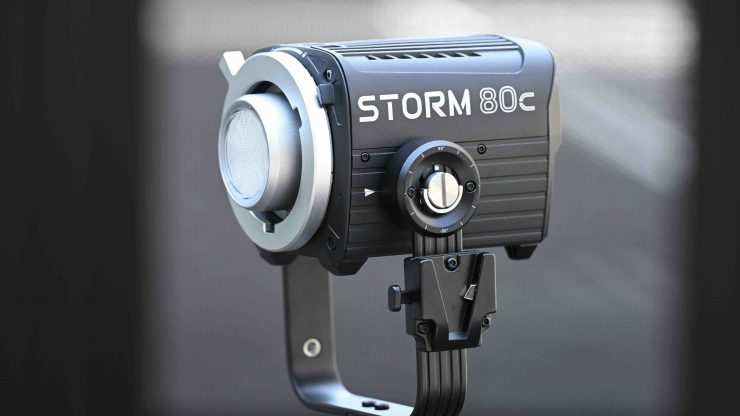
Aputure recently expanded its STORM family of point source lights with the new STORM 80c and STORM 1000c. These tunable color lights feature the new BLAIR-CG light engine (Blue/Lime/Amber/Indigo/Red/Cyan/Green), offering a claimed color spectrum greater than any other professional LED fixture currently available.
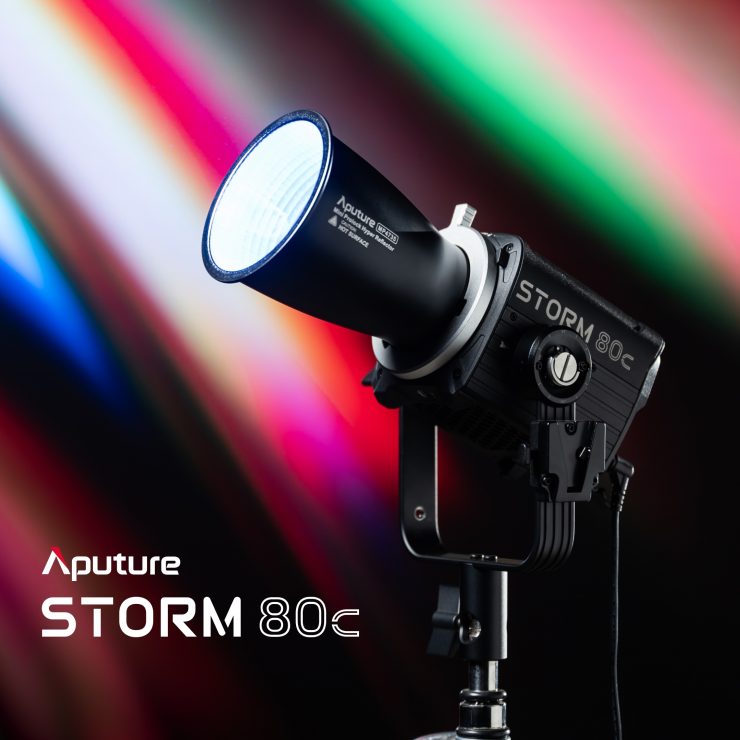
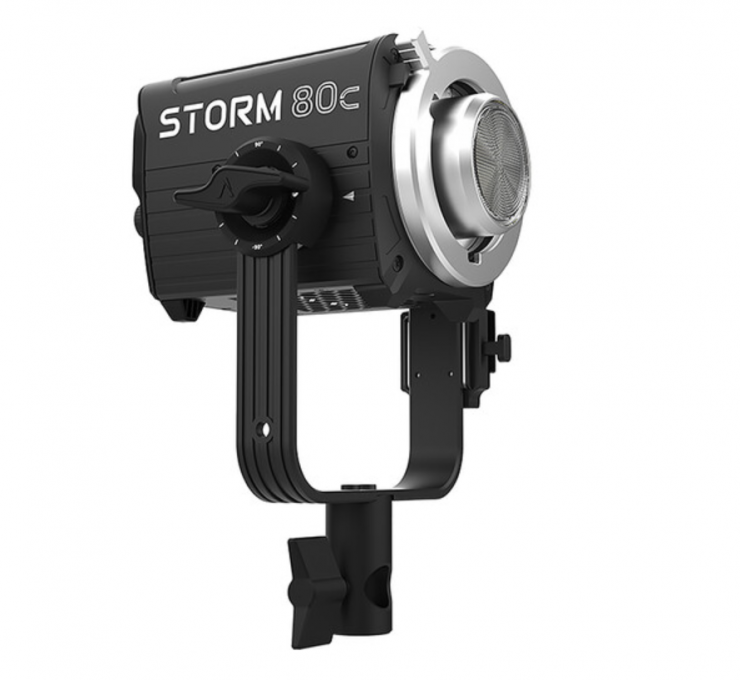
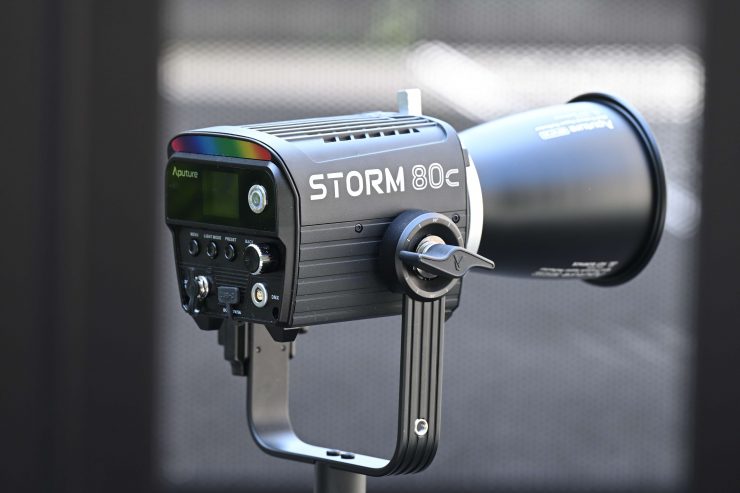
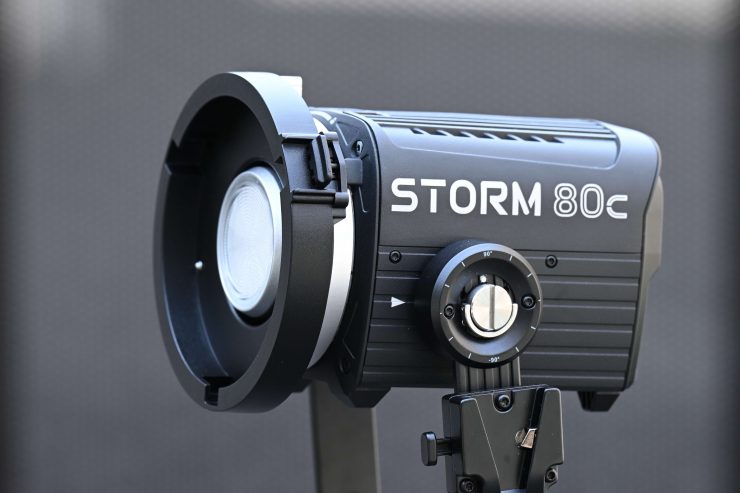
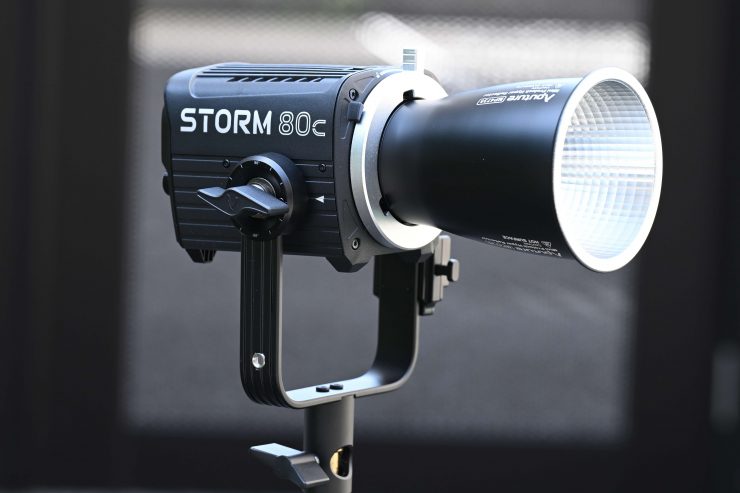
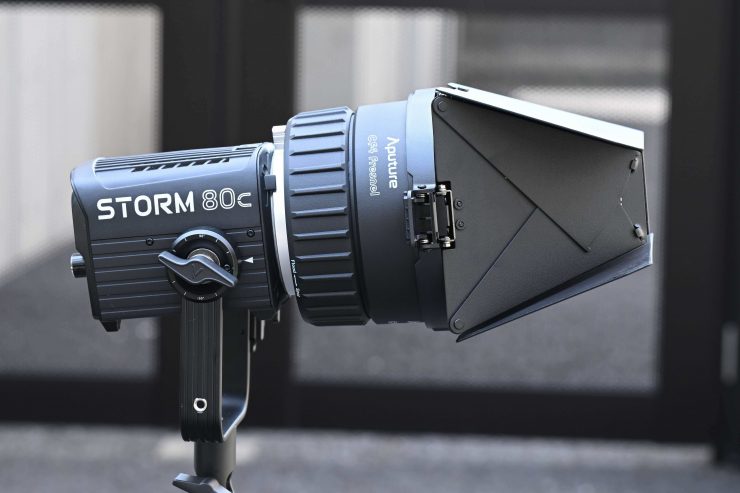
The STORM 80c is a lot smaller than the STORM 1000c and the impressive STORM 1200x that I previously reviewed on the site.
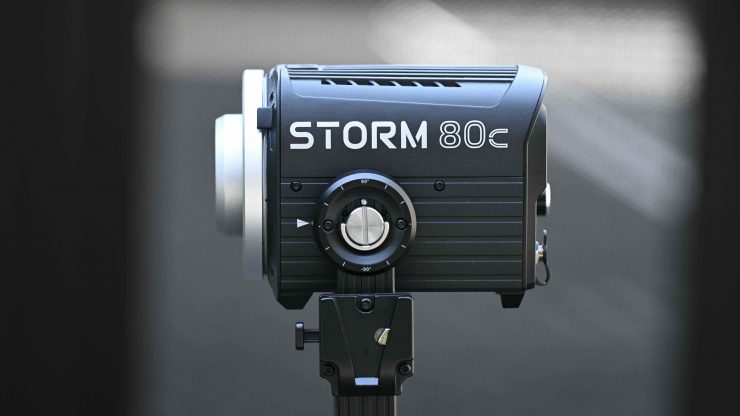
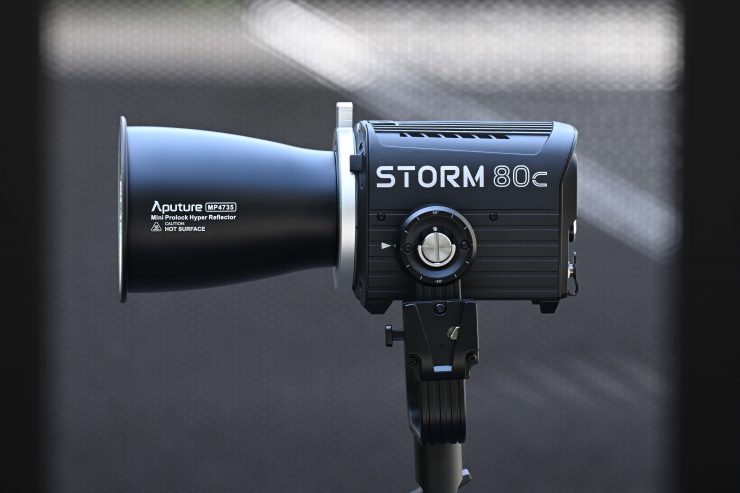
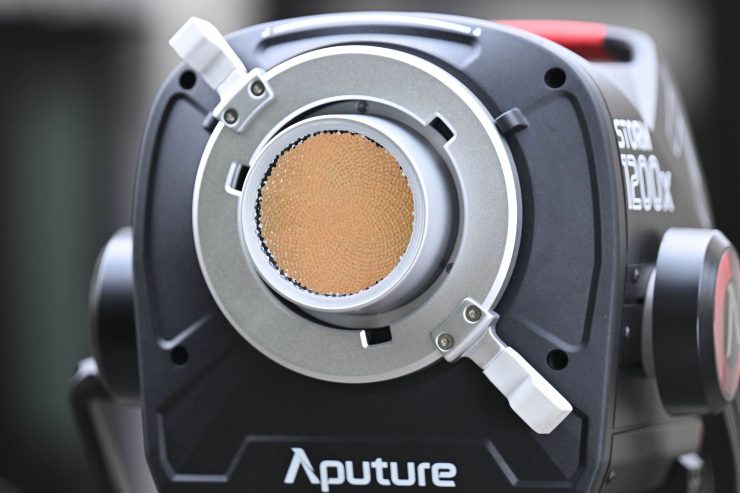
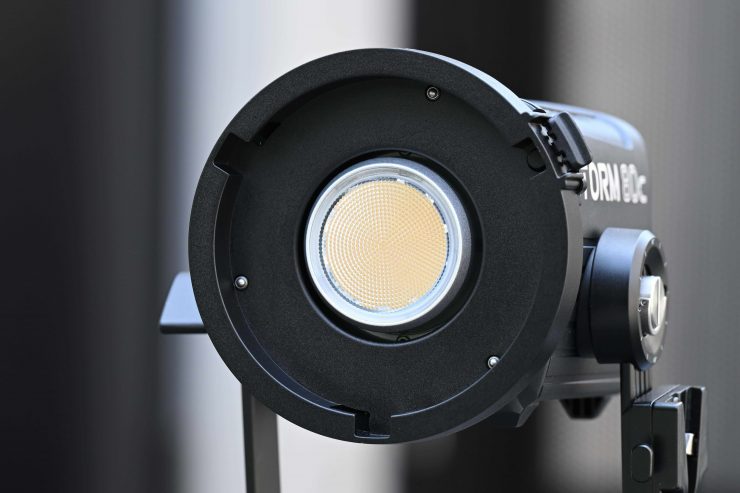
The STORM 80c is being touted as a compact and highly portable point-source COB light. It boasts an extended white light adjustment of 1800-20,000K CCT with 100% +/- green control, which is the full ASC MITC range of adjustment.
The light draws 100W and it features a Mini ProLock Bowens-Type Mount. It can be powered remotely through an optional V-mount battery.
Key features
- Compact, Portable Film/TV Light Fixture
- Output: 19,850 Lux at 3.3′ w/ Reflector
- 1800-20,000K CCT; BLAIR-CG Color Control
- 80W Color-Tunable Point-Source Unit
- Onboard, DMX, Sidus & App Control
- AC Adapter & USB-C 100W Input Options
- Optional V-Mount Battery Plate
- SSI (D56) 88 | SSI (Tungsten) 84
- 4 Dimming Curves
- Mini ProLock Bowens-Type Mount
Lights in this form factor are very popular because of their versatility, and we are now starting to see more options coming to market with higher outputs and power draws. Despite all of the high power draw, large fixtures getting released, it is good that companies are still making smaller, more affordable options that can be run via camera batteries.
So, let’s get on with the review and see how the Aputure STORM 80c stacks up.
Concept
The whole concept behind the new technology in the STORM series was to create highly tunable white light and full colors with the best quality and highest output.
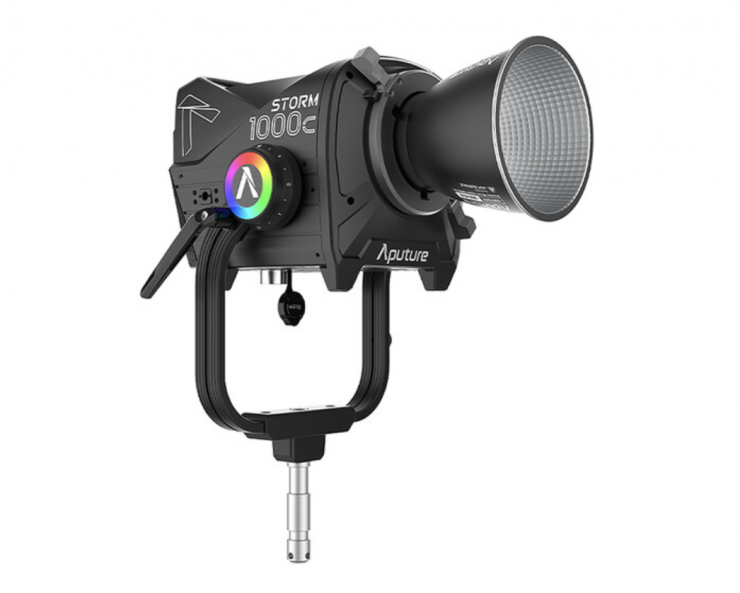
STORM 1000c 
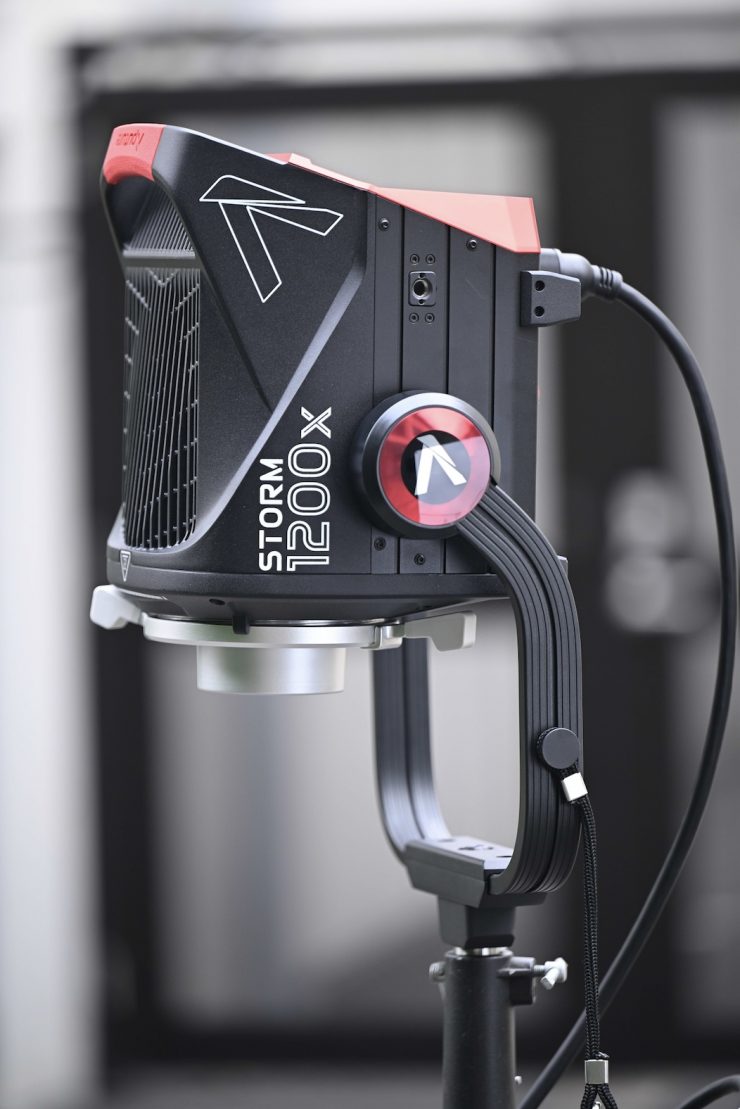
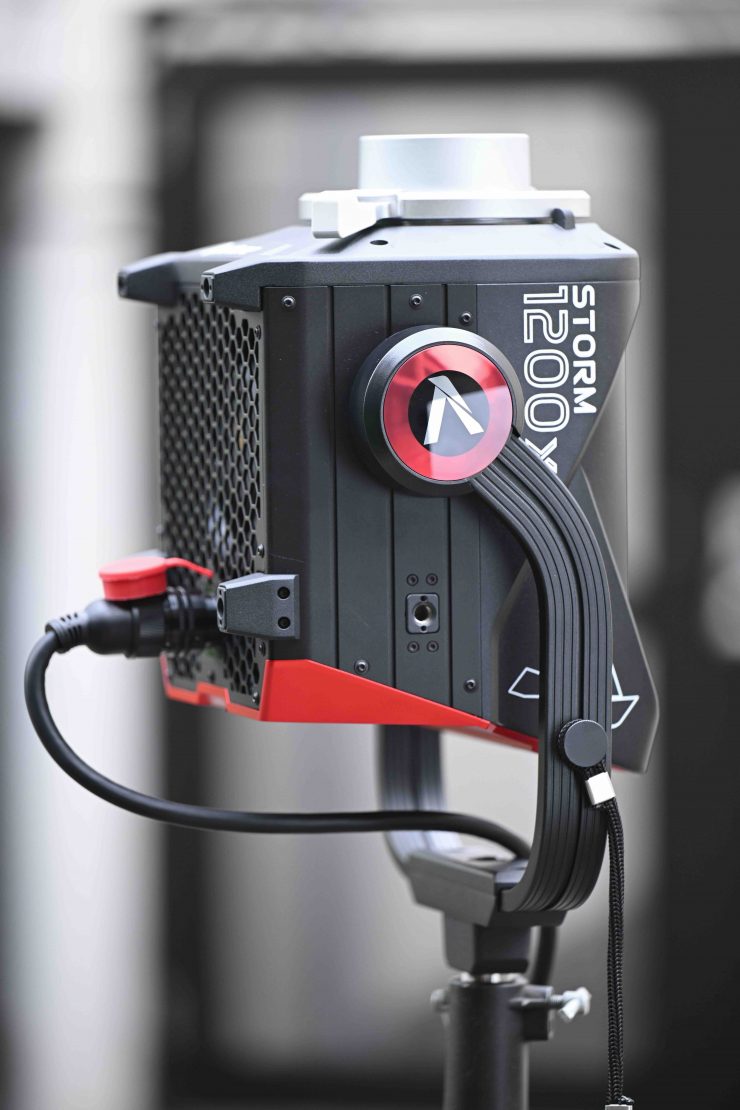
STORM 1200x
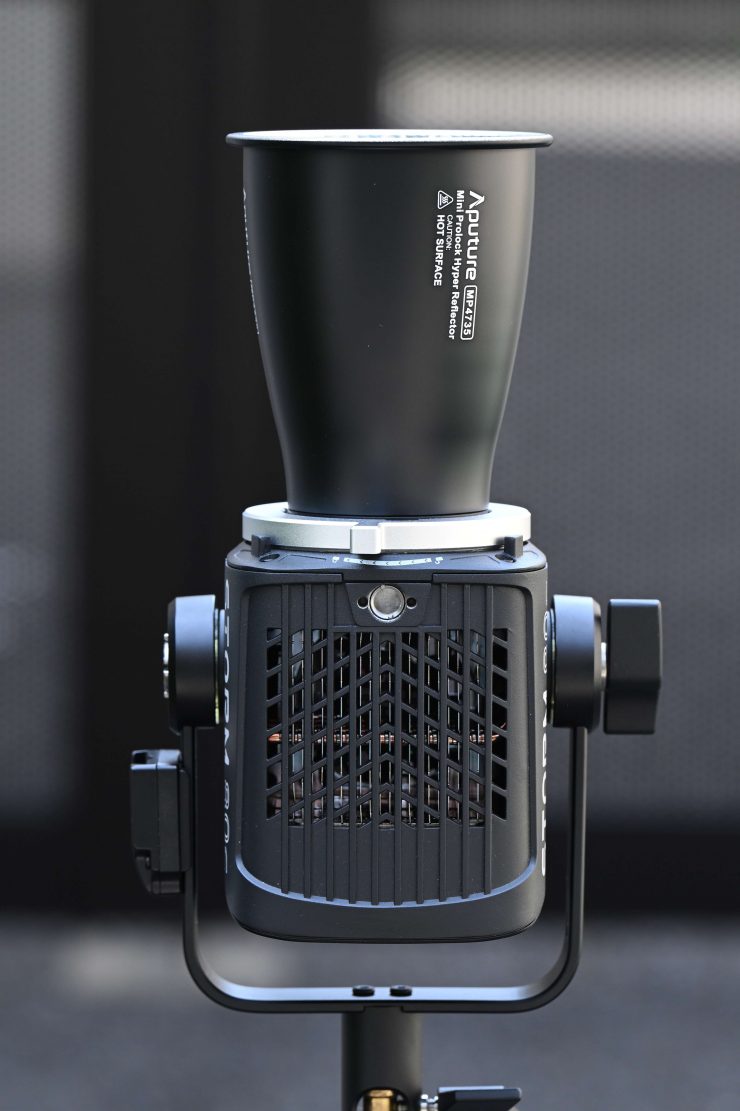
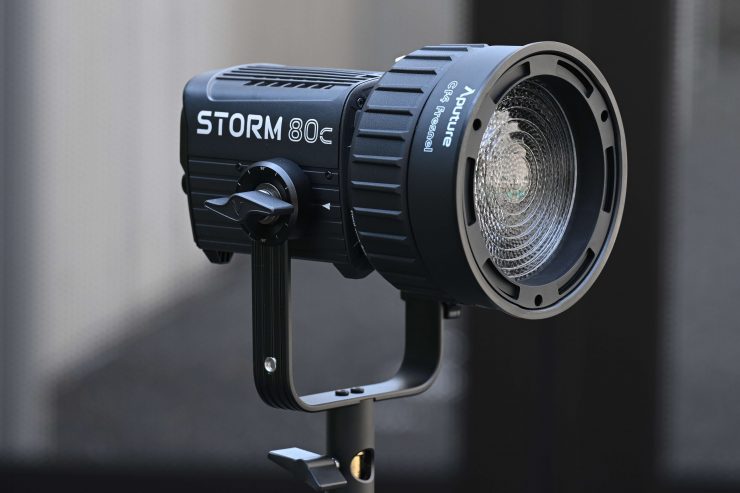
The STORM 80c looks like a mini-sized version of the STORM 1000c.
BLAIR-CG Light Engine
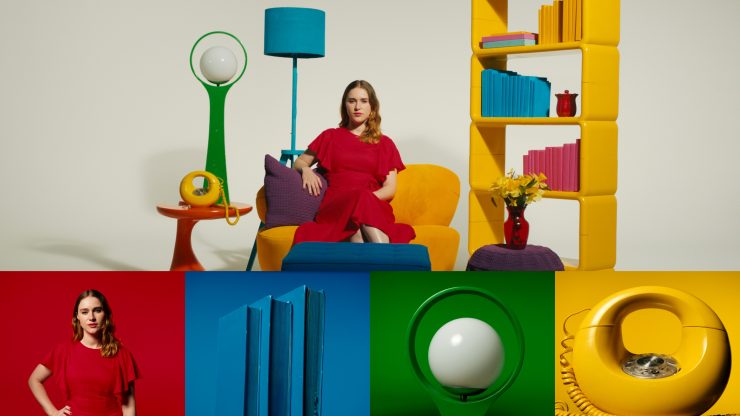
The new BLAIR Light Engines are undoubtedly a direct result of Aputure acquiring Prolycht last year. With both Aputure and Prolycht engineers now working together for the same company, they have been able to come up with something that is quite unique. Aputure claims that the new BLAIR-CG light engine is the best tunable color light ever produced in an LED, delivering the greatest range and highest color accuracy. It can reach 90% of Rec2020 colorspace, achieving saturated colors in shades otherwise unobtainable, such as accurate yellow.
Aputure could have taken the easy path and just used the RGBACL light engine from Prolycht, but they decided to go in a slightly different direction.
Like its sister the BLAIR light engine found in the STORM tunable white lights, BLAIR-CG includes a calibrated indigo emitter, which emulates the near-UV light of real daylight and tungsten. This activates the natural fluorescence of various fabrics, plant life, and other materials, thereby replicating the effect of natural light. White fabrics can appear whiter, colors more vibrant and all surfaces in general will appear the same as they do under natural light.
The BLAIR Light Engine in the STORM 1200x utilizes blue, lime, amber, indigo, and red, LED emitters. With the new STORM 80c and 1000c, Aputure has added additional cyan and green emitters. This is quite different from RGBWW or RGBACL. Lights that utilize RGBACL don’t use any white LEDs, instead, they mix all of those different color LEDs to produce white light, and that’s essentially what BLAIR is doing too.
The light engine was designed to deliver a better quality white light to fill out the color spectrum while offering greater adjustability. The calibrated Indigo is said to enhance fluorescing materials, resulting in a higher quality white light that better matches natural daylight and black body sources such as tungsten quartz.
Adding Indigo is very interesting because the light it emits is right at the edge of our visible spectrum and that is why engineers probably haven’t thought about doing it before, that was until now. But, why Indigo? Well, not all objects or surfaces reflect light, some of them absorb it. What Aputure engineers found is that by adding an Indigo emitter certain materials and objects retained their natural brightness and color. In practice, this actually makes quite a noticeable difference. In some of the examples I have seen, you can certainly see its benefits. The benefits will be more noticeable when using the light at daylight CCT setting as opposed to tungsten.
The human eye is only really capable of detecting wavelengths from 380 to 700 nanometers, and most LED lights don’t contain any information below around 420 nanometers. The BLAIR light engine adds information right out to 380 nanometers.
Utilizing color control functions such as HSIC+, xy coordinates, and a gel equivalency mode, BLAIR-CG is claimed to be capable of matching gelled incandescent lights, target hues, and heavily saturated objects and dyes.
Aputure decided to call it BLAIR because they wanted to avoid the alphabet soup confusion of other RGB variants. Regardless of whether you like the name or not, it is easier to remember.
The human eye is only really capable of detecting wavelengths from 380 to 700 nanometers, and most LED lights don’t contain any information below around 420 nanometers. The BLAIR and BLAIR-CG light engine adds information right out to 380 nanometers.
How did they arrive at BLAIR?
Instead of just making incremental improvements, Aputure got to the point where they asked themselves what are we trying to do, and what are the problems we are trying to solve. They wanted to come up with a better mouse trap and not just build another existing one. This led them to look at different ways of coming up with an alternative solution to what was already available. Aputure received a lot of feedback from Art Directors, make-up artists, etc. that things just never seemed to look quite right when trying to replicate daylight sources.
With LED lights, replicating tungsten has always been a lot easier than replicating daylight. A lot of LED lights when used at daylight CCT settings never quite look right. The color of skin tones, fabrics, etc. can look slightly off. This led Aputure to re-look at the spectrum to see what was missing.
What Aputure found is that there was a discord between measuring colors with a meter and seeing what actually happened when it came to light being reflected and absorbed by colors. Certain surfaces reflect light, and others absorb it, and then there is another group that reflects back light that is different from what is hitting it. This can lead to differences in color and brightness. This discovery led to what Aputure believes was the key ingredient that was missing in the color engine, Indigo.
Probably the best way to describe it is that if you were to shine an incandescent UV light at an object, you can see how bright that reflected light is compared to the light being emitted from the source.
If an LED light doesn’t have a certain frequency that is contained in UV light it won’t look the same. This is why so many LED lights struggle to replicate daylight sources because up to now, those frequencies weren’t being generated by the light engine. Why engineers didn’t see this in the past, is because they believed that these frequencies weren’t visible to the human eye, but what they were overlooking was that the reflected light from these frequencies was visible.
Now, some other companies have been using an extra blue emitter in their light engines to help replicate better daylight sources, and while that may sound similar to what Aputure is doing, it isn’t exactly the same. Companies like Maxima are using technology to add more information out toward the edges of the spectrum, but it’s not the same as what Aputure is now doing.
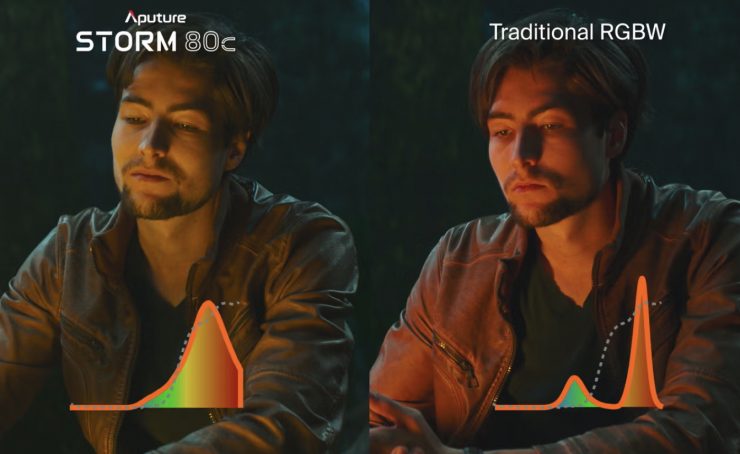
The above image from Aputure compares the STORM 80c light to a traditional RGBW fixture.
This does show a good real-world illustration of what the new BLAIR-CG Light Engine does. Lights like the Maxima 3. Maxima 6, or ZOLAR Vega 30C, use similar, but not the same technology.
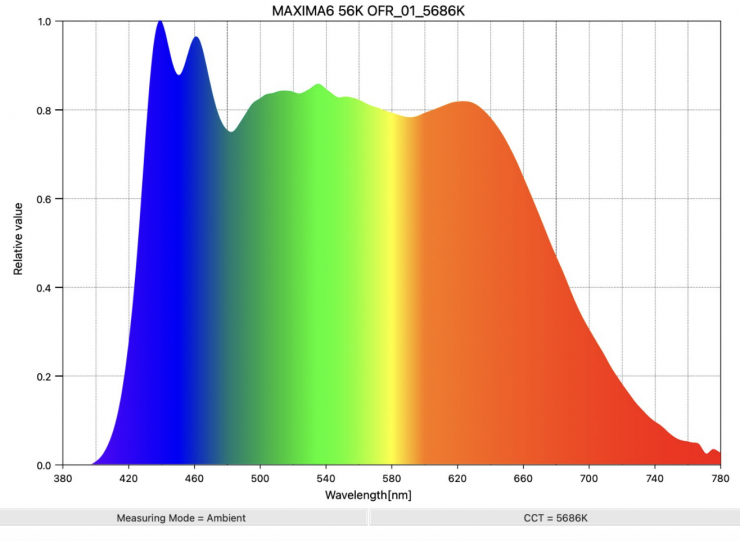
Maxima 6 GaN 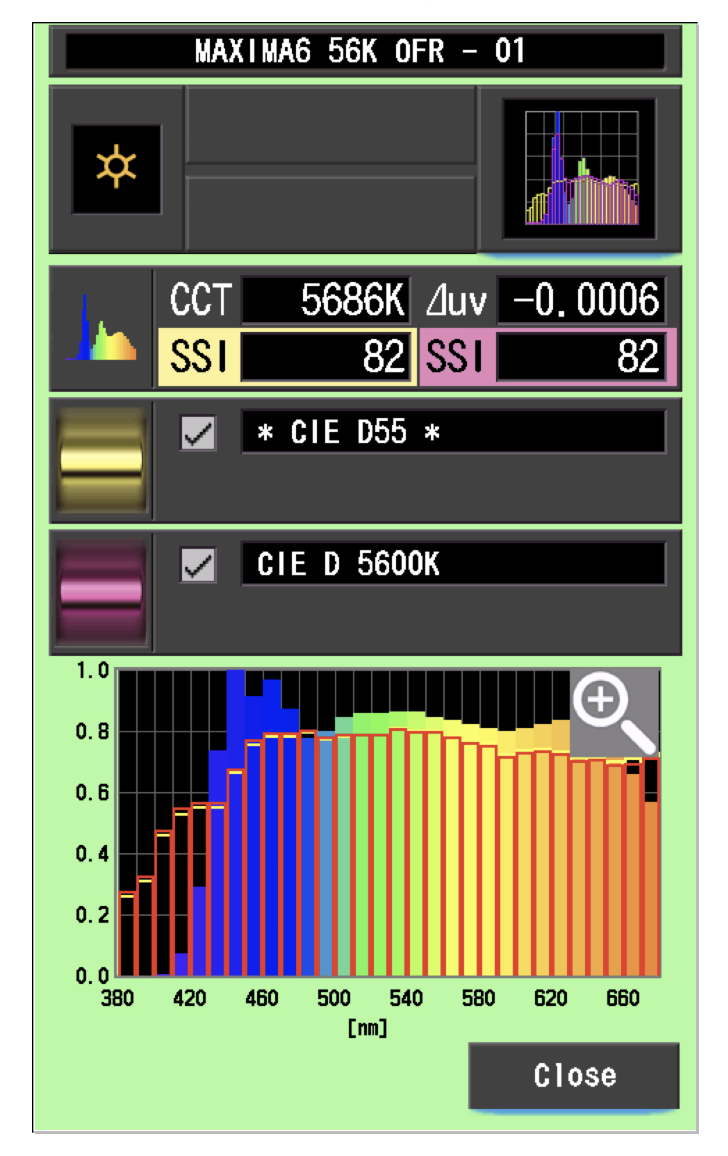
If we look above at the daylight spectrum of the Maxima 6 GaN or Maxima 3, you can see the extra blue spike at around 430nm, which is similar, but not quite the same as what I expect to see with the Aputure STORM 80c/1000c. The Maxima 6 GaN utilizes Gallium Nitride which is a binary III/V direct bandgap semiconductor that is well-suited for high-power transistors capable of operating at high temperatures. Since the 1990s, it has been used commonly in light-emitting diodes (LED). Gallium nitride gives off a blue light used for disc-reading in Blu-ray.
Now, what you clearly need to remember is that the Maxima 6 GaN and Maxima 3 are daylight-only (5600K) fixtures.
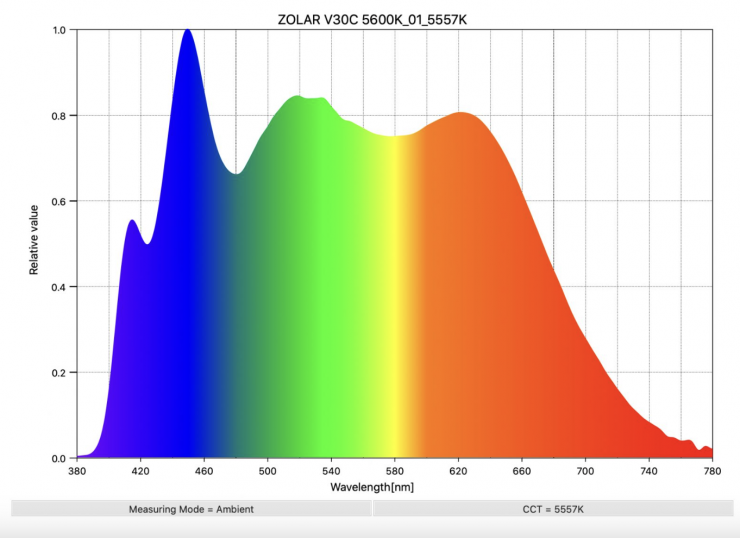
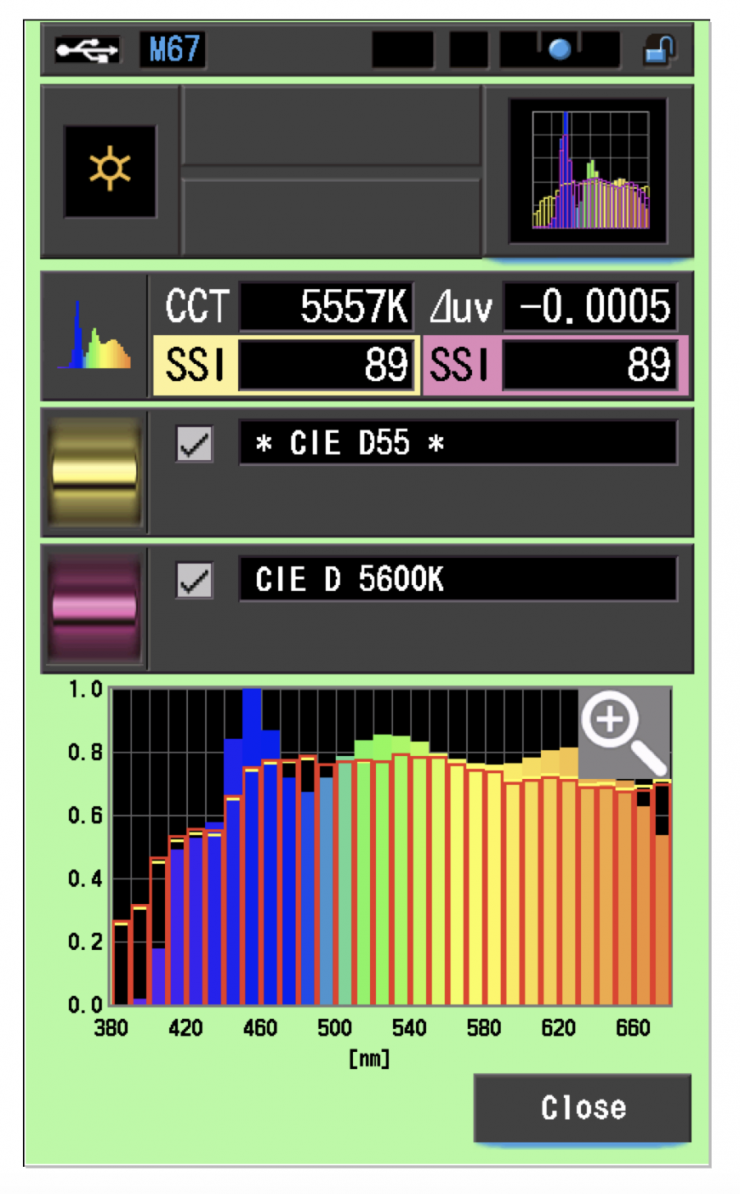
If we have a look at a full-spectrum fixture that is doing something similar, in this case, the ZOLAR Vega 30C, you can see there is extra information at around 400nm. You can also see why this translates to high SSI scores.

If we look at an LED light that isn’t utilizing this type of technology, such as the ARRI Orbiter, we can see the difference in the spectrum.
How well will it match other Aputure fixtures?
That is a good question. Earlier Aputure fixtures utilized different color engines. If you leave the light in its standard mode, it will match other Aputure fixtures pretty well. If you want to utilize the color engine to better match daylight sources, you will be able to put it into another mode.
As the light also has an x,y co-ordinates mode, you will be able to dial it in to better match other lighting sources as well.
Build Quality

The build quality of the STORM 80c is solid, and I would say that it is in line with other current Aputure fixtures. It’s not going to have the build quality of an ARRI, Creamsource, or Kelvin fixture, but I think it’s going to be good enough for most people’s needs.
How will it stand up to the rigors of fieldwork and the day-to-day punishment of being in a rental house? That’s hard to know, as it’s a brand new light.
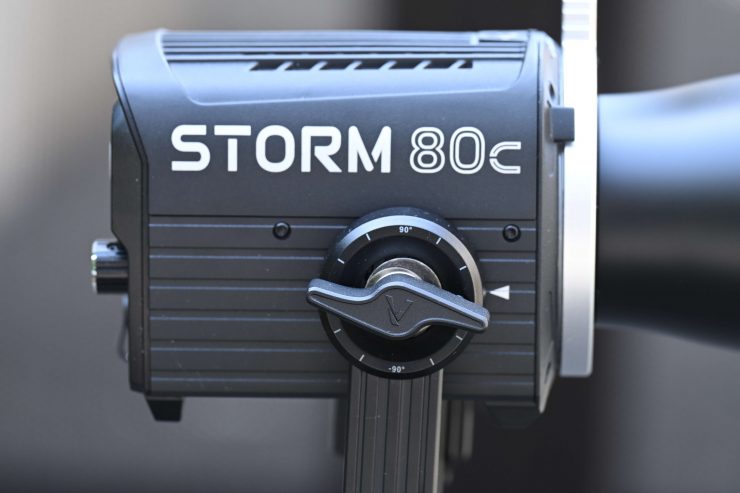
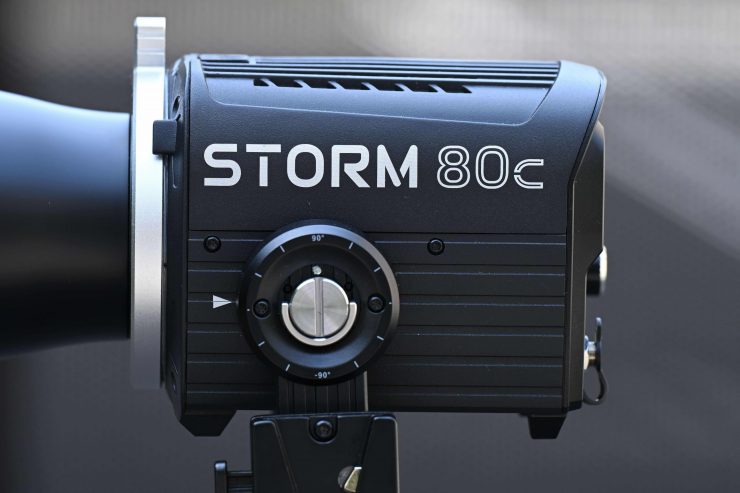
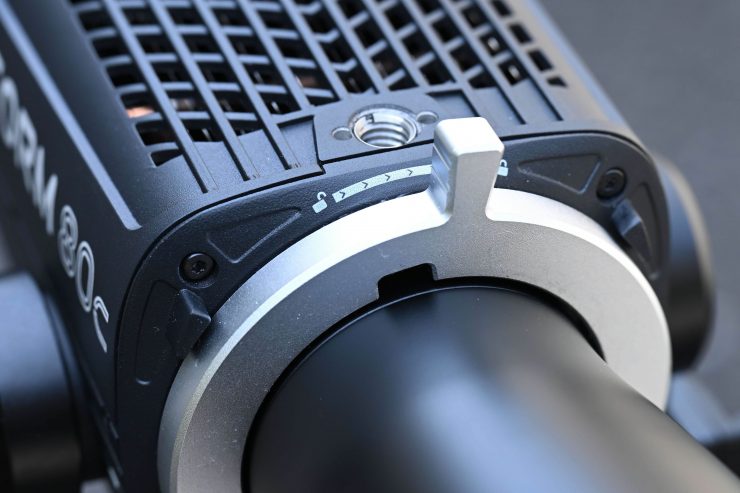
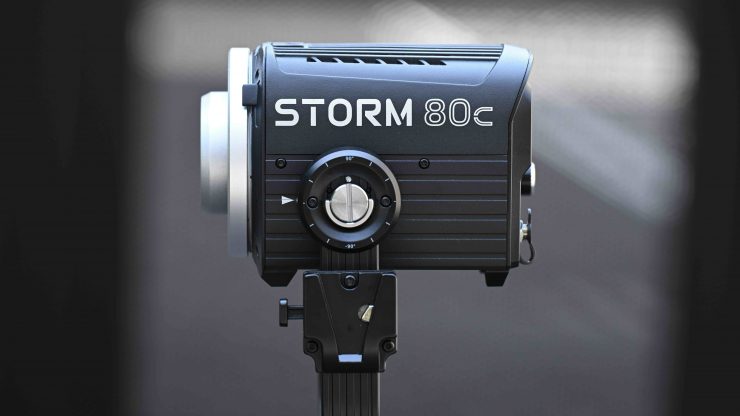
The light features a single locking mechanism on the yoke frame that is well made and it solidly locks the light down. There are also degree markings, which are handy.
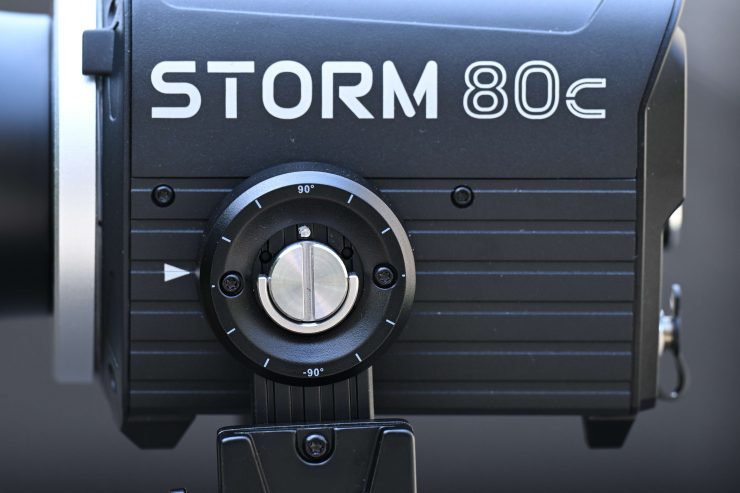
The yoke frame was designed to be easily removed
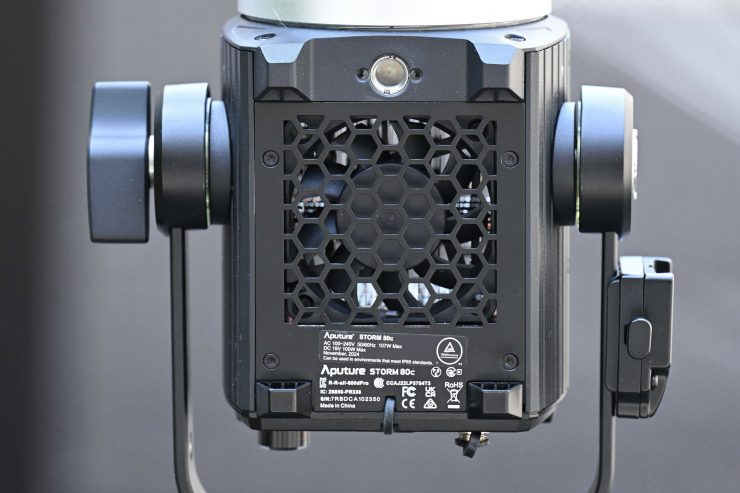
IP65 Weather Protection
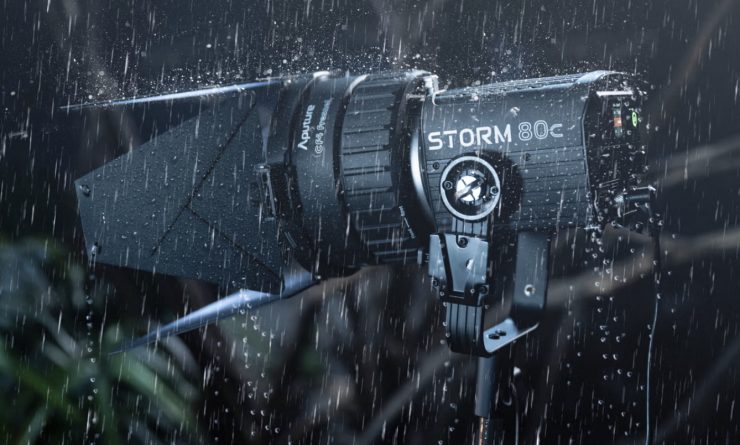
The fixture features IP65 dust and weather protection, which means the STORM 80c can work in extreme environments. Seals on every connector and around components allow the fixture to be used outside in the rain.
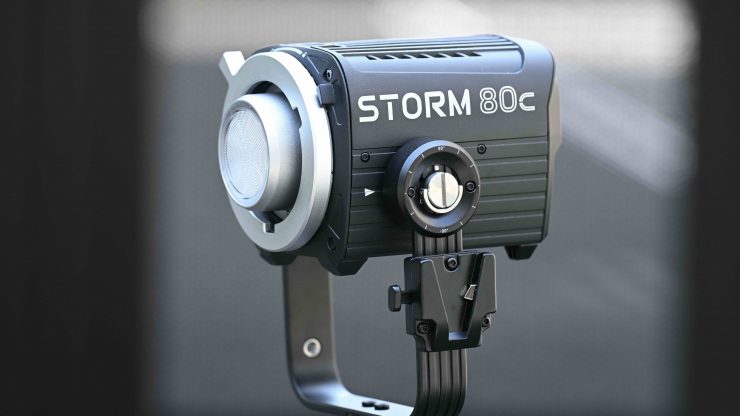
Design
The Aputure STORM 80c was designed as a single unit with an integrated controller, however, there is a small AC power supply.
You can place the STORM 80c flat on the ground because the power input is located on the back of the fixture.
A lot of today’s modern lights are now a seamless blend of hardware and software. With software playing such a big role, lighting companies could continue to improve and update fixtures over time via firmware updates, however, you don’t actually see too many firmware updates getting released for lights. It will be interesting to see if Aputure adds features or extra functionality via firmware in the future.
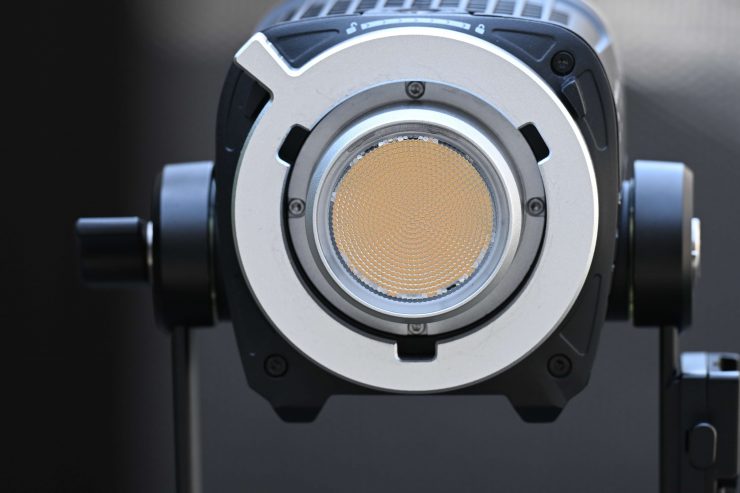
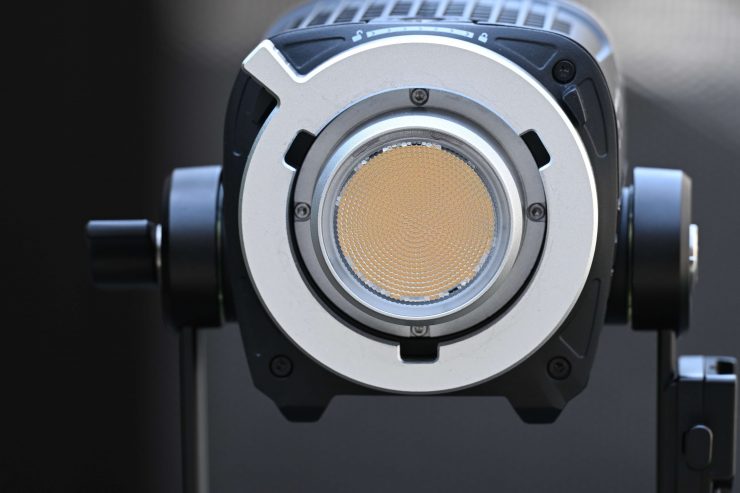
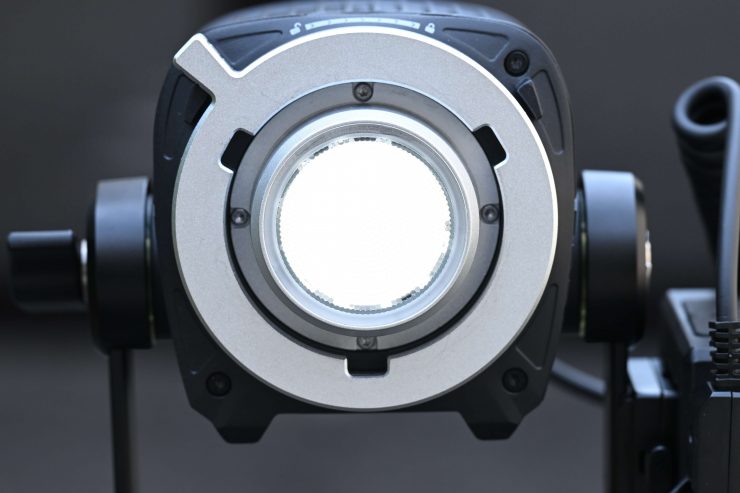
COB
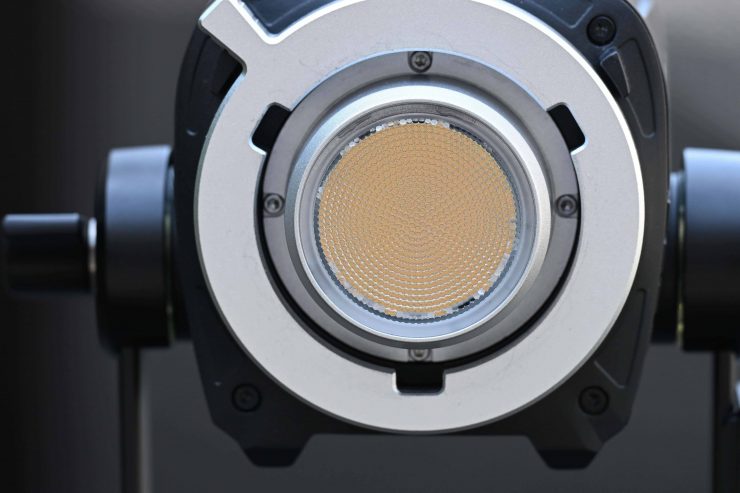
Quite a few LED lights on the market, including the Aputure STORM 80c, are using COB technology. COB stands for “Chip On Board” where multiple LED chips are packaged together as one lighting module. The advantage of COB LEDs being multi-chip packaged is that the light-emitting area of a COB LED can contain many times more light sources in the same area that standard LEDs could occupy. This results in a greatly increased lumen output per square inch.
The first caveat with COB LEDs is that they produce a ton of heat, and that heat needs to be effectively dispersed. The second caveat is that you will usually need to diffuse them as they are very bright to look at and can be unsuitable for directly lighting talent. The trouble is, if you use them with diffusion, such as a softbox, you are going to lose a ton of output because that output is coming from a small-sized source. With a lot larger source, say a 2×1 panel, you don’t lose as much output.
Weight & Size
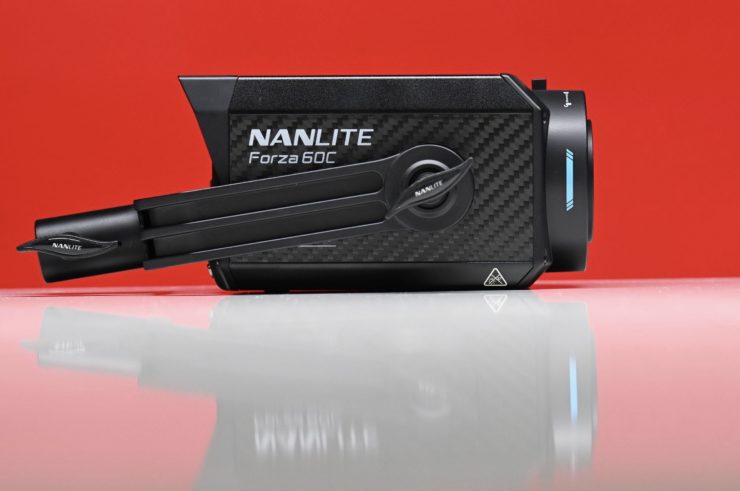
The STORM 80c weighs 2.98 lb / 1.35kg (Fixture with Yoke), and the power supply is 0.9 lb / 405g. As a comparison, the Nanlite Forza 60C RGB LED Monolight weighs 2.4 lb / 1.08kg.
So, how does that weight compare to some of the competition?
| TOTAL WEIGHT | |
| Aputure STORM 80c | 1.8kg / 3.88 lbs (including yoke) |
| Nanlite Forza 60C | 1.26kg / 2.82 lbs (including yoke) |
| Neewer CB60 RGB | 1.7kg / 3.7 lb |
| COLBOR CL60R RGB COB | 760g / 1.7 lb (Overall Kit with Reflector) |
| COLBOR CL120R Lite | 1.6kg / 3.5 lb (Fixture with Mount) |
| HIVE LIGHTING Wasp 100-CX | 907g / 2 lb |
| HIVE LIGHTING Wasp 100-C | 1kg / 2.3 lb |
Please note that I am only listing similar fixtures with a power draw of between 70-120W.
Mounting
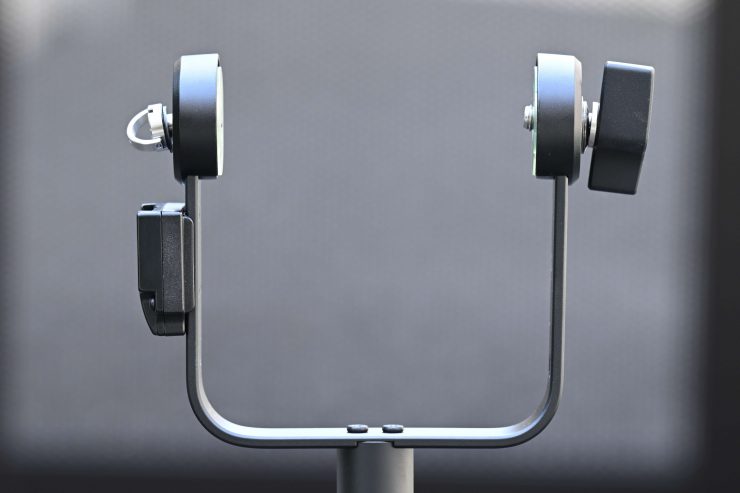
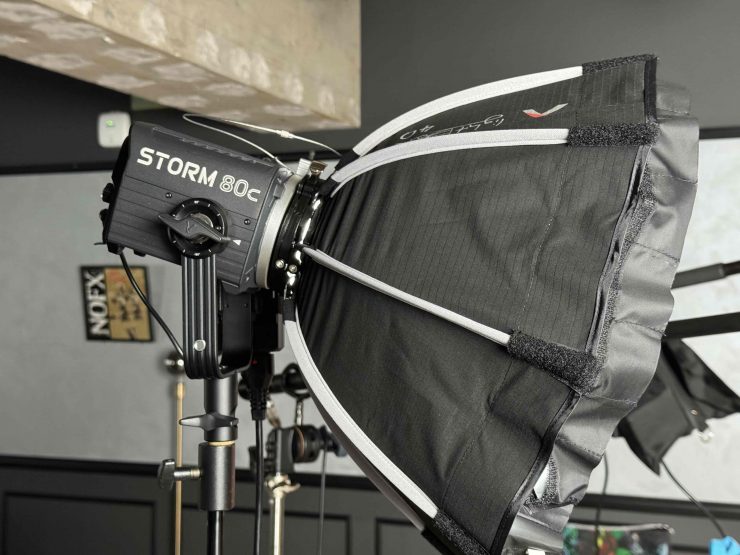
As I mentioned earlier, the Aputure STORM 80c comes with a robustly made yoke that allows you to have a good tilt range when light modifiers such as softboxes are attached.
The yoke gives you a lot of adjustment, and there aren’t any clearance issues with the power connector hitting the frame.
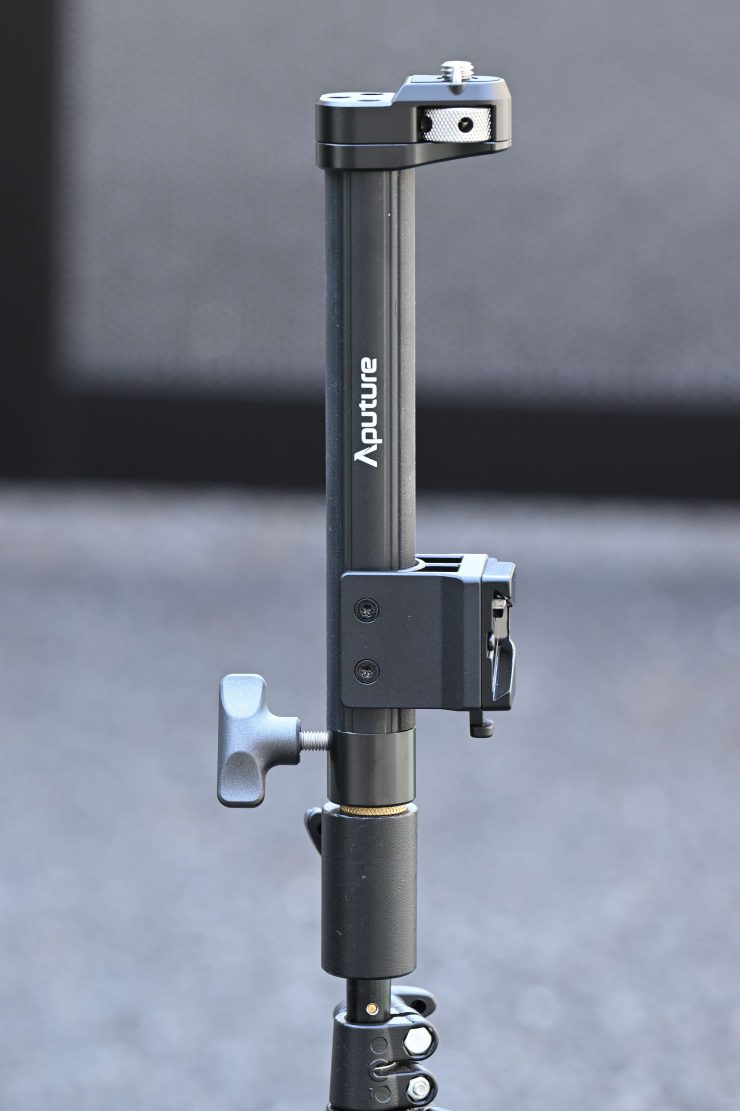
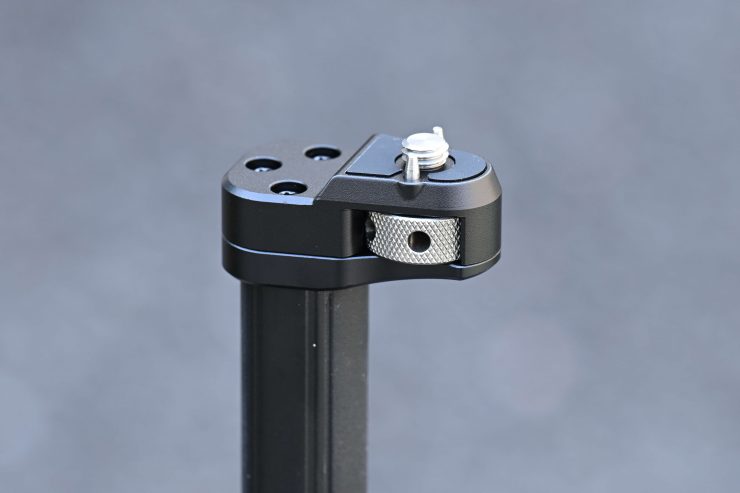
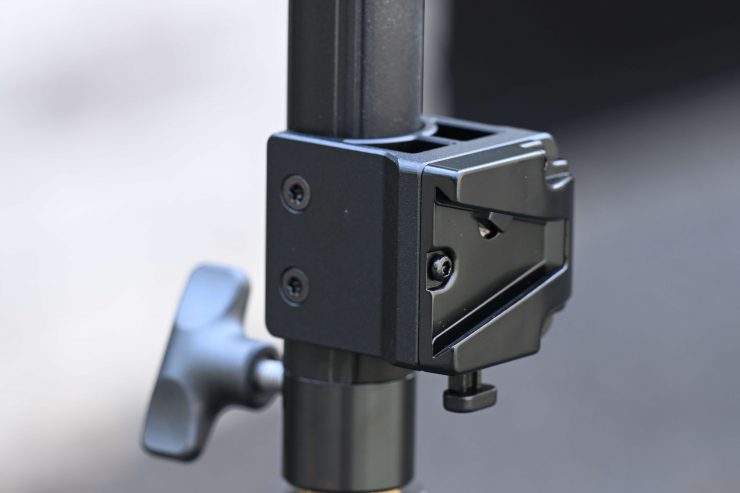
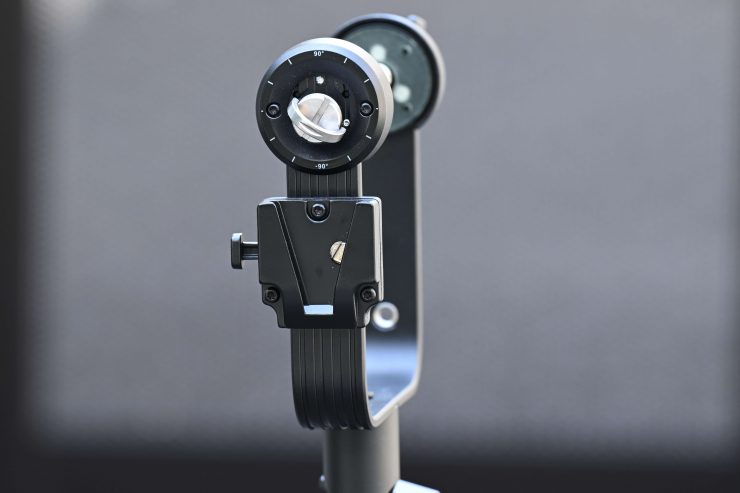
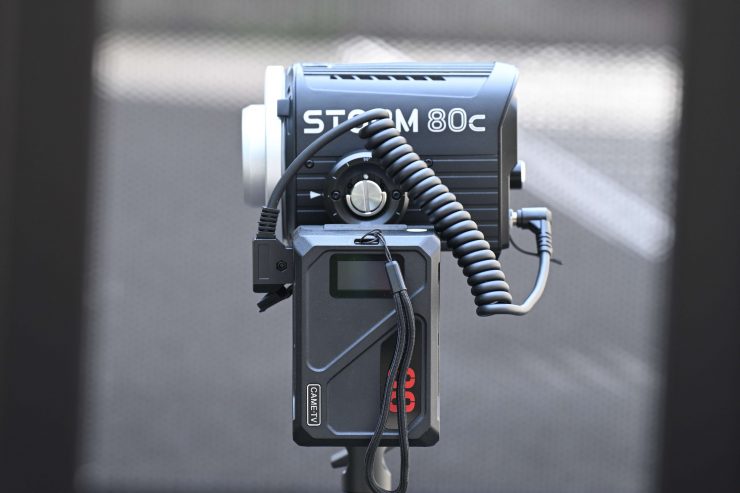
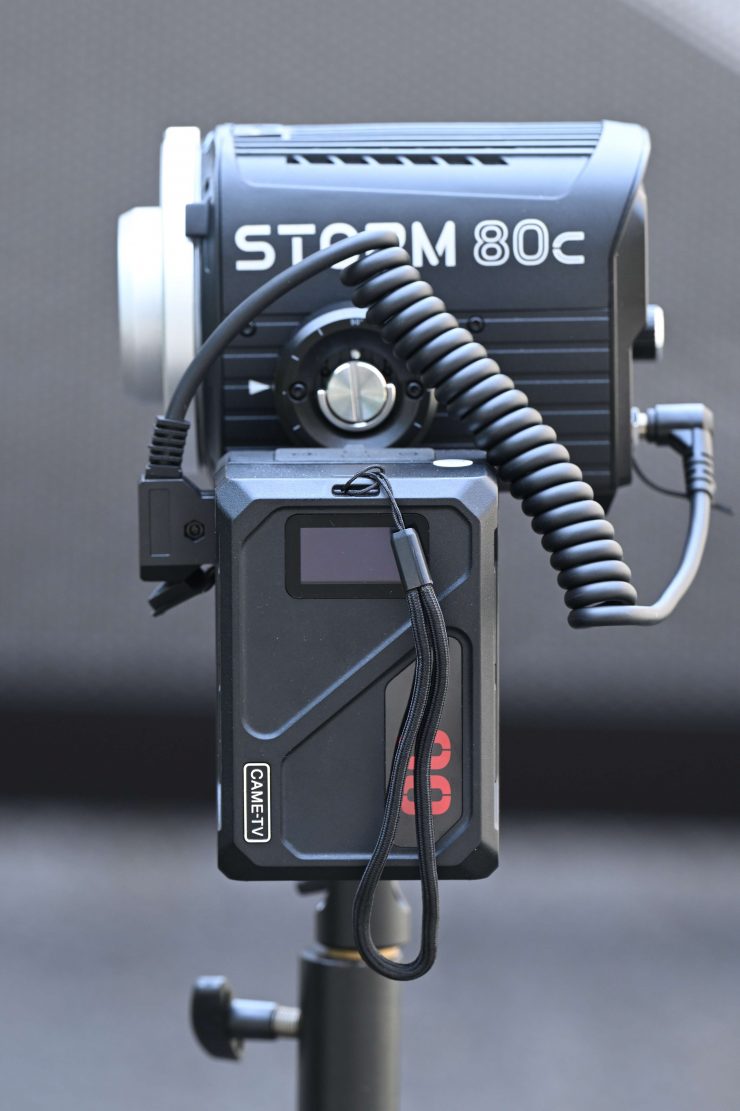
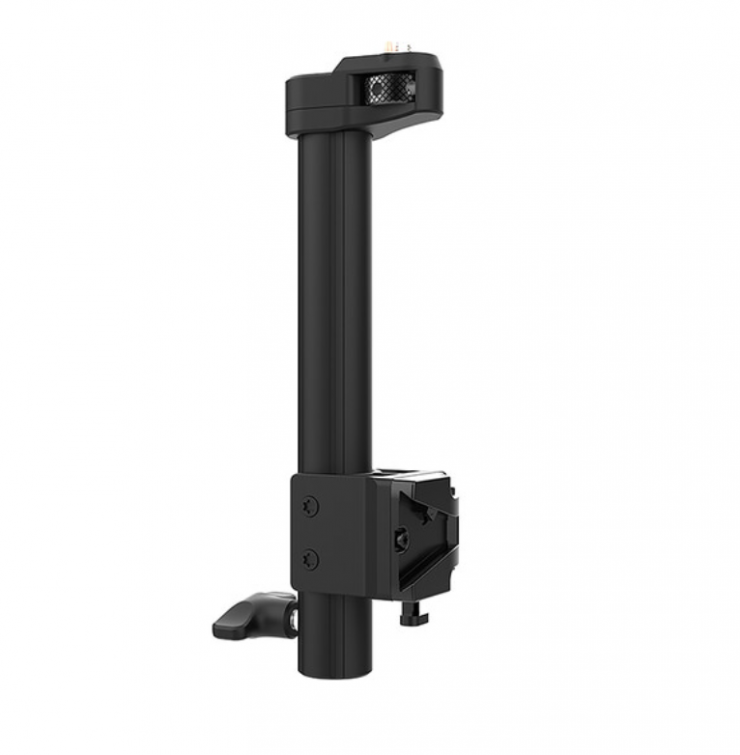
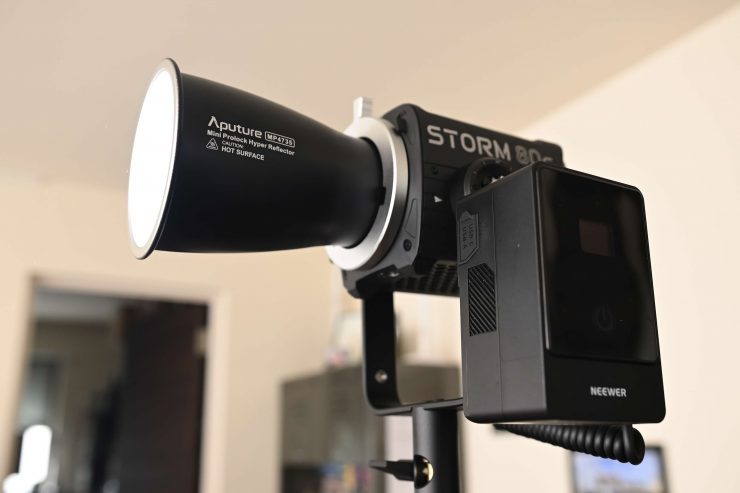
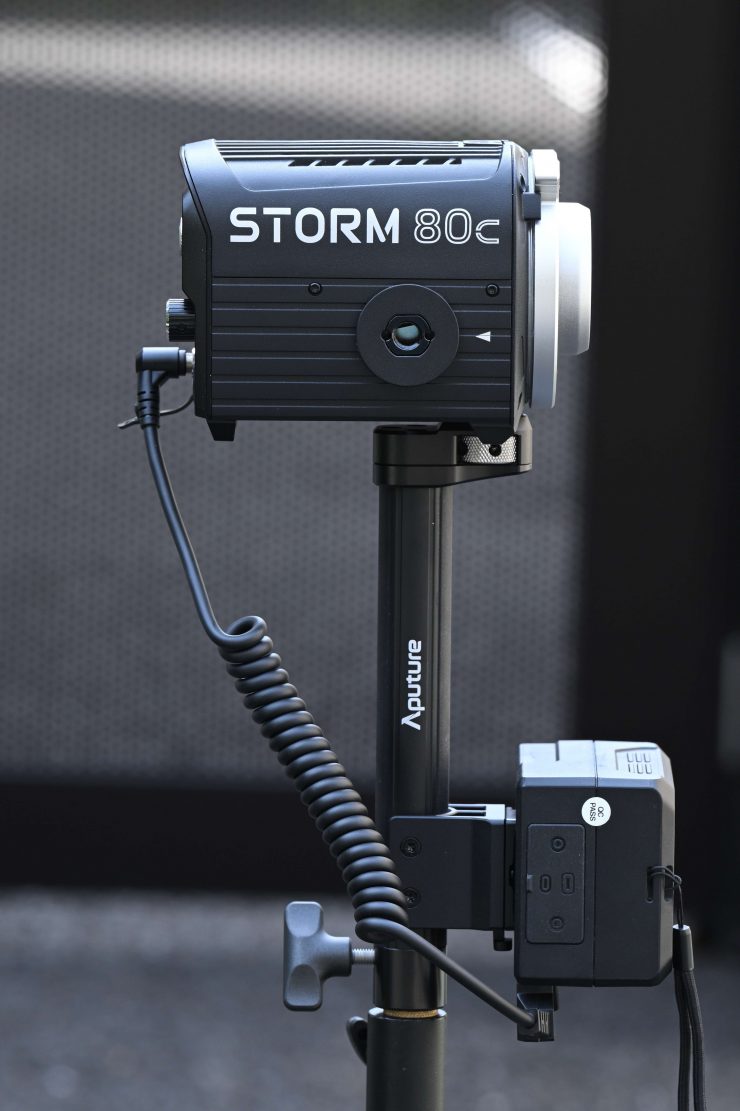
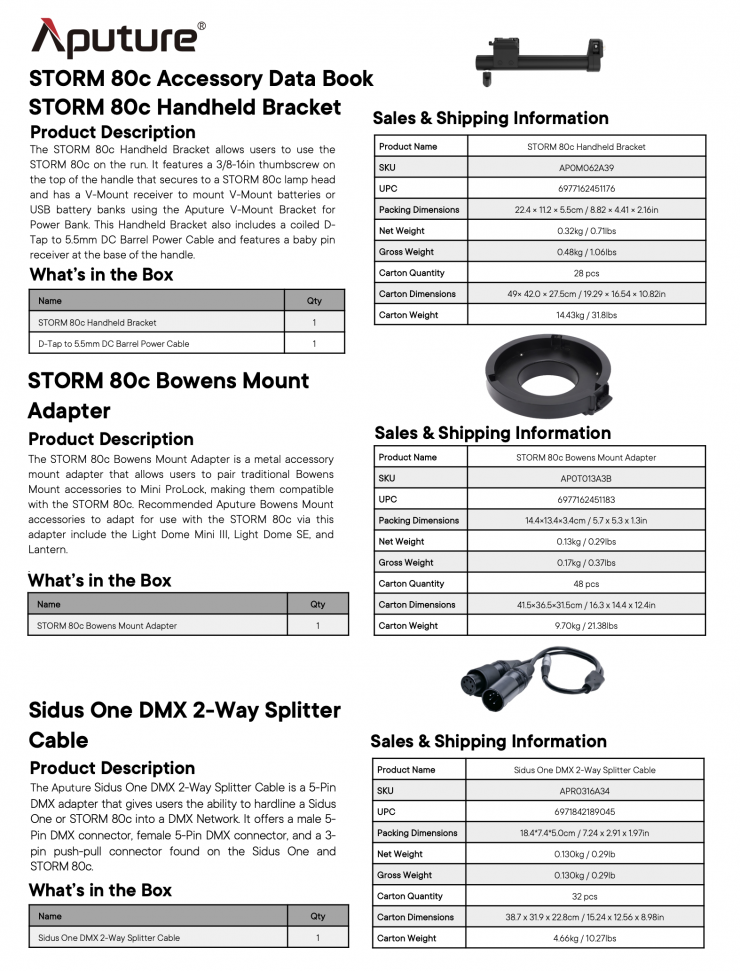
You can also purchase an optional Aputure Handheld Bracket with V-Mount and D-Tap Cable for STORM 80c, which retails for $79 USD. This also has a V-mount battery wedge plate, so you can attach a battery.
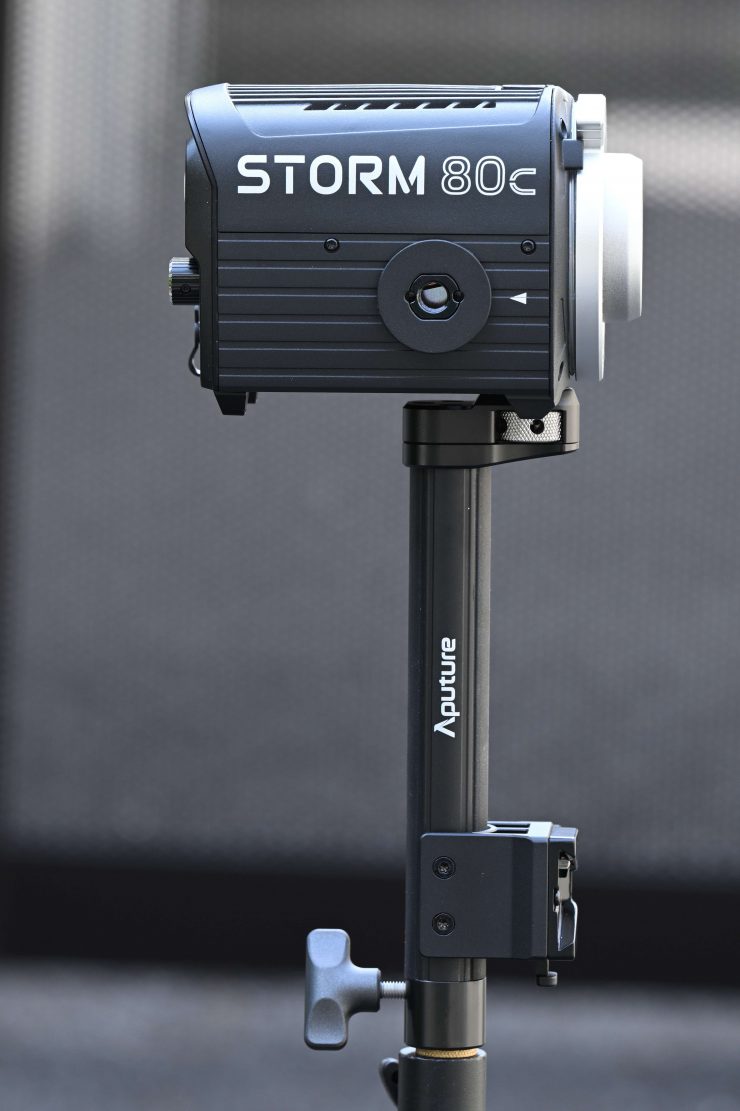

You can easily detach the STORM 80c from its yoke frame and then mount it to the Handheld Bracket.
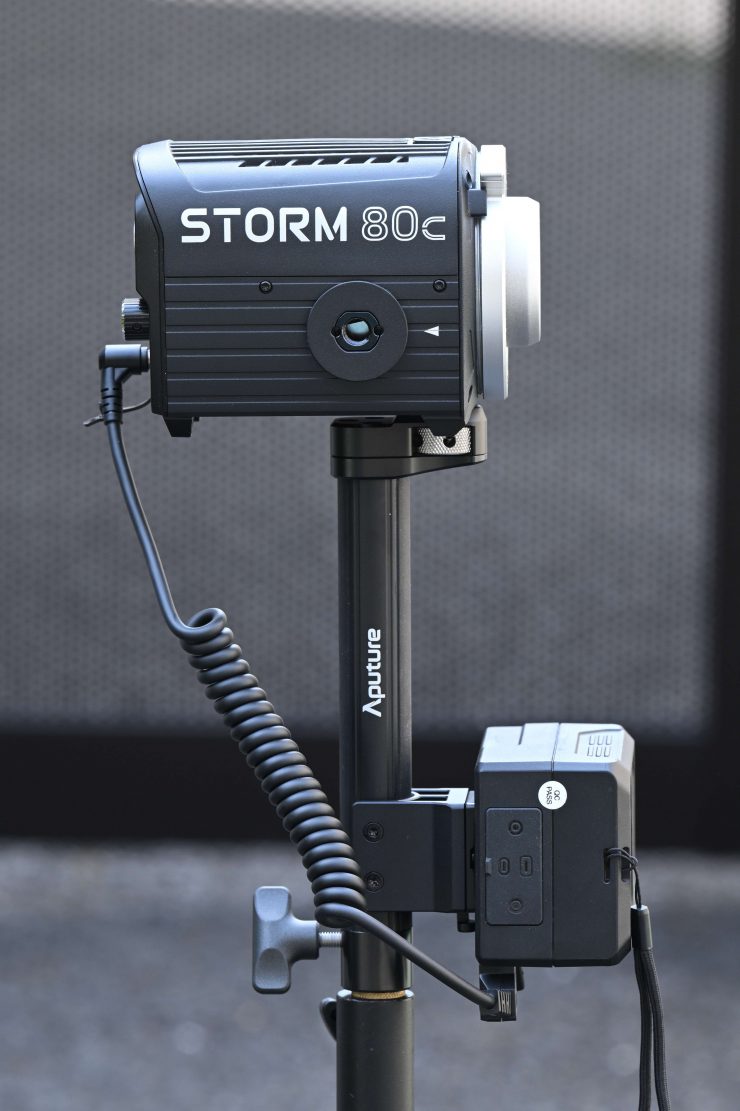
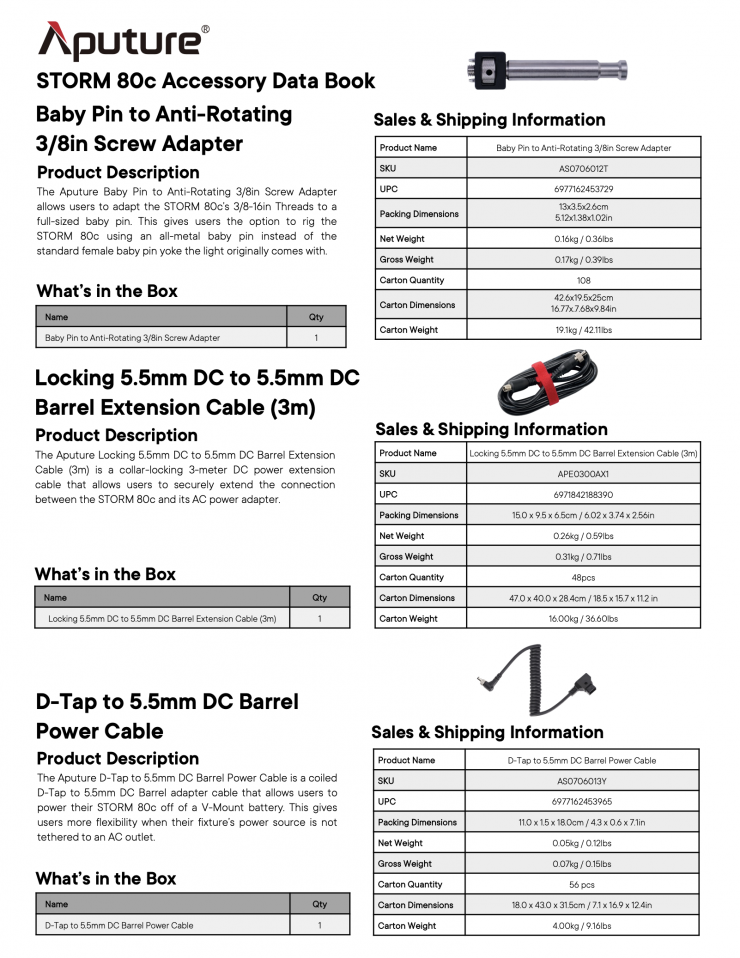
By attaching a battery, you can power it remotely and either have someone hold it or place it directly on a light stand. You would also need to purchase the Aputure D-Tap to Locking 5.5mm DC Barrel Power Cable for STORM 80c ($10 USD) to run it via. battery remotely.
The yoke frame is easily strong enough to hold the STORM 80c and decent-sized lighting modifiers.
ProLock Mini Bowens-S Mount
The STORM 80cc features a positive locking clamp on the Mini Bowens mount. The Bowens S and Mini mounts were never designed to take large and heavy lighting modifiers that are now available.
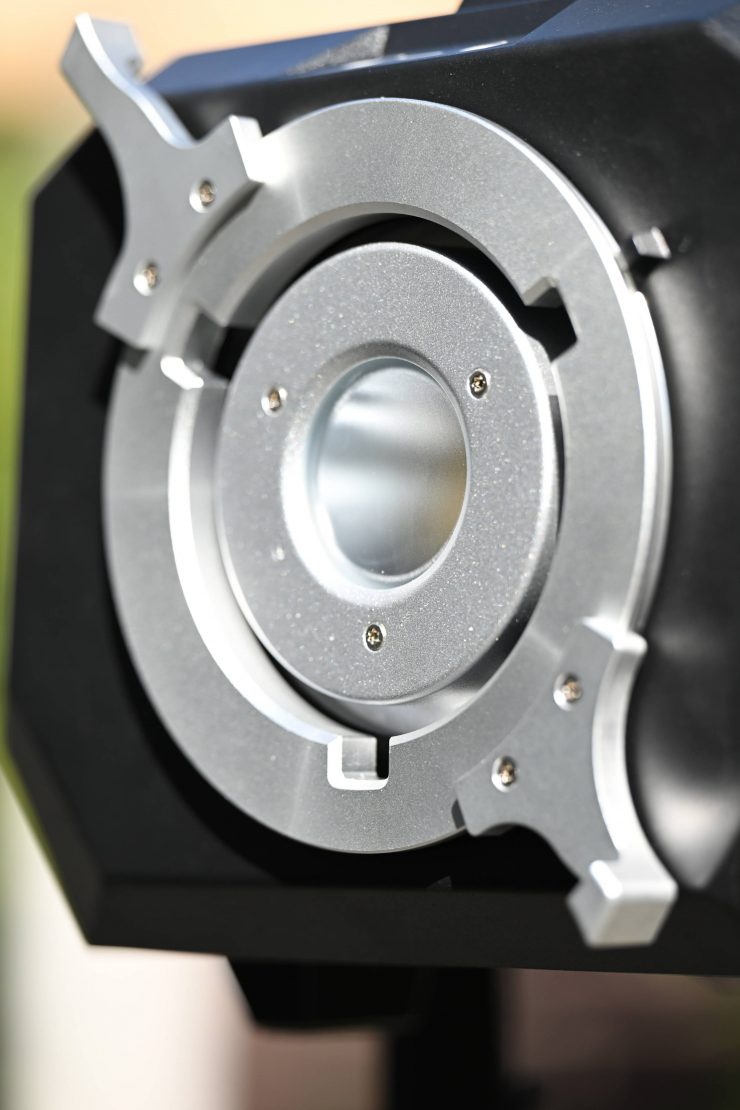
Again, this is a direct result of the Prolycht acquisition. The Prolycht Orion 675 FS featured a Prolock Locking Bowens Mount, and that technology has now found its way into Aputure products.
Essentially, the ProLock is like a PL mount for your light. It works in exactly the same way as a PL camera mount. It is made out of metal and it is very strong. This allows you to put heavy lighting modifiers on the STORM 80c without fear of anything breaking.
Once you lock in an accessory, it doesn’t move or wobble around like it would if you were using a standard Bowens Mini mount. Having the ProLock also makes it far easier to attach and remove lighting modifiers.
The ProLock is a great feature, and it allows you to stick with a Bowens Mini Mount instead of going to a proprietary mount.
Optional Bowens-S Mount
If you want to use the STORM 80c with Bowens-S mount lighting modifiers, Aputure does sell an optional Aputure Mini ProLock to Bowens Mount Adapter for STORM 80c Monolight ($20 USD).
Power Draw
The Aputure STORM 80c draws 100W. Below, you can see how that compares against some other competing fixtures.
So, how does that weight compare to some of the competition?
| POWER DRAW | |
| Aputure STORM 80c | 100W |
| Nanlite Forza 60C | 88W |
| Neewer CB60 RGB | 70W |
| COLBOR CL60R RGB COB | 80W |
| COLBOR CL120R Lite | 136W |
| HIVE LIGHTING Wasp 100-CX | 75W |
| HIVE LIGHTING Wasp 100-C | 75W |
As you can see, the Aputure STORM 80c draws 12W more than the Nanlite Forza 60C.
The Aputure STORM 80c can be powered via 100 to 240V AC power.
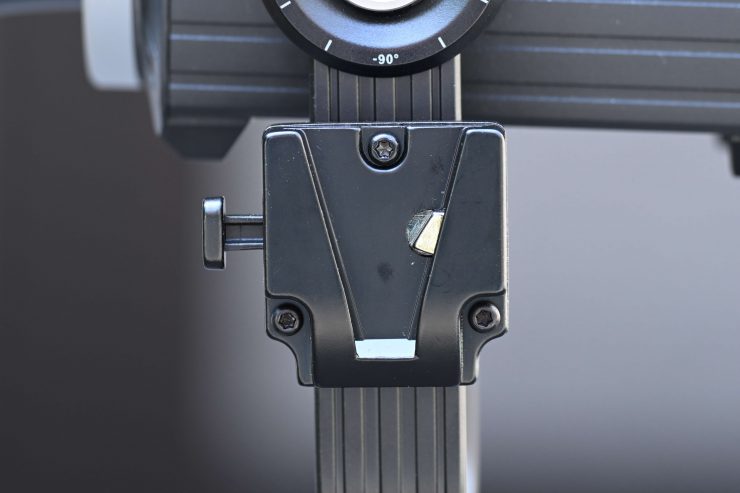
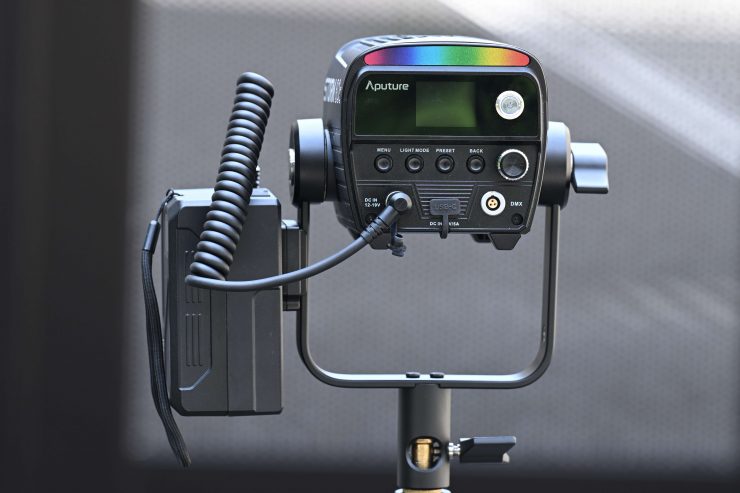
There is a V-mount wedge on the yoke frame where you can attach a battery so you can run the light remotely.
Aputure also gives you the ability to power it via the 100W USB-C input, or as I previously mentioned, from a V-mount battery using the optional Aputure Handheld Bracket with V-Mount and D-Tap Cable for STORM 80c ($79 USD).
How does it stay cool?
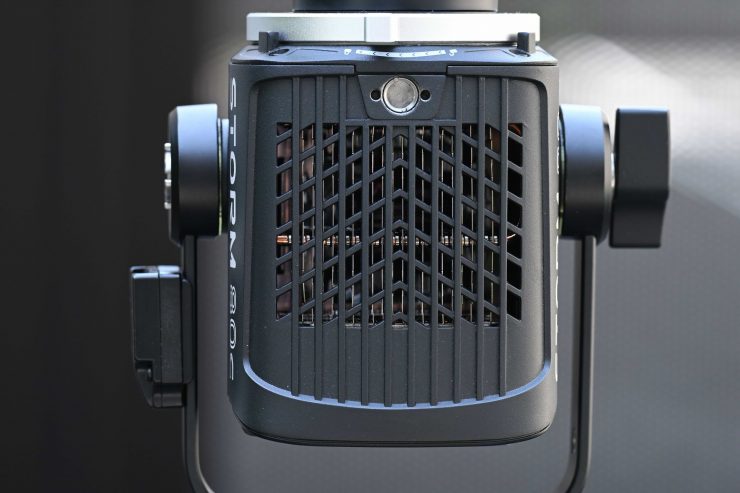
COB lights can get very hot, and keeping them cool is not an easy task. Using fans is the best solution, but the caveat with fans is that they can create noise.
The STORM 80c utilizes a fan in the light head.

There are also large heatsinks on the top of the fixture.
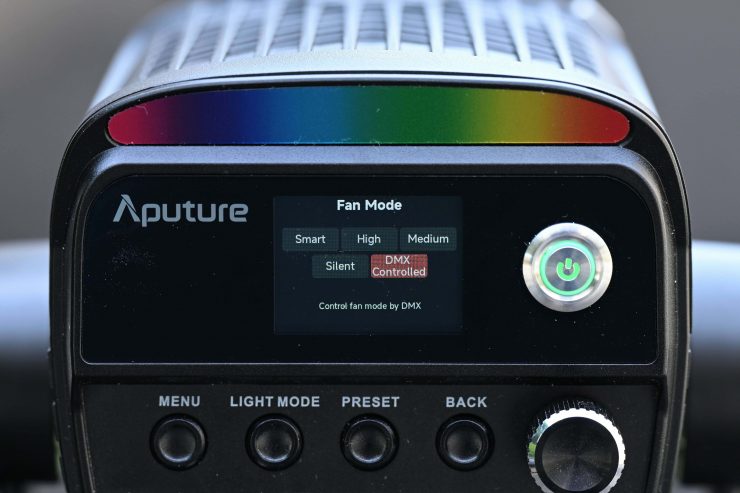
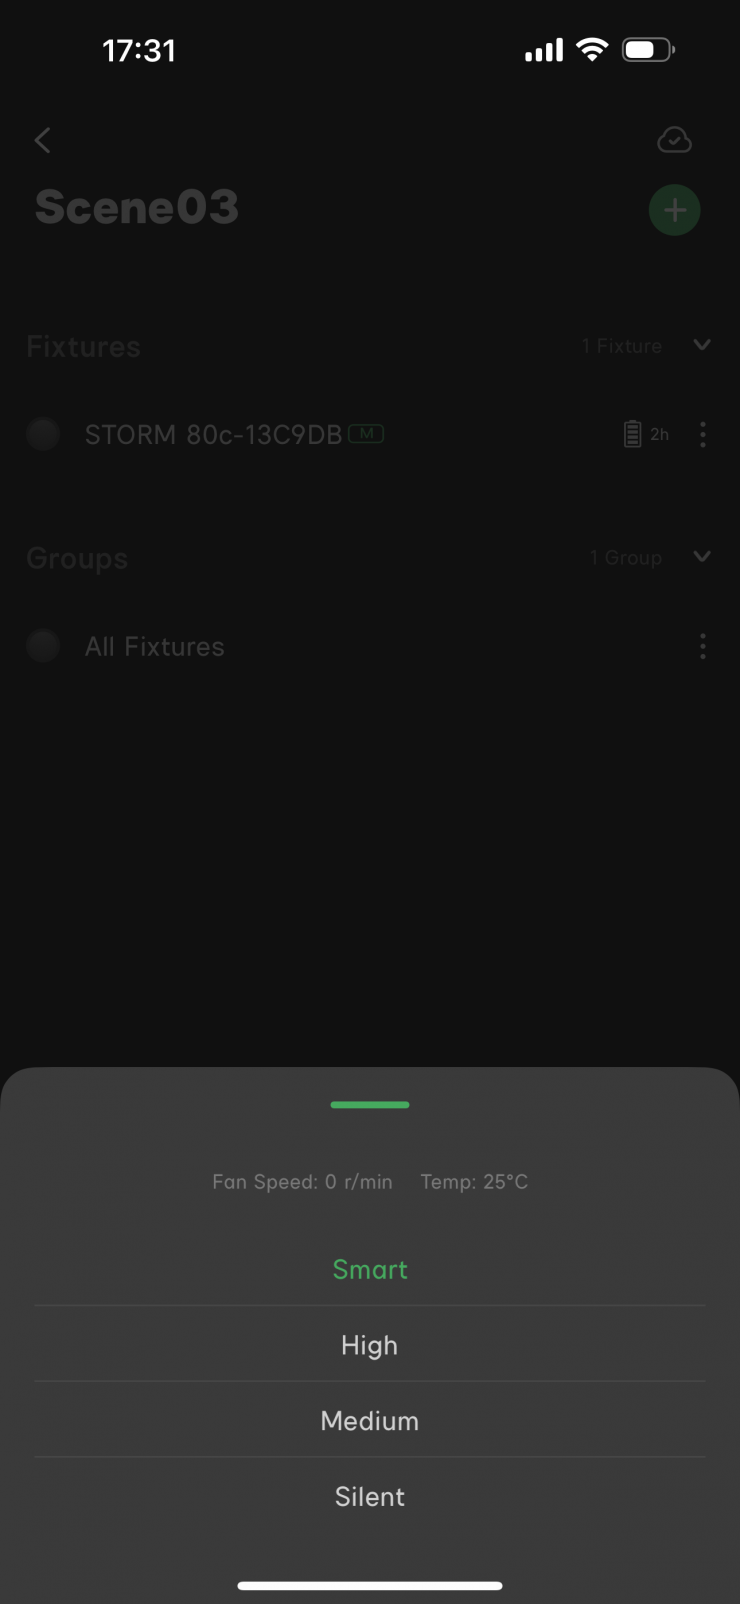
Aputure has included 5 Fan Modes:
- Smart
- High
- Medium
- Silent
- DMX Controlled
If you choose Smart mode, the fan speed changes depending on the temperature of the unit.
In High mode, the fan runs at its maximum speed. Aputure recommends that you turn this mode on if the ambient temperature exceeds 40° C.
If you choose Medium mode, the fan runs at relatively low speeds. Aputure recommends this mode when the ambient temperature is under 35° C. If the temperature exceeds 35° C, it may cause the over-temperature protection to kick in.
In Silent mode, the fan runs at its lowest level, and the total output is reduced. Now, for some reason, despite the light only operating at 20W, the output level still displays 100%. This is something I would like to see Aputure address.
I found the fan noise to be barely audible, which didn’t surprise me considering the size and output of the fixture. Yes, there is some noise when the light is used in its High mode, but it isn’t enough to be of any real concern.
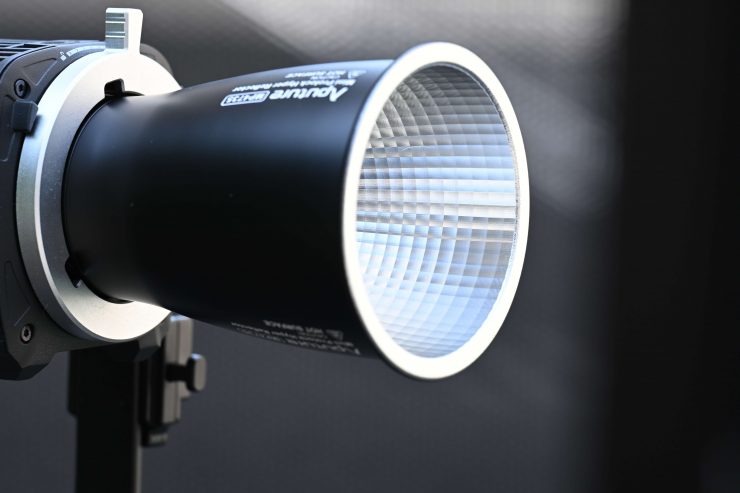
Beam Angle
The STORM 80c has a native beam angle of 60°.
Below, you can see the beam angles when the light is used unmodified and with the various reflectors:
- 60° (Unmodified)
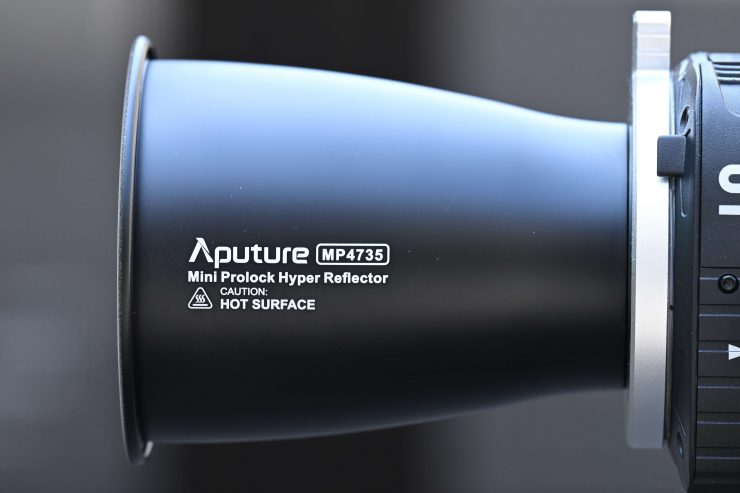
- 35° (with included Hyper Reflector)
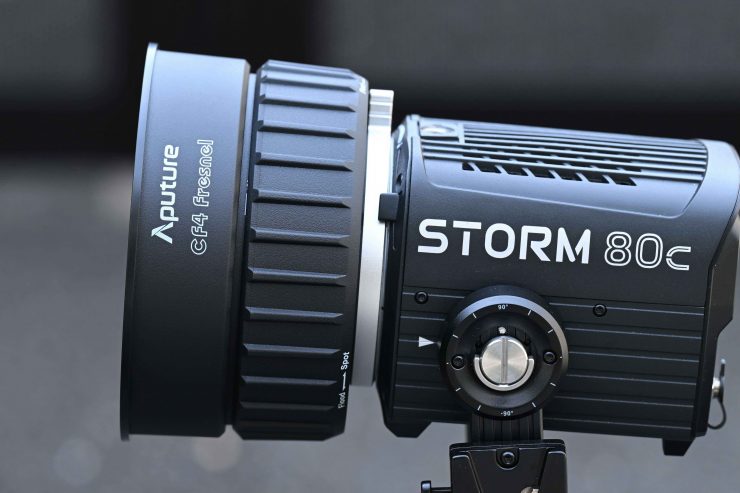
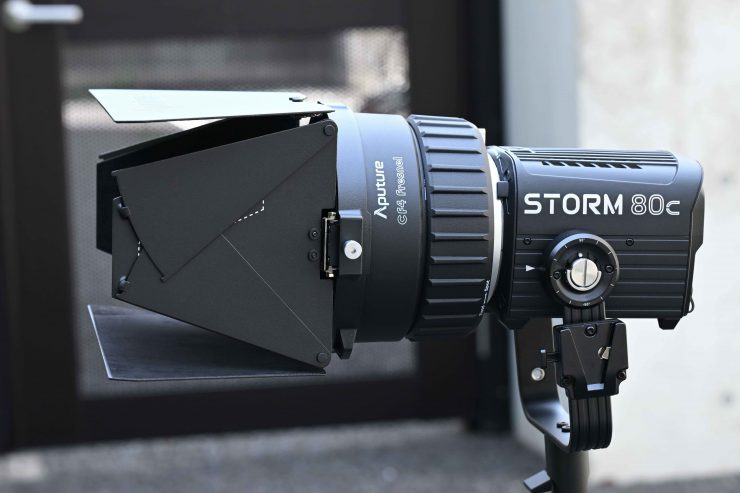
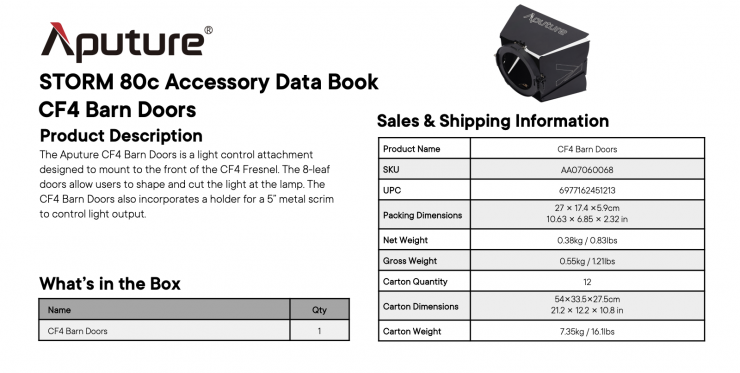
- 15-40° (Aputure CF4 Fresnel for STORM 80c)
60° is fairly narrow, but you can make this wider by attaching various lighting modifiers.
Is there a hot spot with the included 35° Hyper Reflector?
Aputure has been guilty in the past (as have other manufacturers) of having reflectors that produce hot spots, so the claimed output figures appear to be higher than they should be.
I set up a test with the STORM 80c with its 35° Hyper Reflector placed 3m / 9.9′ from a wall. I then took measurements at the center, 15cm, 30cm, 50cm, and 100cm to see if there were any hotspots. Below you can see my results:
STORM 80c with its 35° Hyper Reflector
- Center: 2260 lx
- 15cm from center: 2170 lx
- 30cm from center: 1980 lx
- 50cm from center: 1650 lx
- 100cm from center: 697 lx
I am happy to report that the 40° Hyper Reflector doesn’t have a big hotspot, and the illumination drop-off was quite gradual.
CF4 Fresnel
I set up a test with the STORM 80c with its optional CF4 Fresnel set at 15 degrees, placed 3m / 9.9′ from a wall. I then took measurements at the center, 15cm, 30cm, and 50cm, to see if there were any hotspots and how the fall off was. Below you can see my results:
STORM 80c with CF4 Fresnel
- Center: 3990 lx
- 15cm from center: 3630 lx
- 30cm from center: 2780 lx
- 50cm from center: 1270 lx
The Fresnel doesn’t have a massive hot spot. It is only when you get around 30-40cm from the center does the illumination starts to drop off pretty fast.
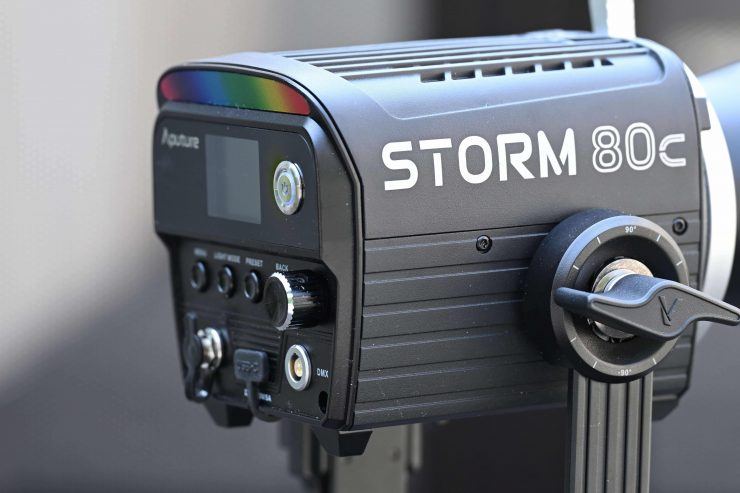
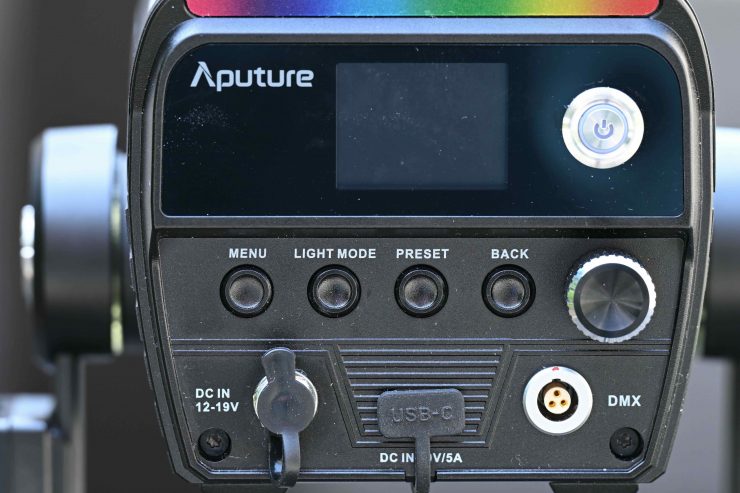
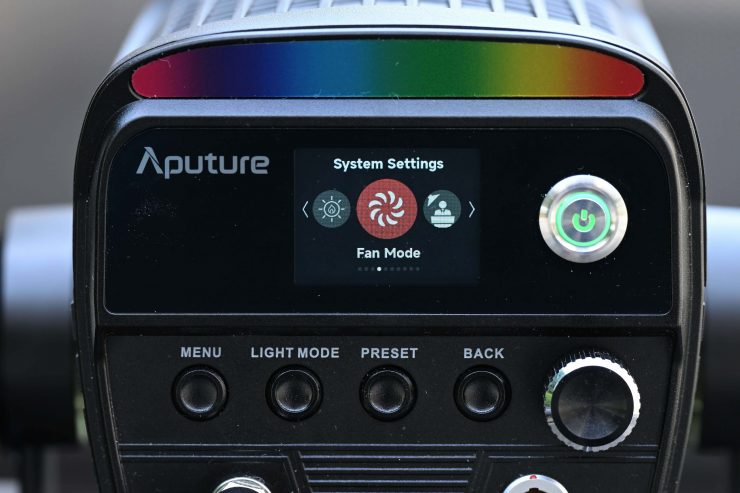
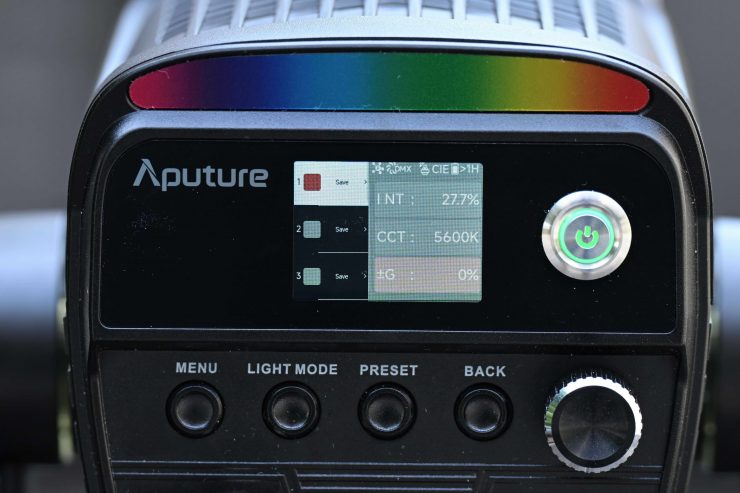
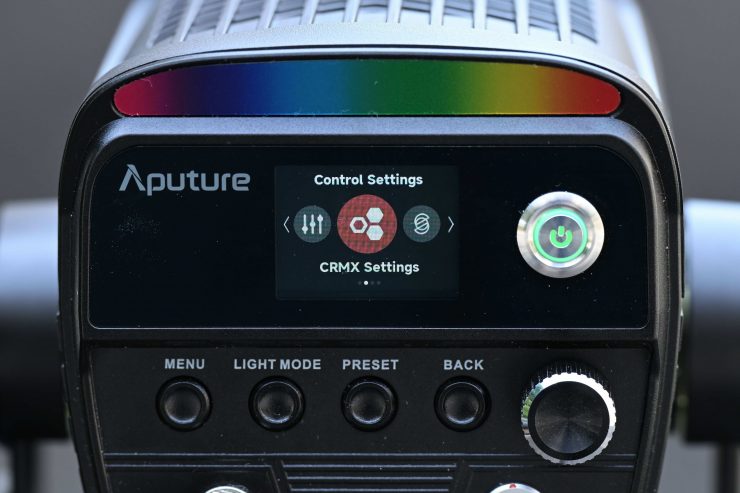
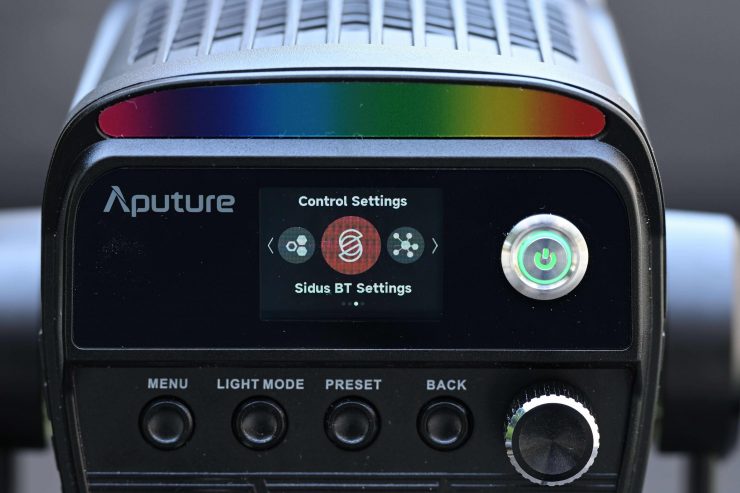
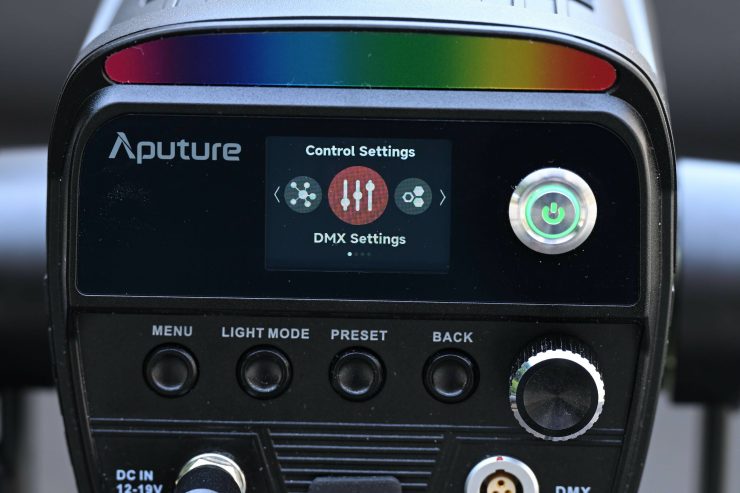
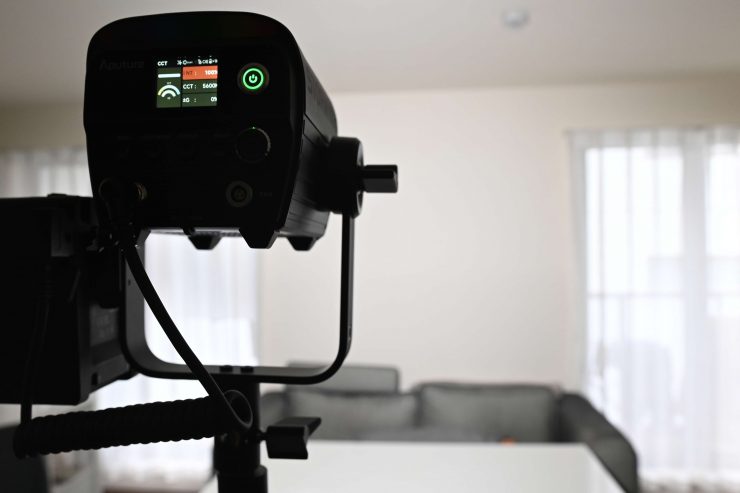
Controls & Menu System
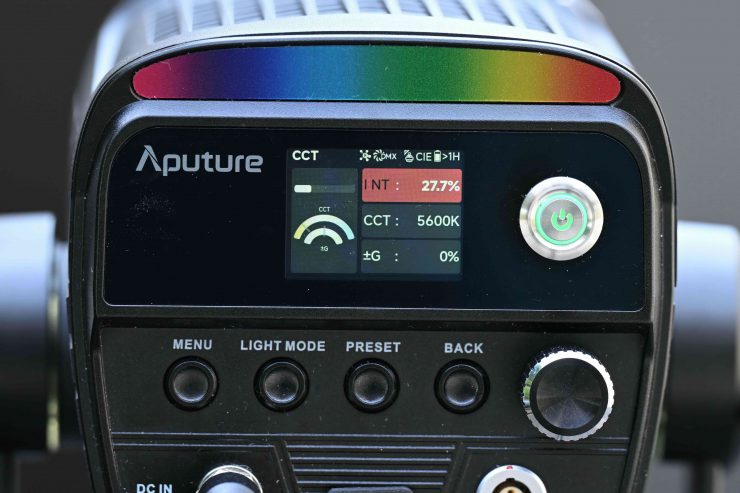
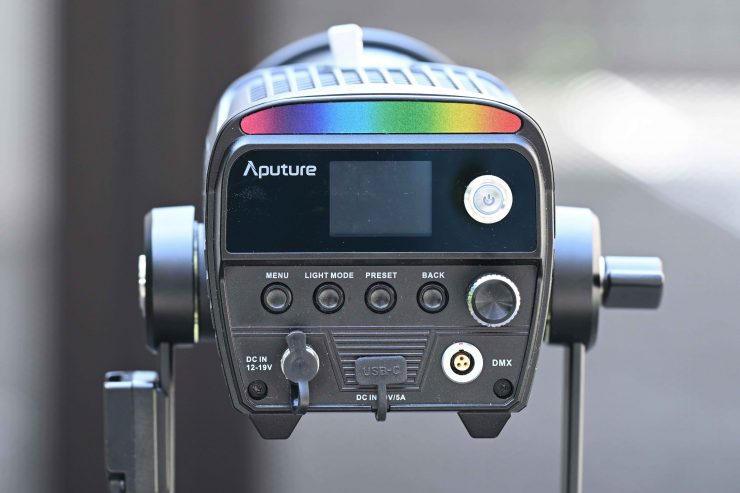
The Aputure STORM 80c has an LCD screen on the back that clearly shows you information about the light. While it is not a touchscreen, it is still pretty quick to access all the available lighting modes and make changes. It is an easy interface to use.
I like that Aputure hasn’t just used the same interface that is found on previous fixtures. Redesigning and improving on previous products is what lighting companies should be doing. The design of the interface isn’t a massive departure from the operating systems of previous Aputure fixtures, so users who are familiar with Aputure operating systems will be right at home.
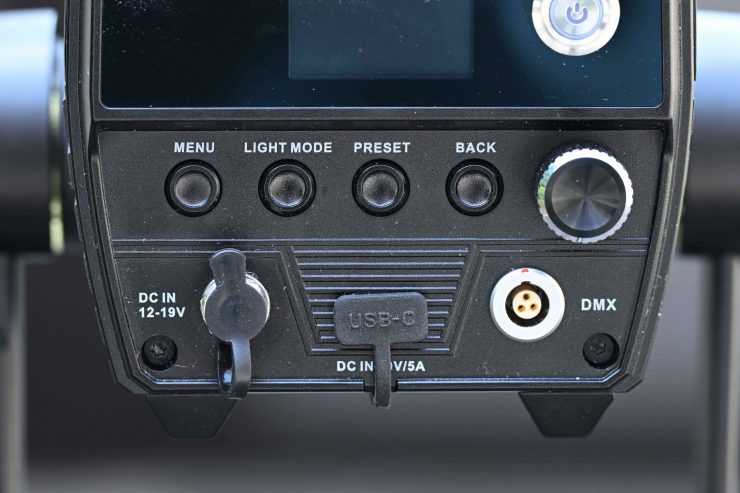
There are four buttons: Menu, Light Mode, Preset, Back, and a Power On/Off button.
With a good light, you shouldn’t have to read a manual to work out how to operate it. You should be able to turn it on and use it straight away. You won’t find any deep sub-menus or complicated way of making changes on the STORM 80c. It was designed to be simplistic and easy to operate.
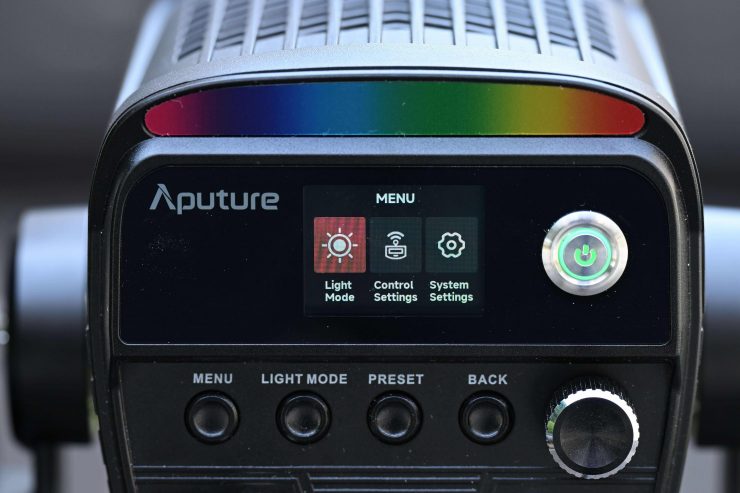
In the main Menu, there are three different sub-categories:
- Light Mode
- Control Settings
- System Settings
Light Mode
Light Mode just takes you to the page where you can choose between the four different operating modes that I will talk about a bit later.
Control Settings


In Control Settings, you can access the following:
- DMX Settings
- CRMX Settings
- Sidus BT Settings
System Settings

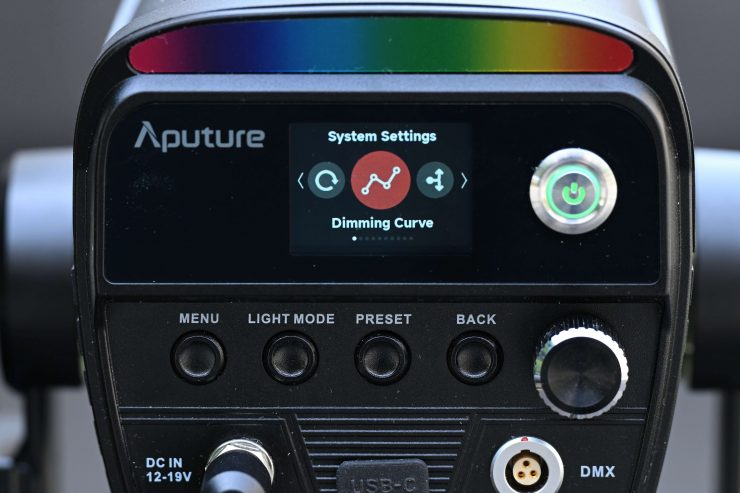
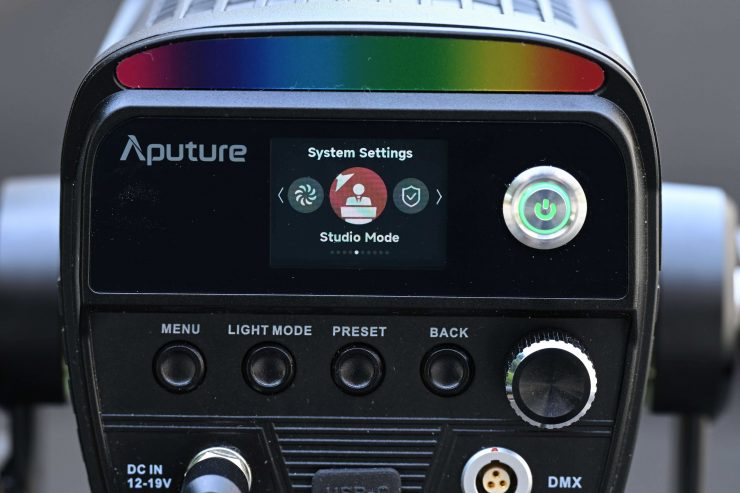
In System Settings, you can adjust and change the following:
- Dimming Curves
- Output Mode
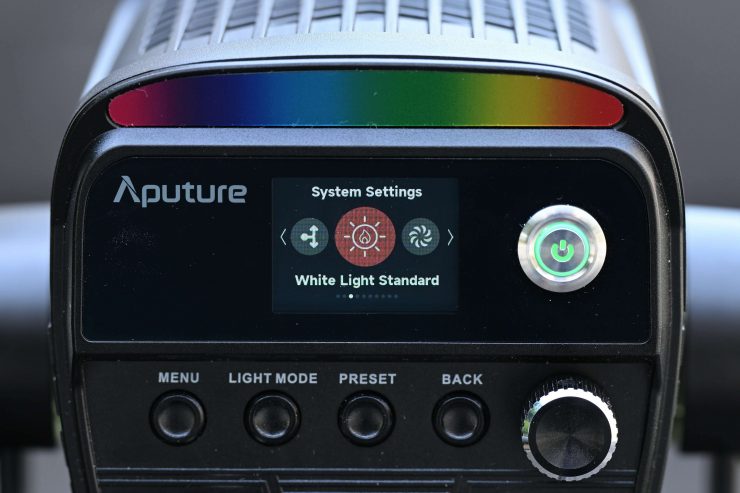
- White Light Standard
- Lead / Follow Mode
- High-Speed Mode
- Fan Mode
- Studio Mode
- Screensaver
- Language
- Product Info
- Update Firmware
- Factory Reset
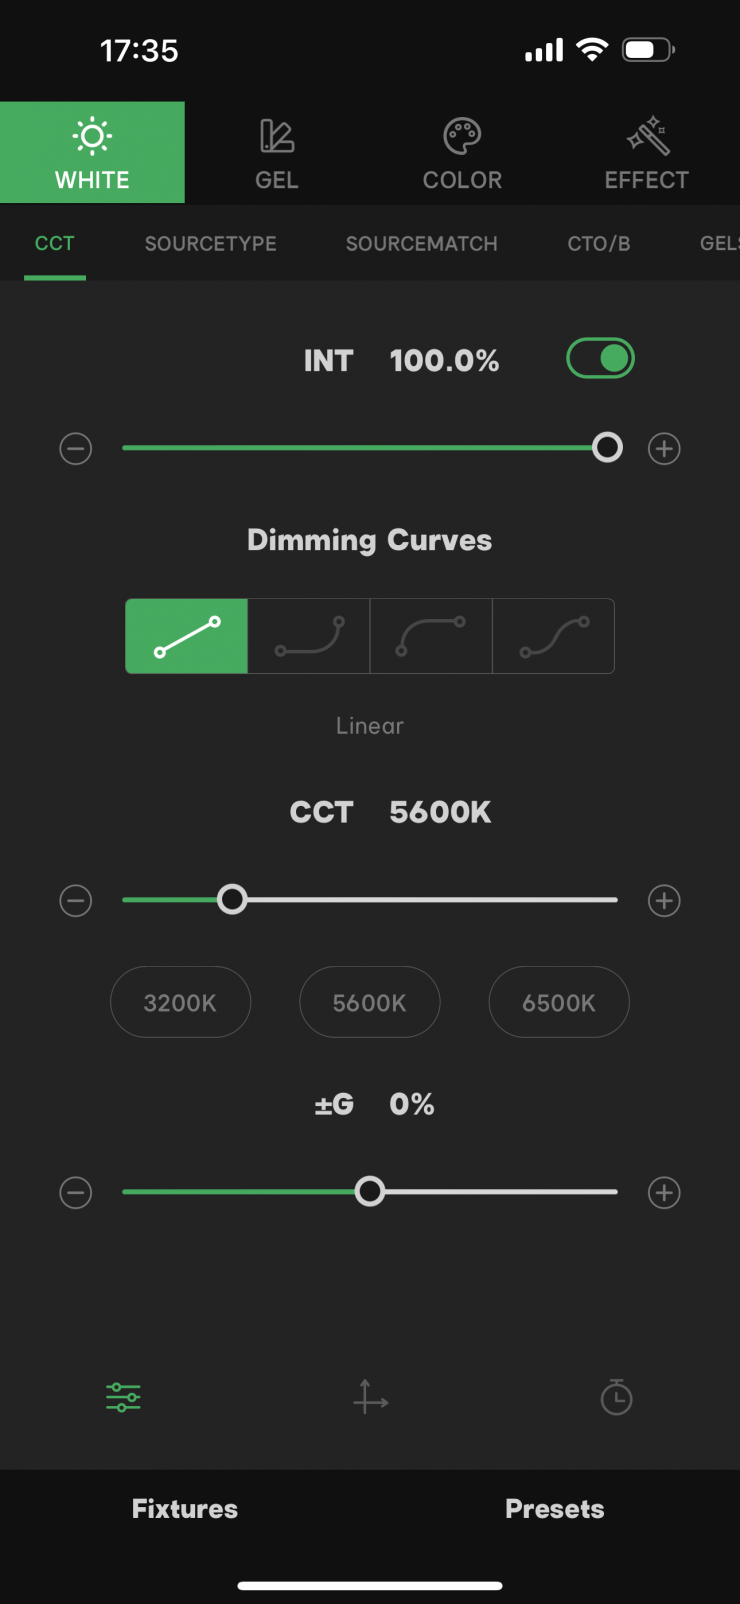
Dimming Curves
In Dimming Curves, you can choose from:
- Linear
- S-Curve
- Exponential
- Log
The light will dim right down to 0.1%, which is certainly handy.
Output Mode
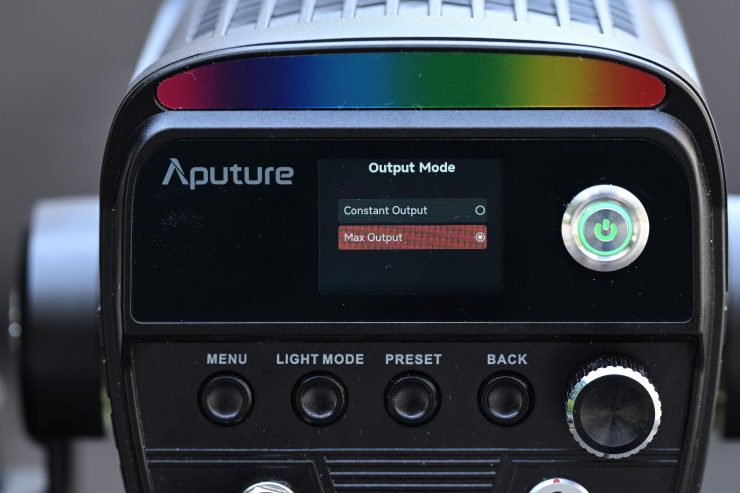
The light has two Output Modes:
- Constant Output
- Max. Output
In Constant Output, the fixture should produce a fairly similar output regardless of the CCT setting. I will test this out later in the review.
In Max. Output mode, the light will produce the most amount of output that is possible at various CCT settings.
White Light Standard
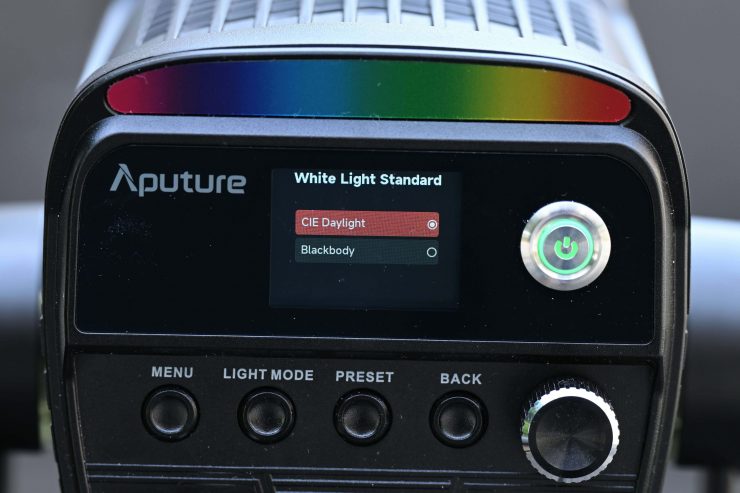
In White Light Standard, you can choose from CIE Daylight or Blackbody.
Blackbody follows the Blackbody curve.
CIE Daylight follows the Blackbody curve up to 4000K, then it transitions from the Blackbody curve to the Daylight curve from 4000-5000K, then follows the Daylight curve from 5000K up. This is the CIE standard as defined by TM30.
Studio Mode
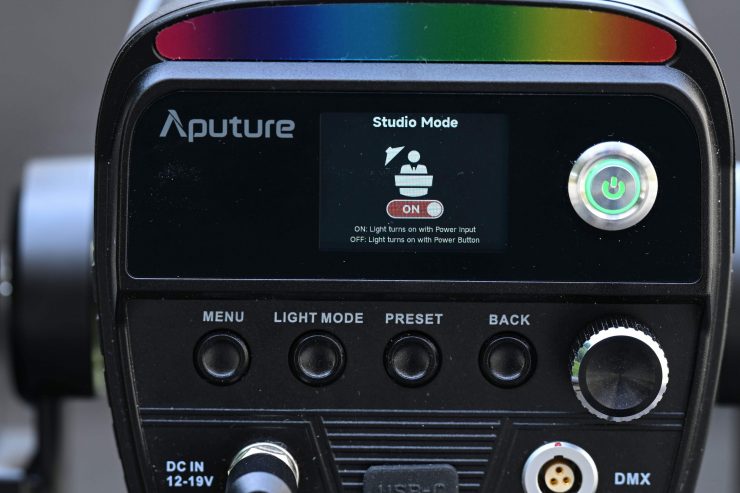
This allows you to set the fixture as either the leader or place it in Follow Mode when using DMX/RDM, CRMX, etc.
Fan Mode
As I mentioned earlier in the review, there are 5 different fan settings you can choose from.
- Smart
- High
- Medium
- Silent
- DMX Controlled
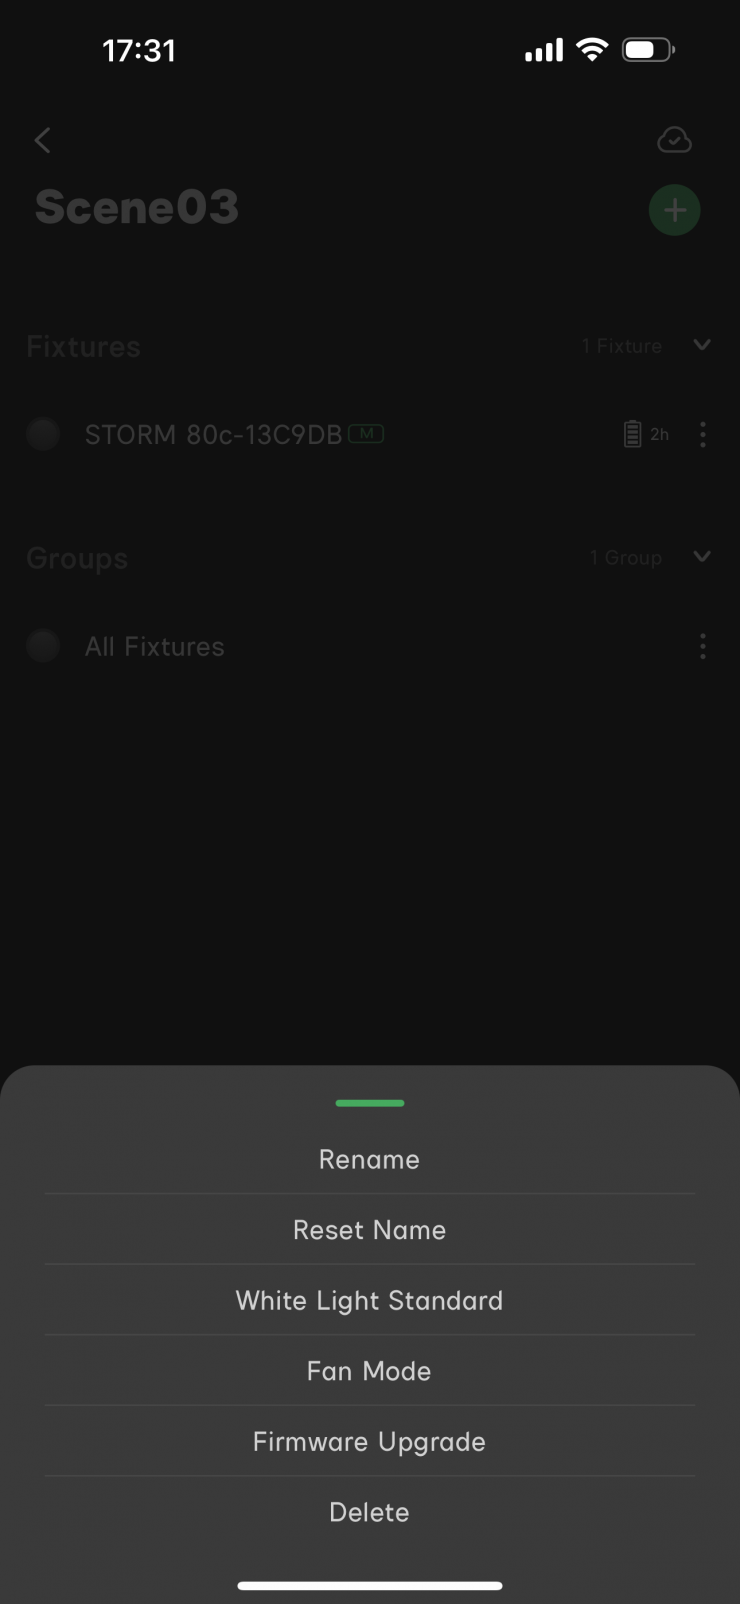
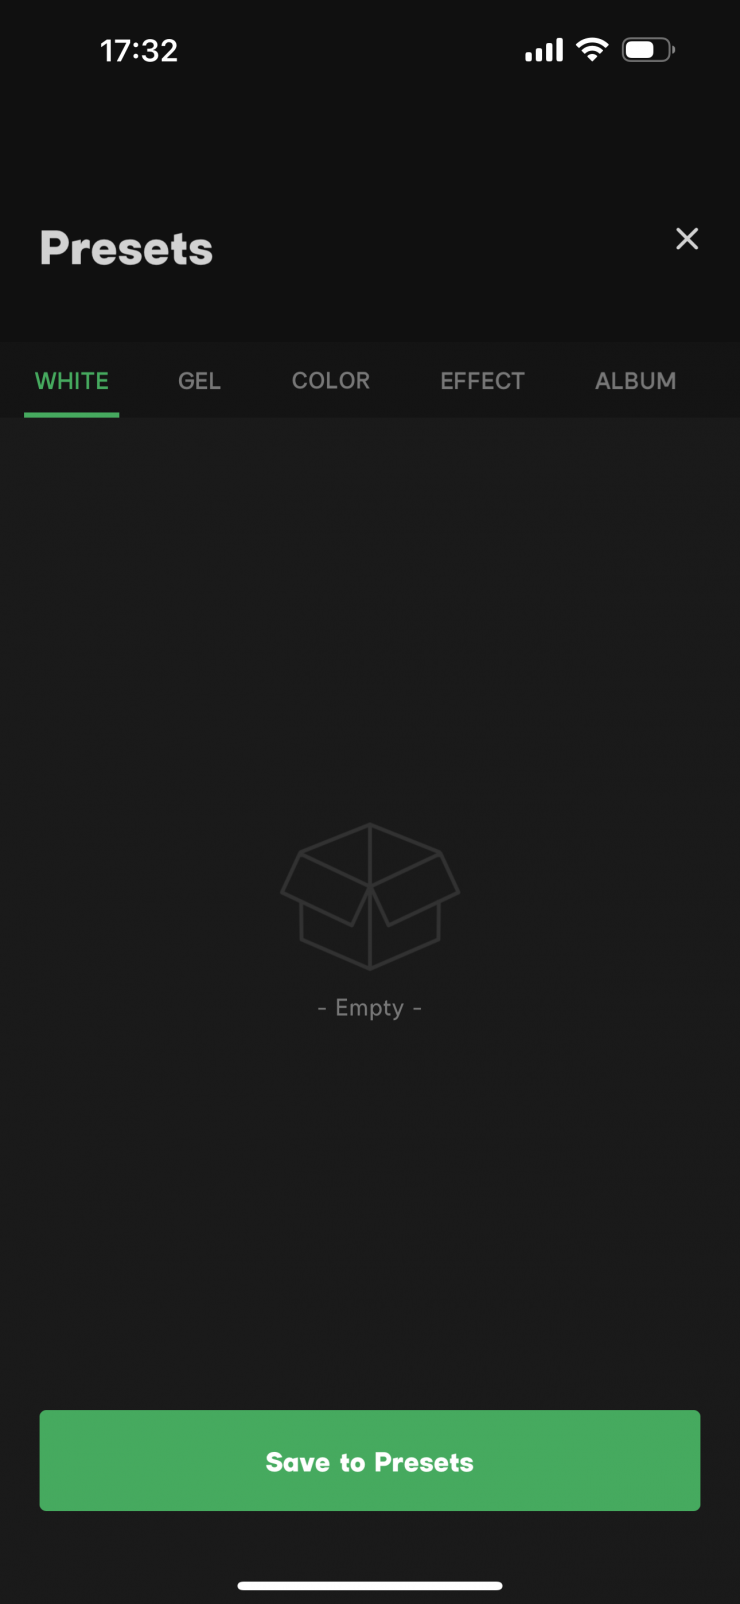
Presets
To recall a preset, you simply press the Preset button and you will see all of your saved settings. What is nice is that each preset tells you exactly what it is, so you can recall them quickly and easily. The preset will actually even save the exact intensity you had the light set at. For repeat lighting scenarios, this is extremely handy.
Operating Modes
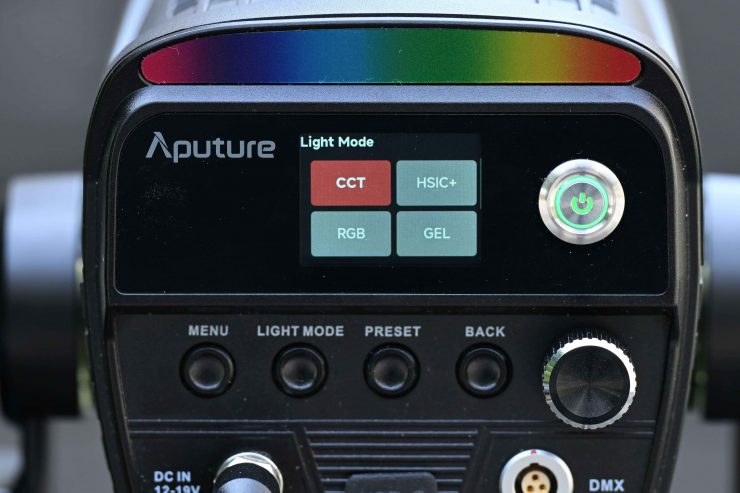
The light has 8 key lighting modes:
- CCT
- HSIC+
- RGB
- GEL
- SOURCE
- xy
- FX
- Sidus FX
Correlated Color Temperature (CCT)
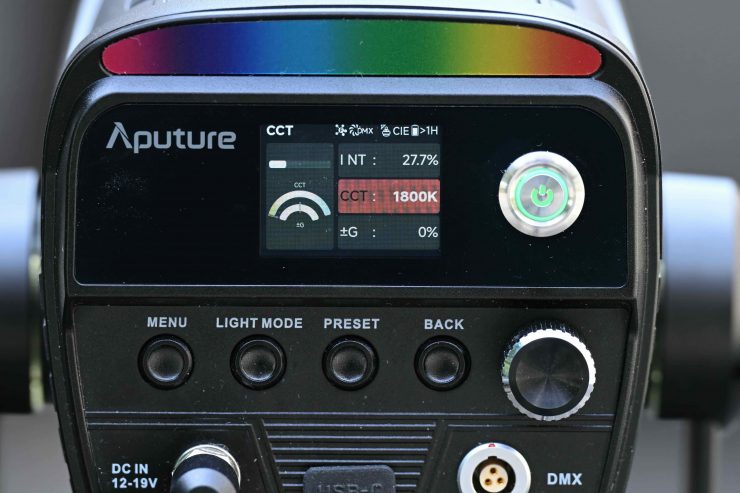
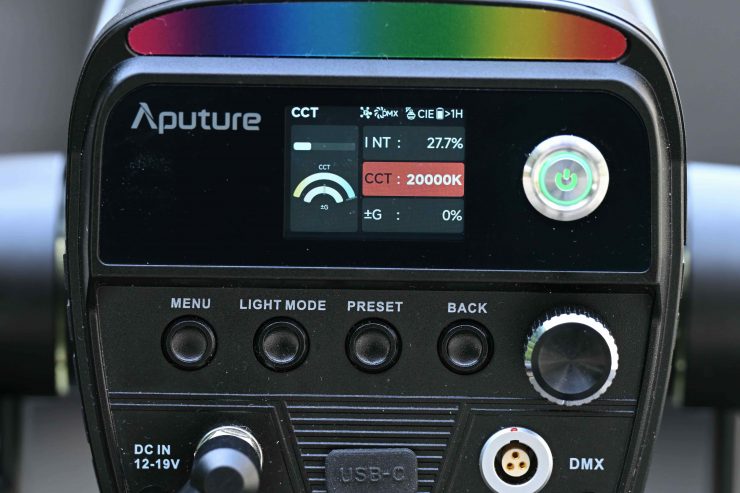
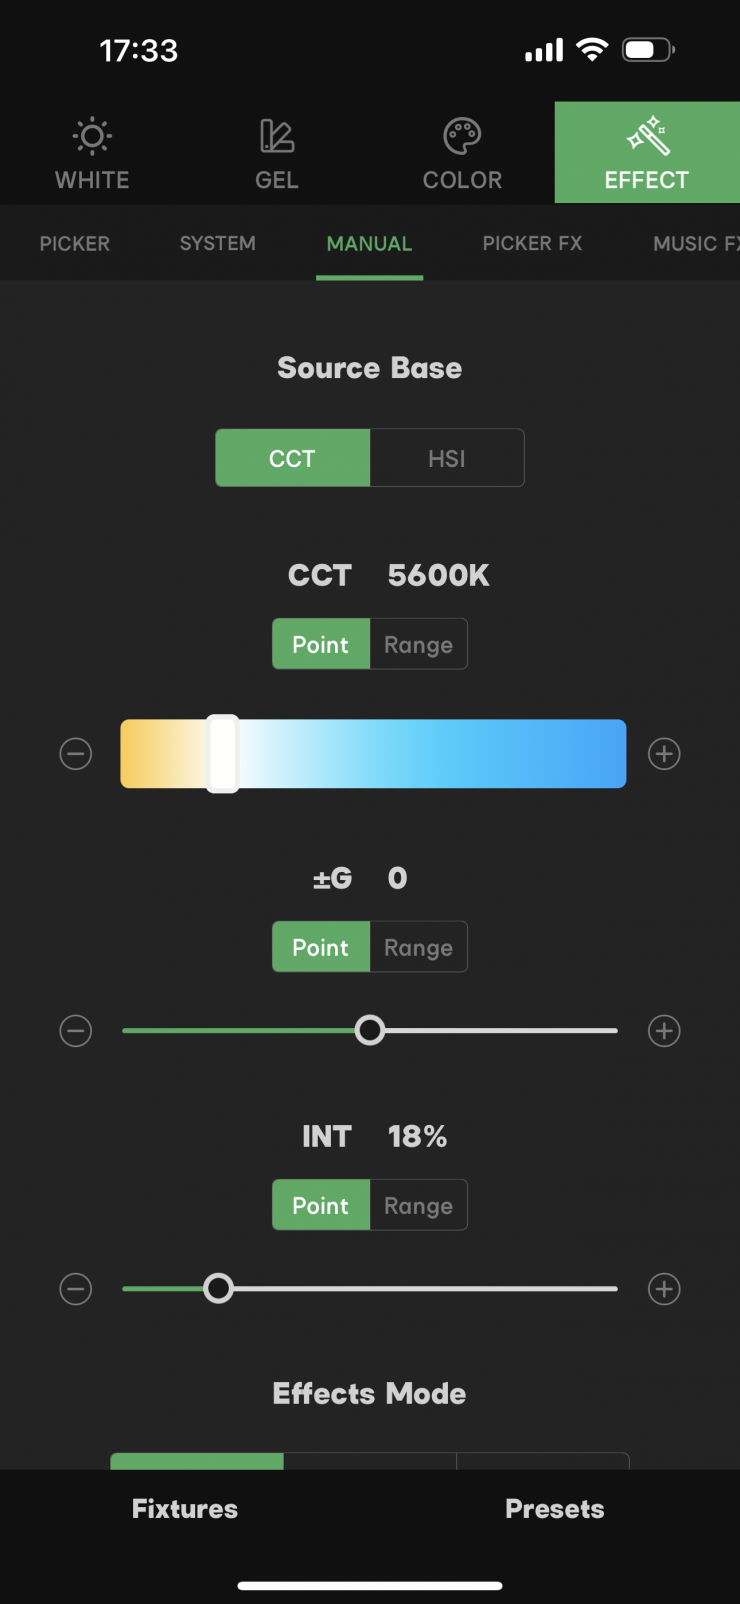
This is the mode most people are going to use the light in. In the CCT Mode, you have full access to making CCT adjustments between 1800- 20,000K. This is an impressive range, and it will suit most people’s needs.
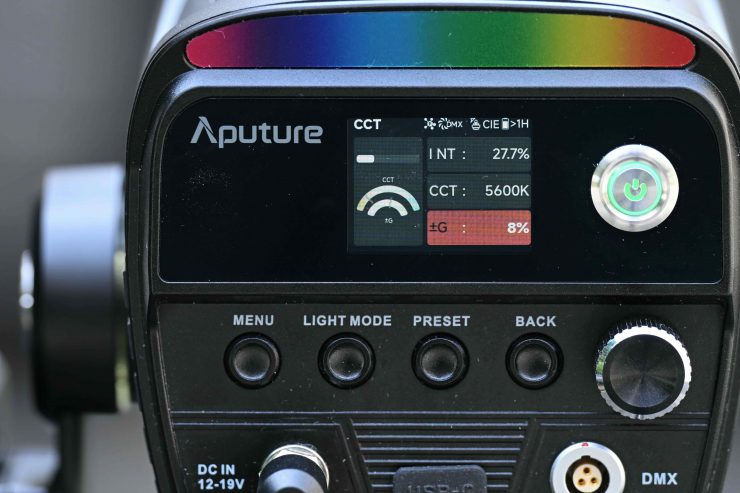
The fixture also has continuous variable (full minus green to full plus green) correction from -100% to +100% (Full ASC MITC Range).
Being able to dial in more or reduce the amount of green coming from your lighting source can make a huge difference. Different camera companies use different sensors in their cameras, and they all react differently to light. Some camera sensors may lean towards magenta, and some, more towards green. By making CCT adjustments, you can dial in the light so that it looks better for whatever camera system you are using. G/M adjustment also helps when you are trying to match lights from different manufacturers.
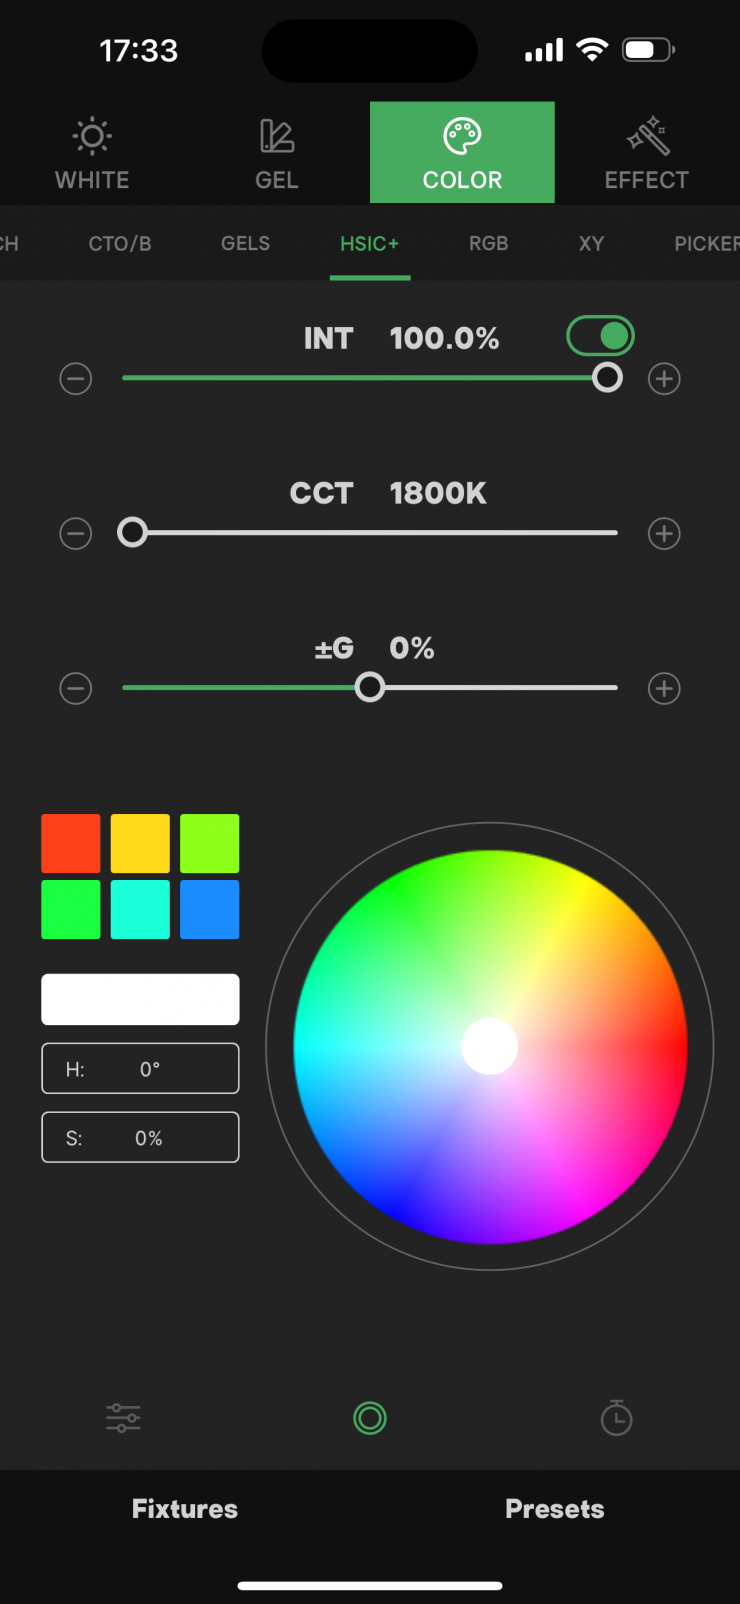
HSIC+
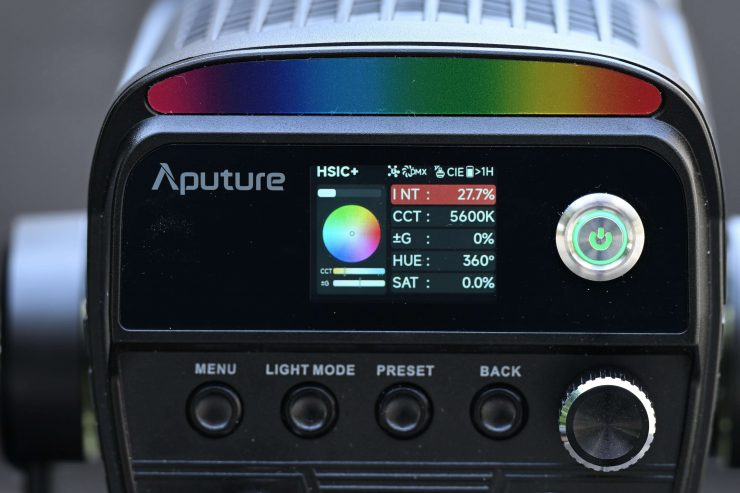
In HSIC+ you can adjust Hue, Saturation, Intensity, as well as the CCT and the +/- G/M bias.
RGB Mode
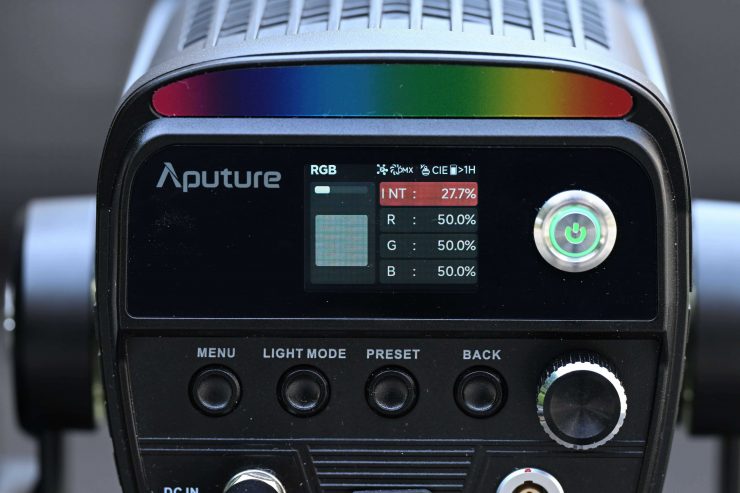
In RGB Mode, you can individually adjust the RED, Green, and Blue channels, as well as the intensity.
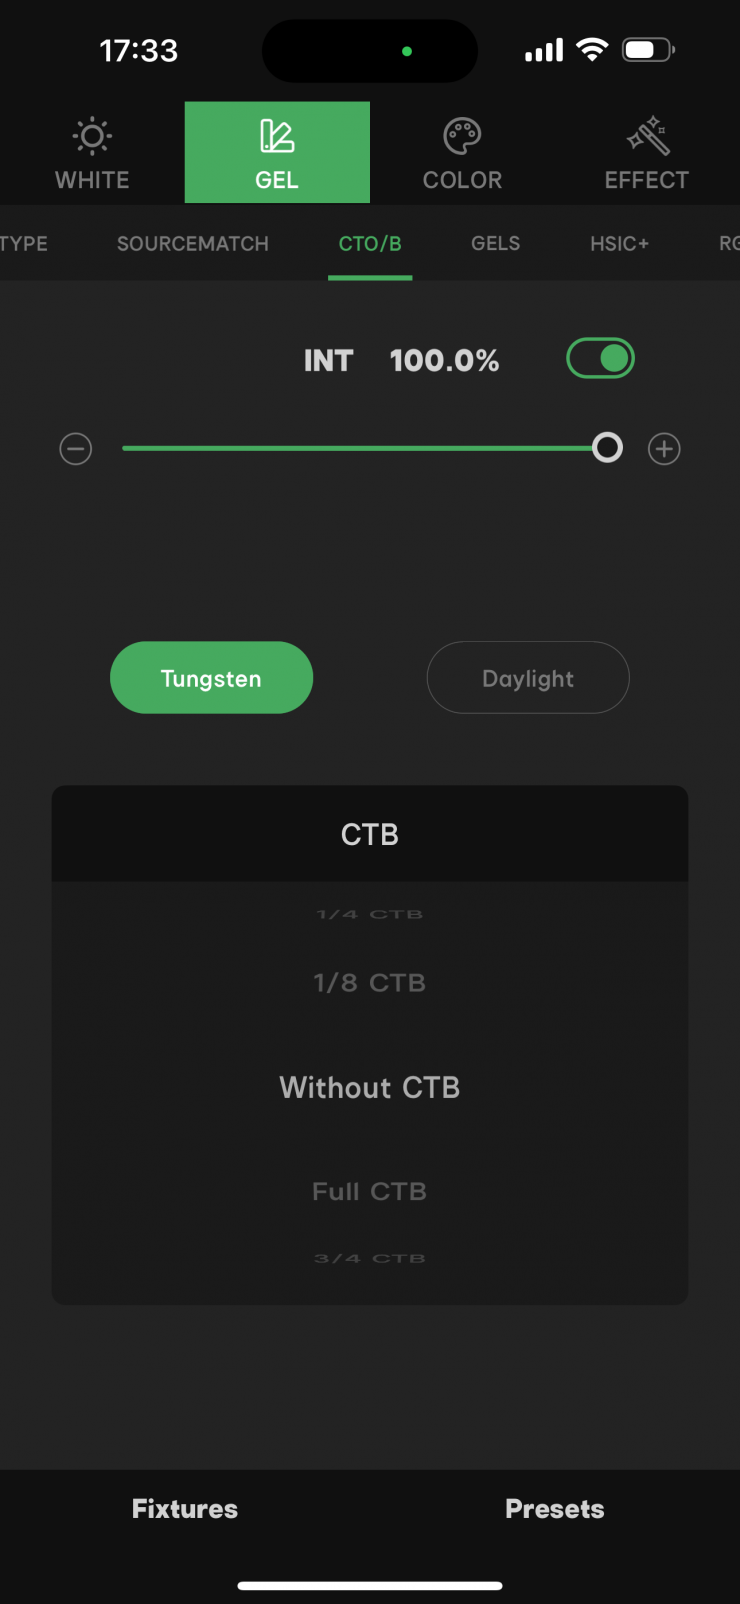
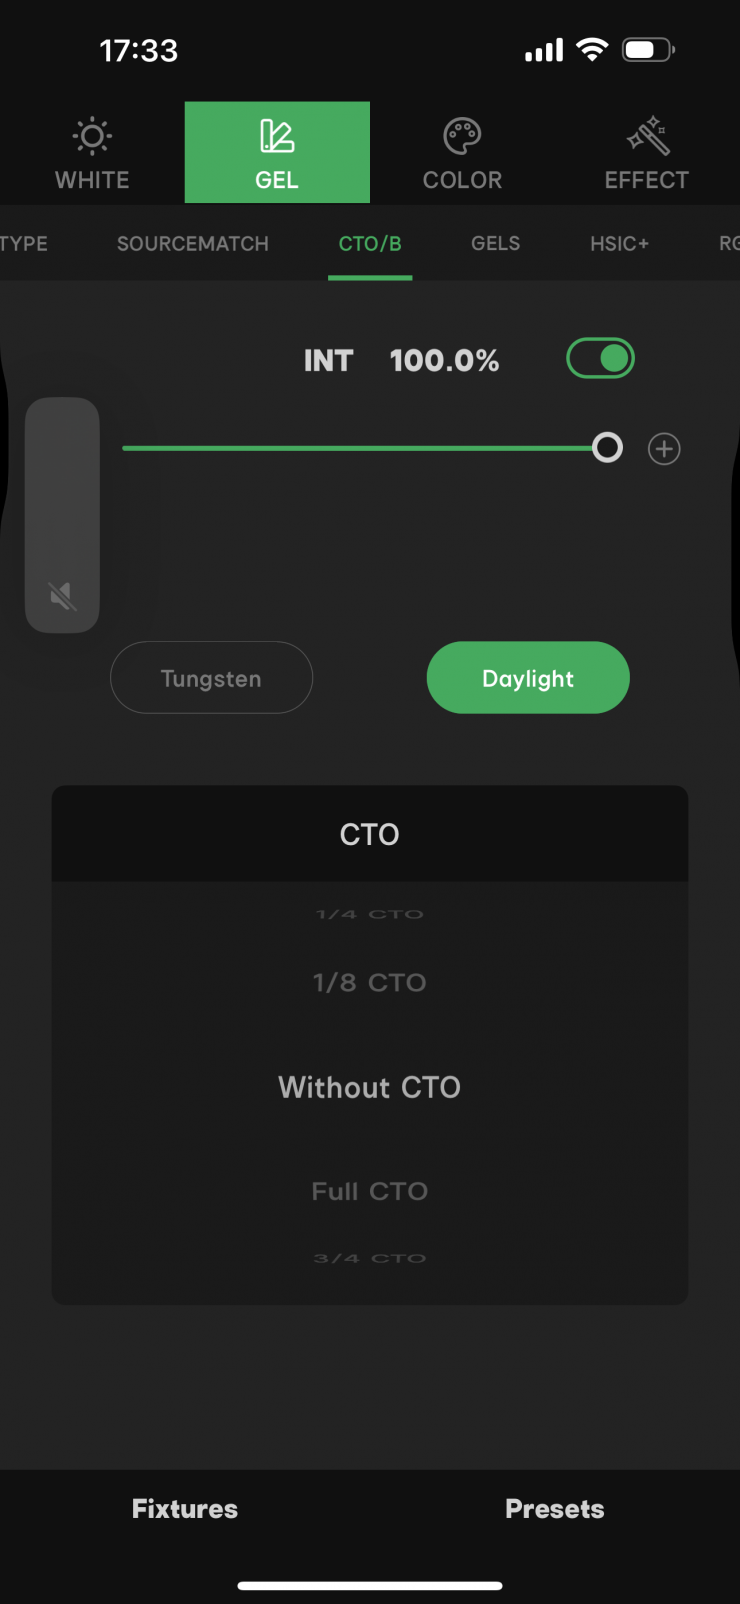
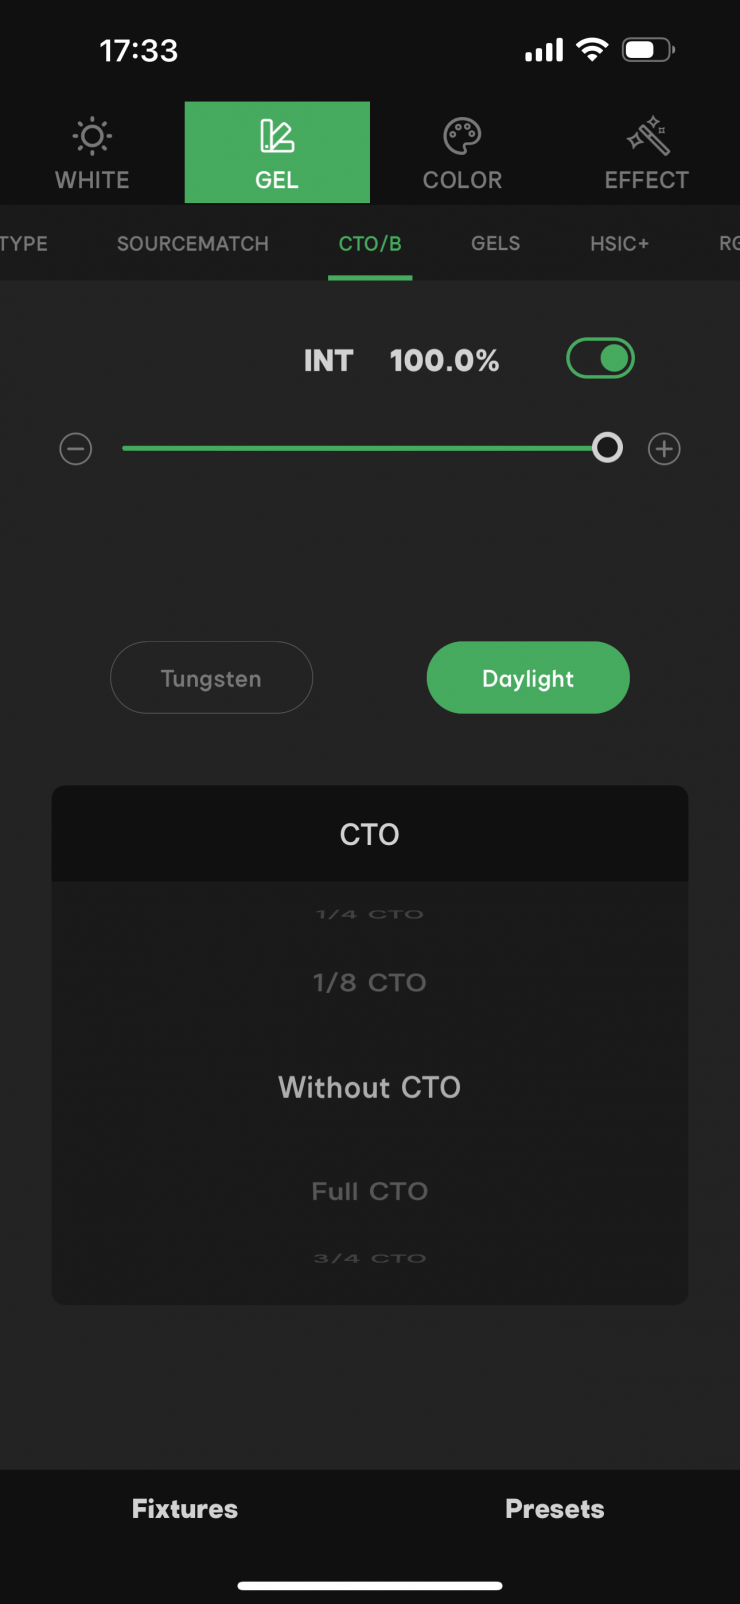
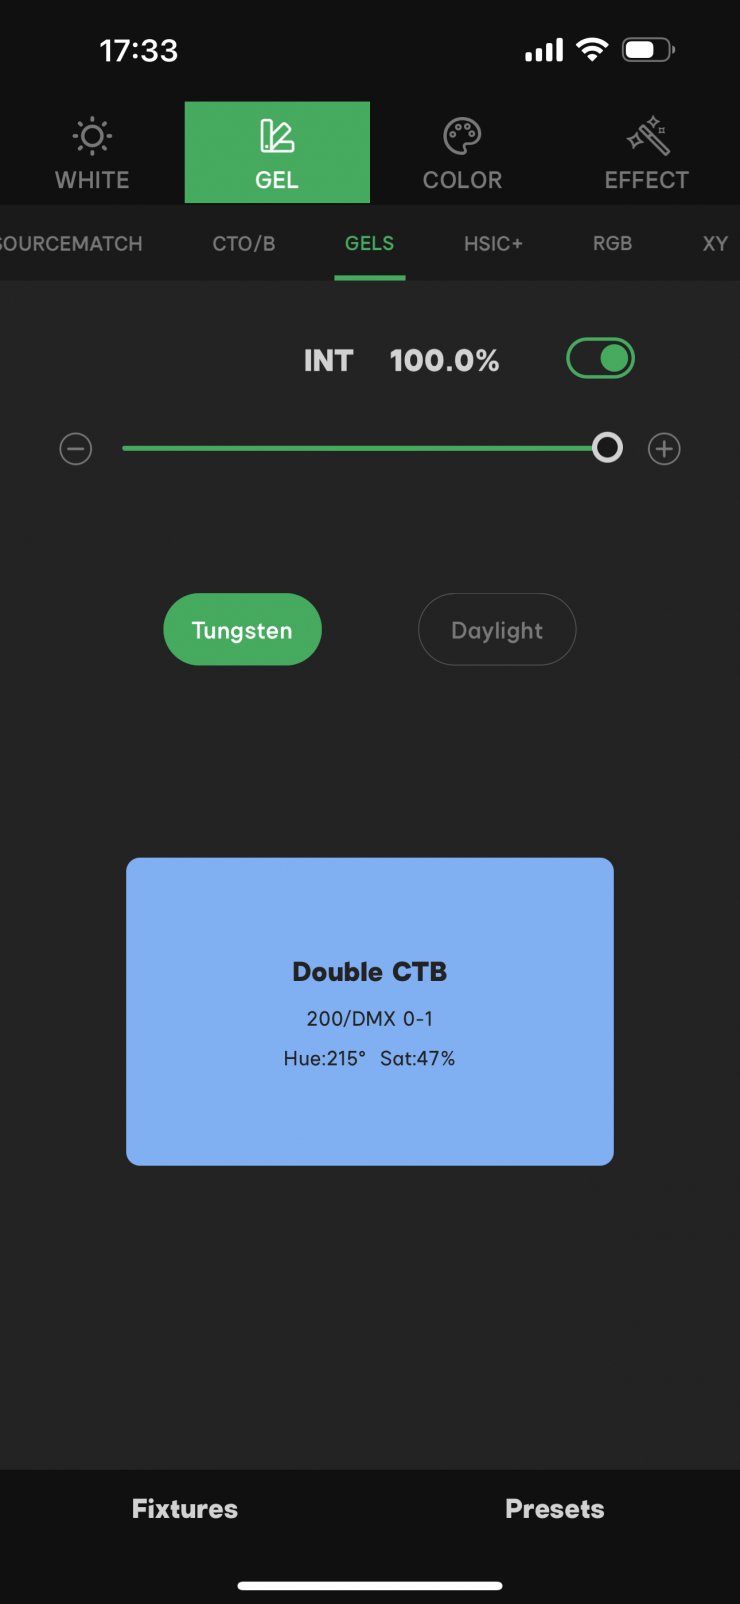
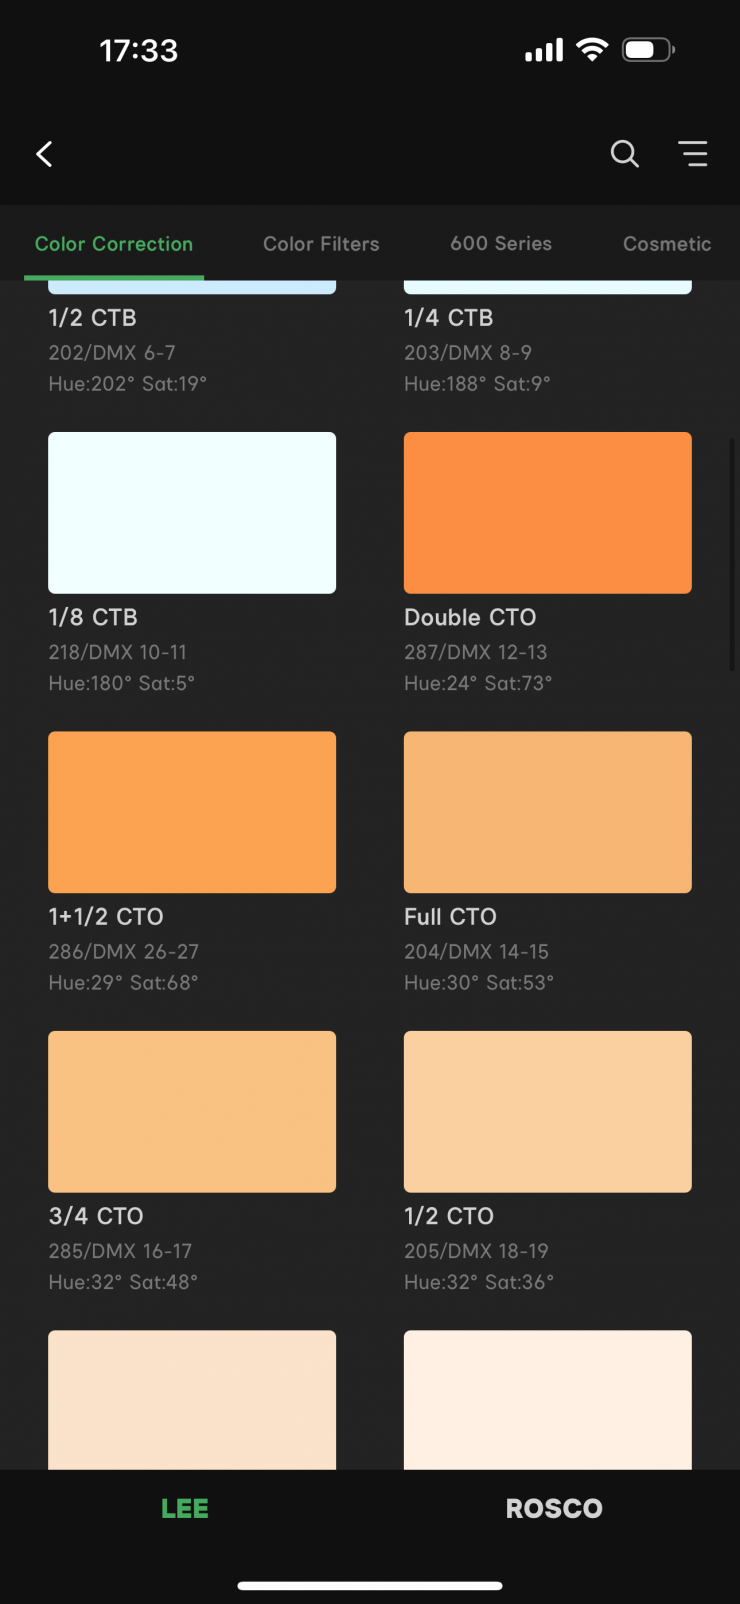
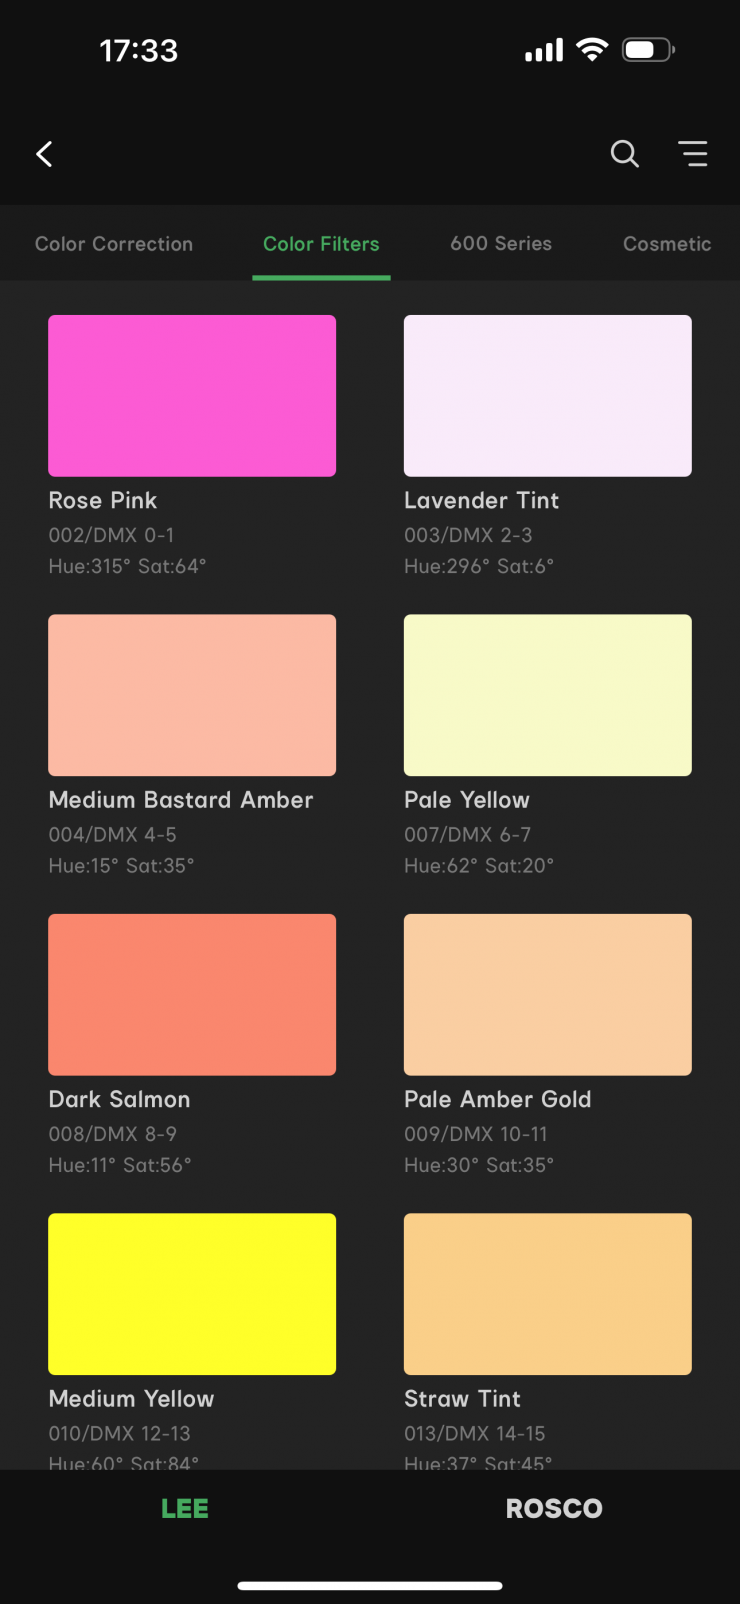
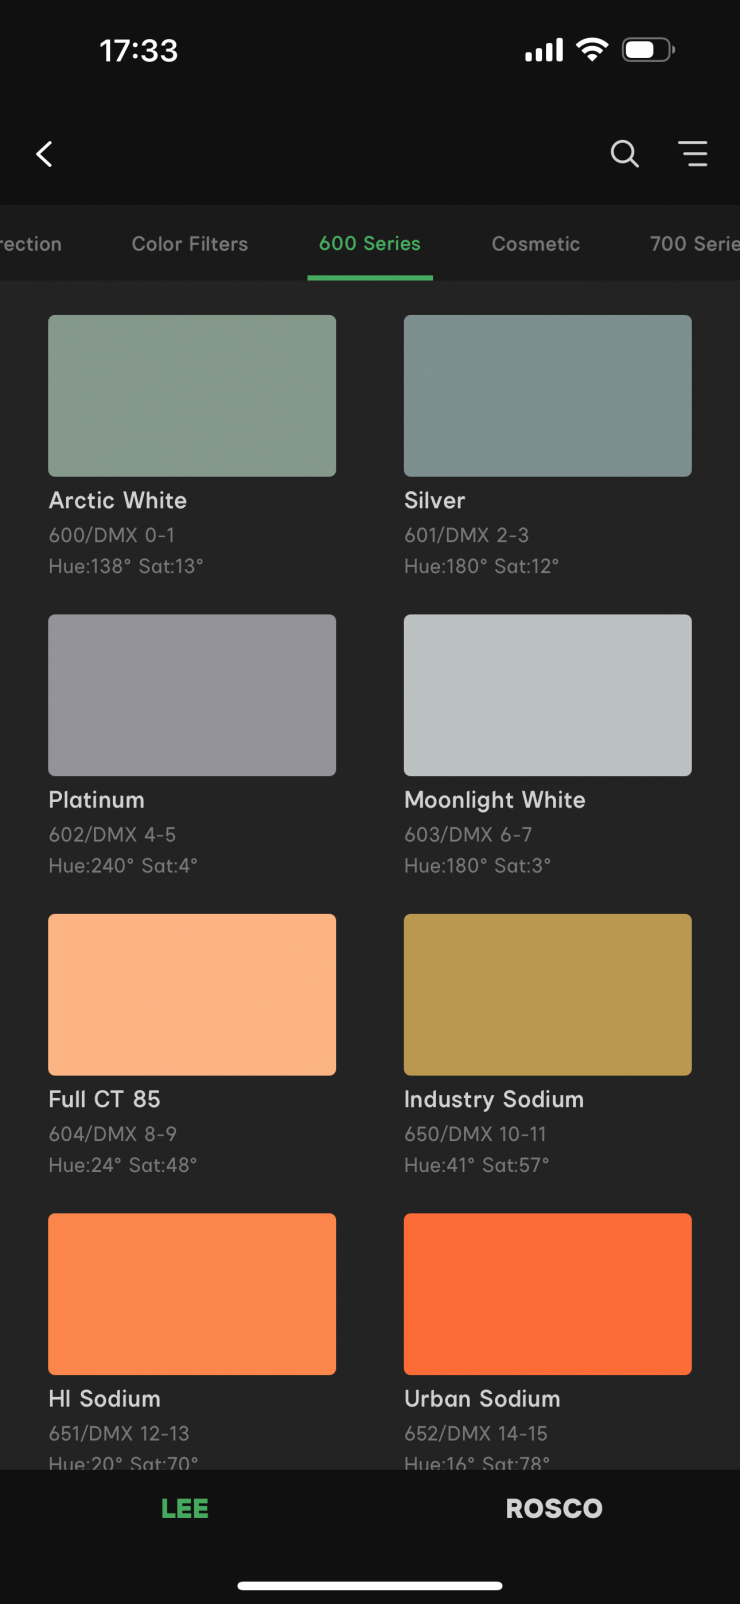
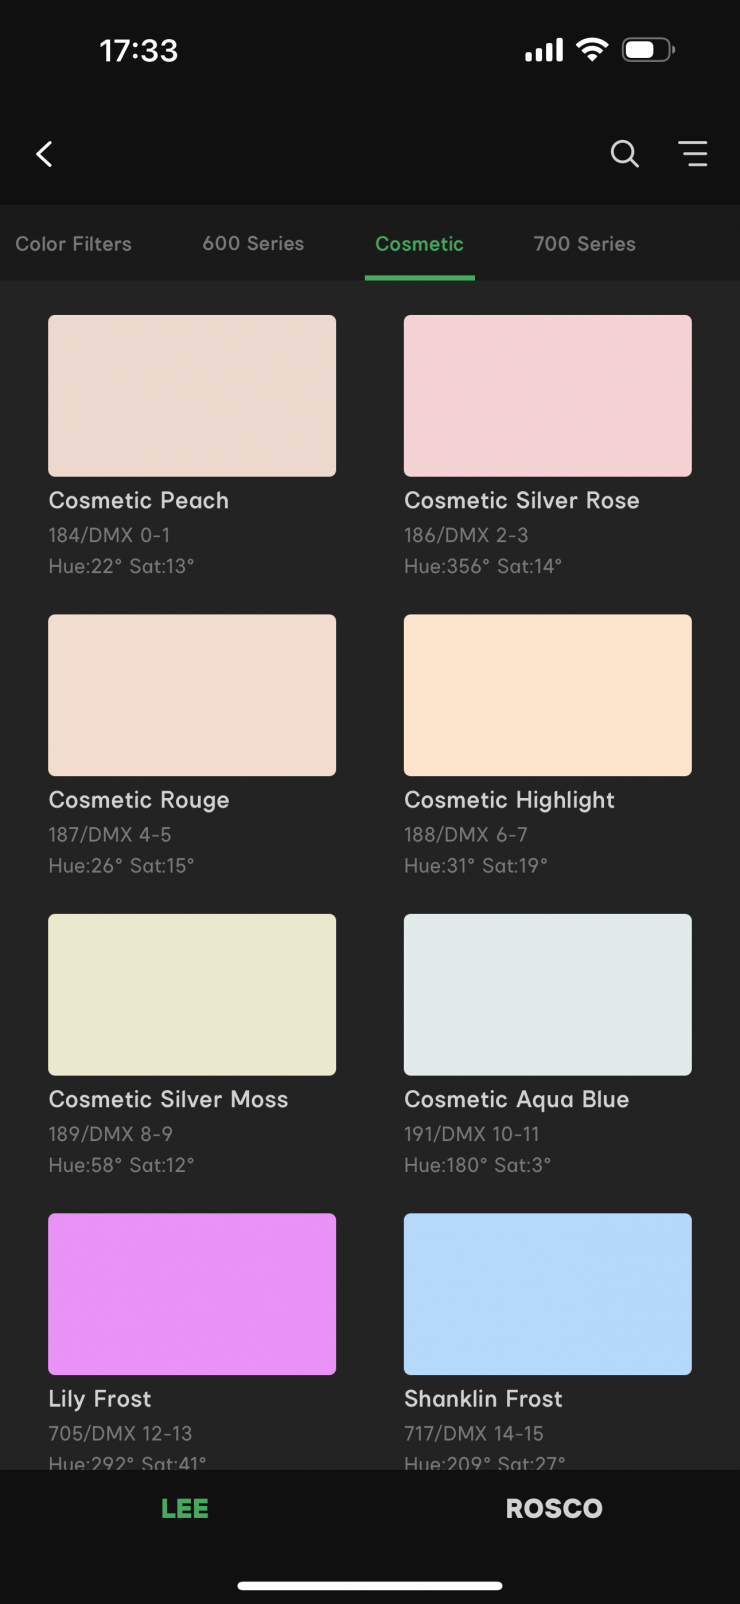
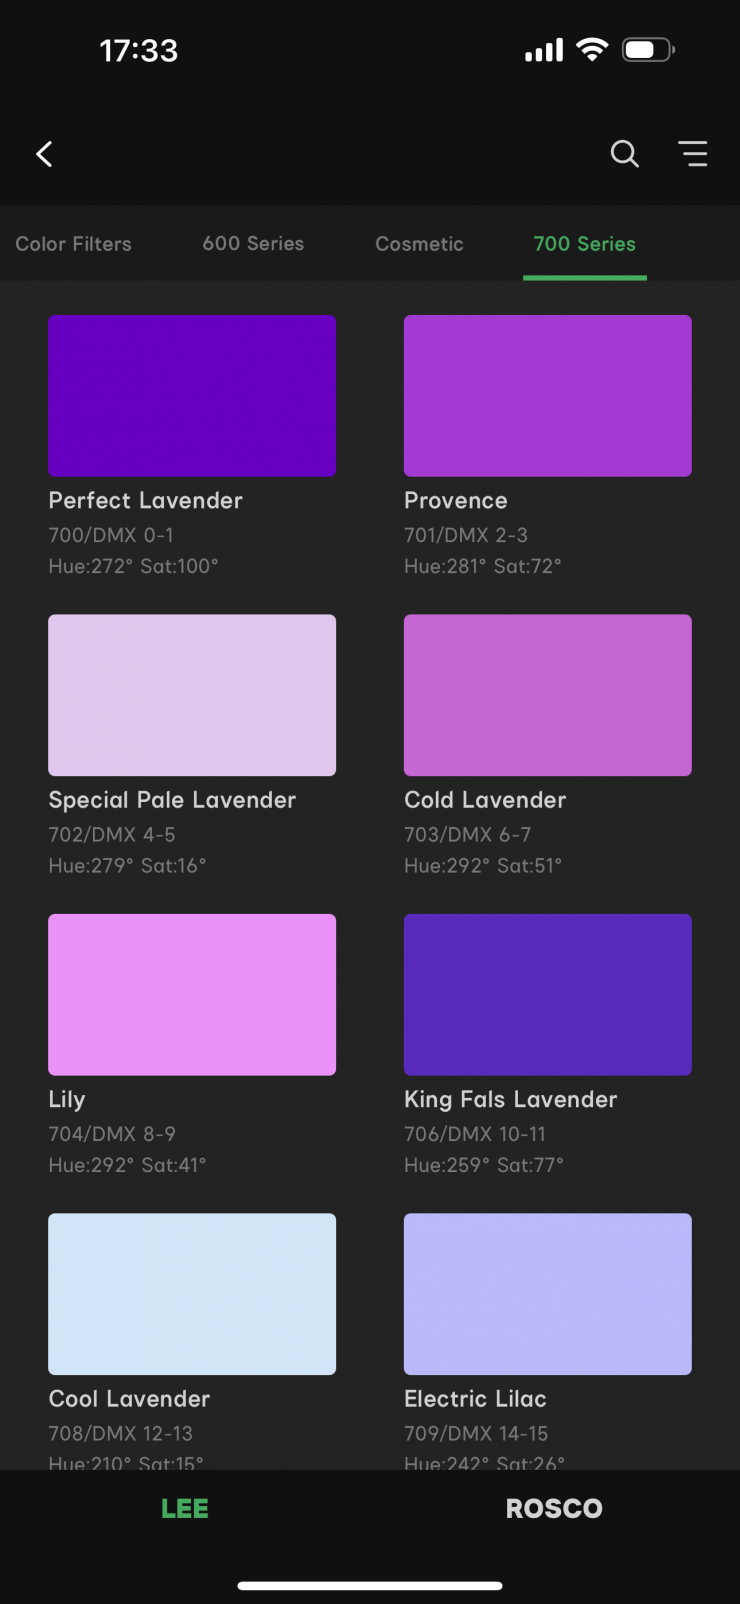
GEL Mode
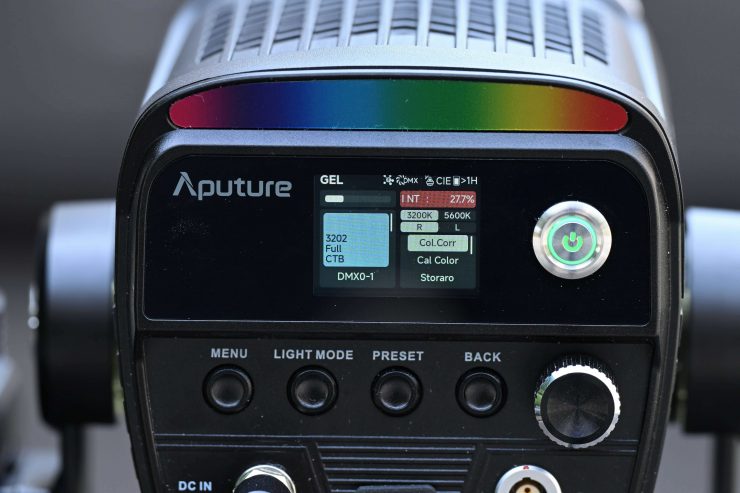
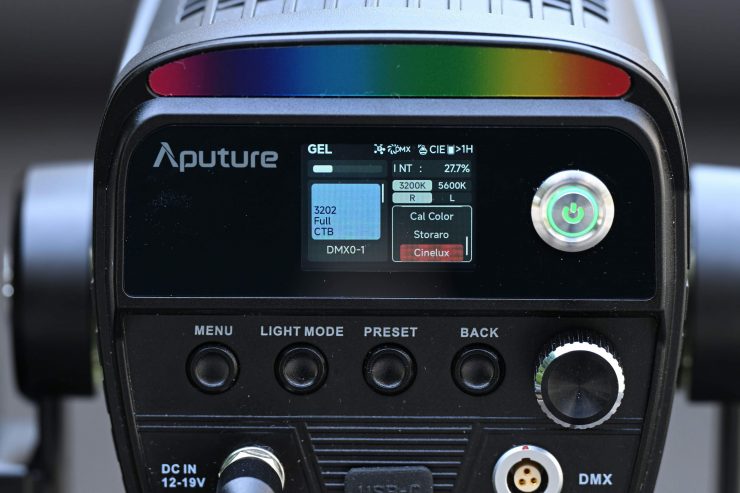
In GEL Mode, you can choose a base Color Temperature of 3200K or 5600K color and the corresponding Rosco or LEE gel to output the desired light.
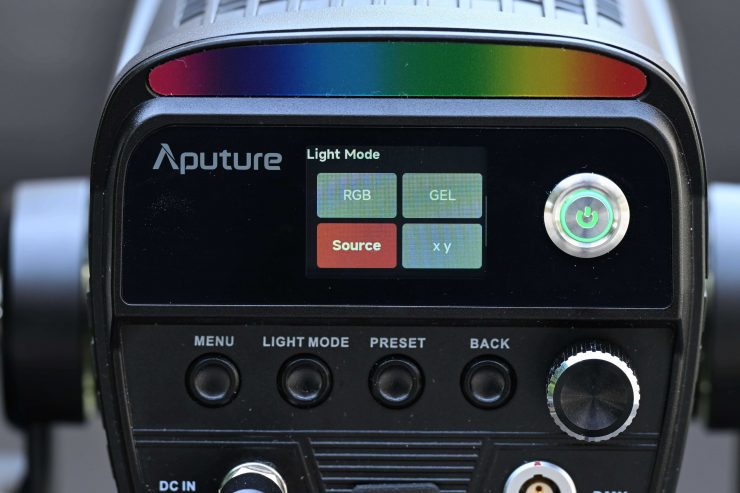
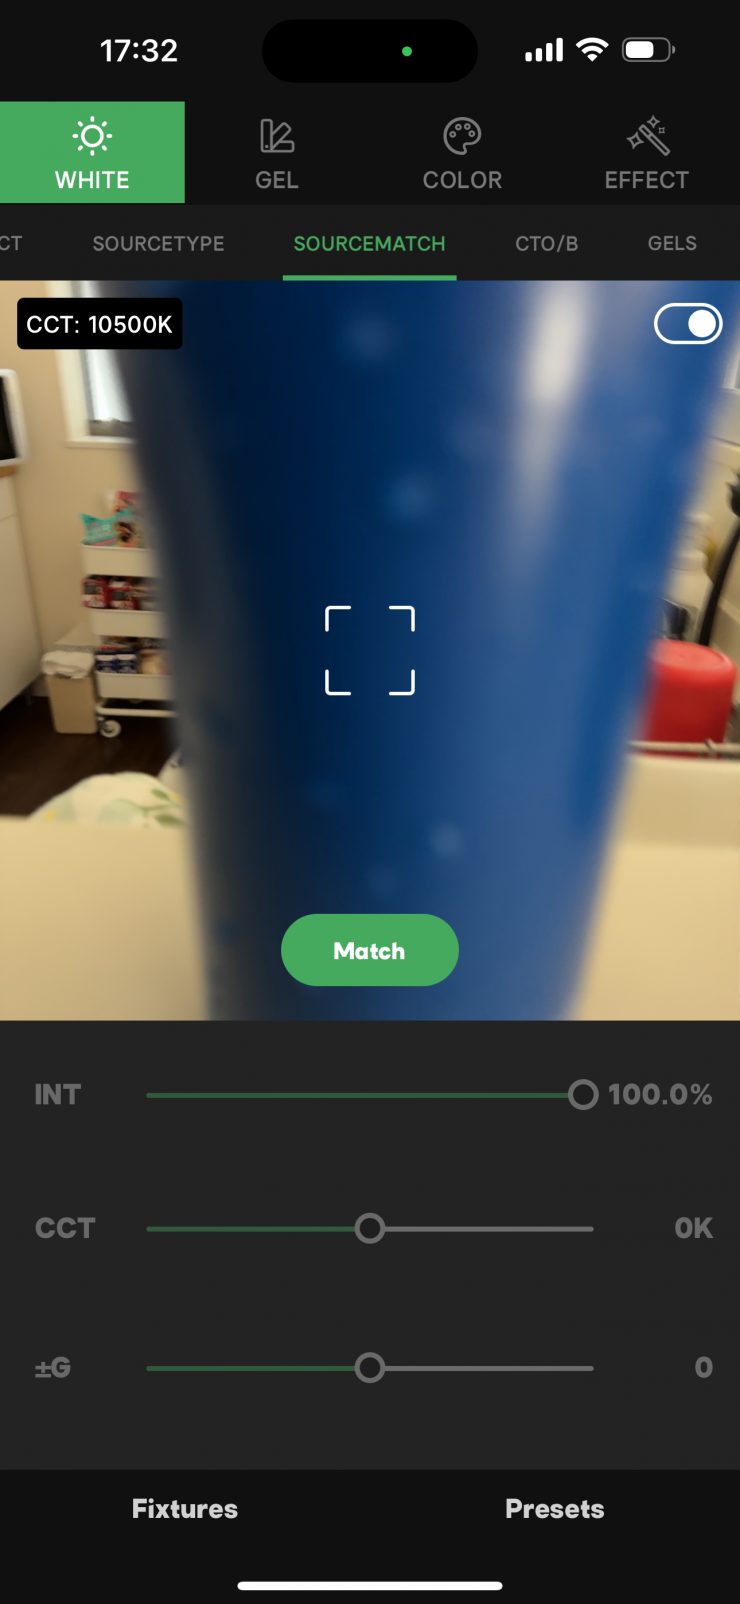
SOURCE Mode
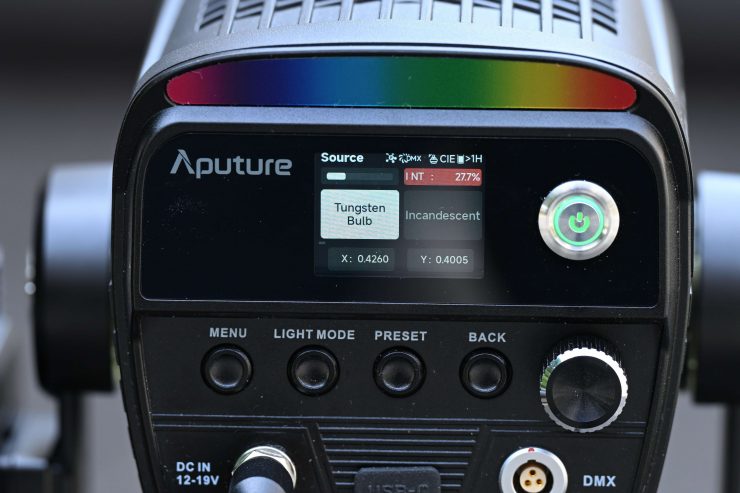
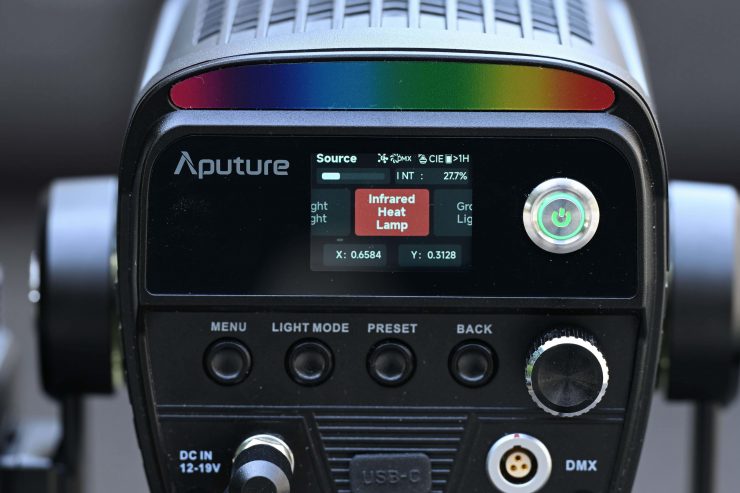
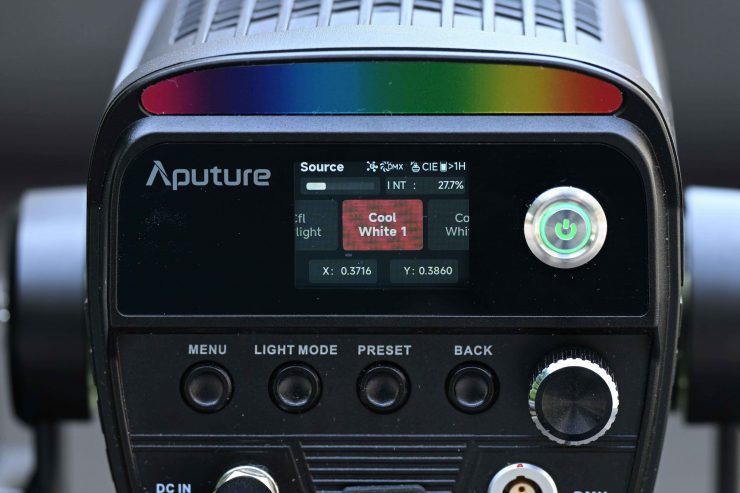
In SOURCE Mode, you can select the light source to mimic and fine-tune the xy coordinates.
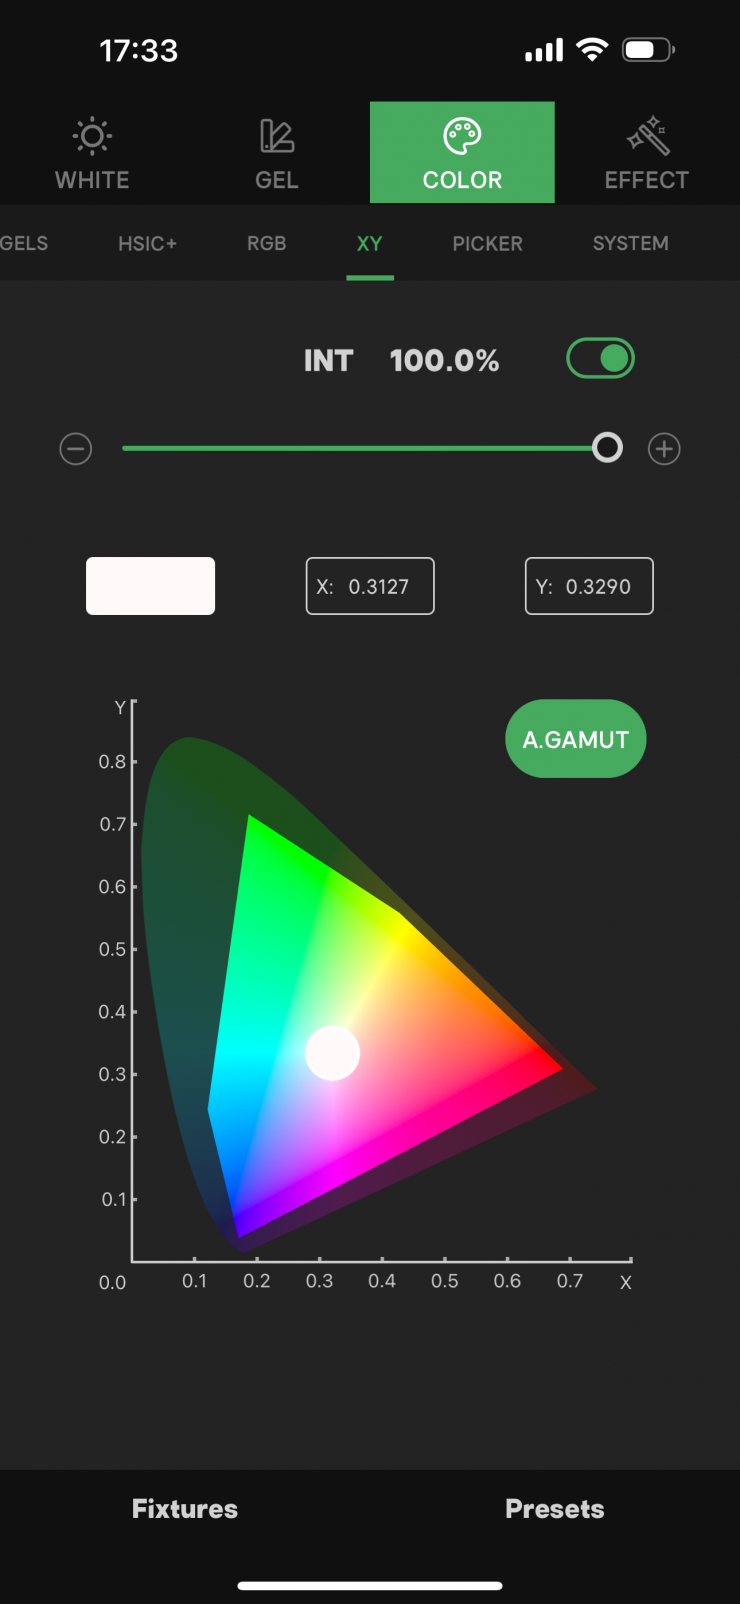
xy
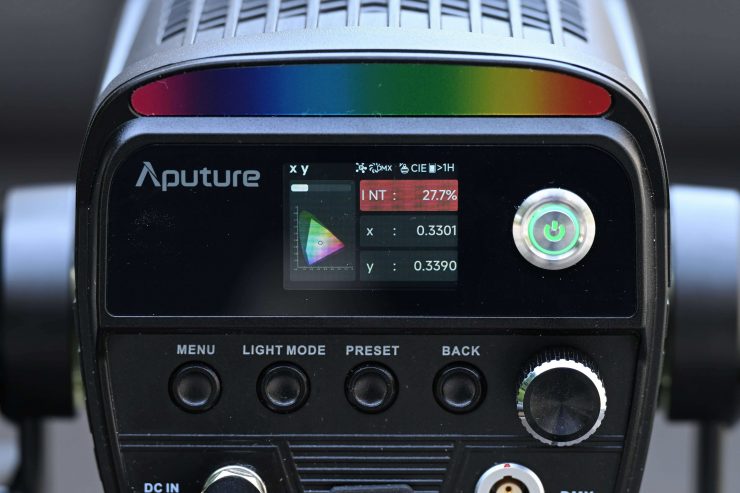
In xy mode, you can dial in exact xy coordinates, however, there doesn’t seem to be the ability to change the Gamut like you can on some other fixtures. It seems to be pre-set to a Rec.709 color space.
Dialing in xy coordinates is a fairly easy way to get a light to match other lighting sources, or at least get it in the ballpark.
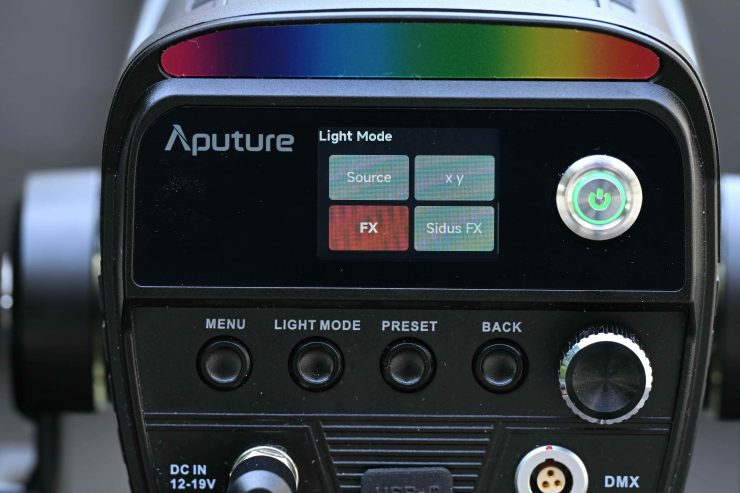
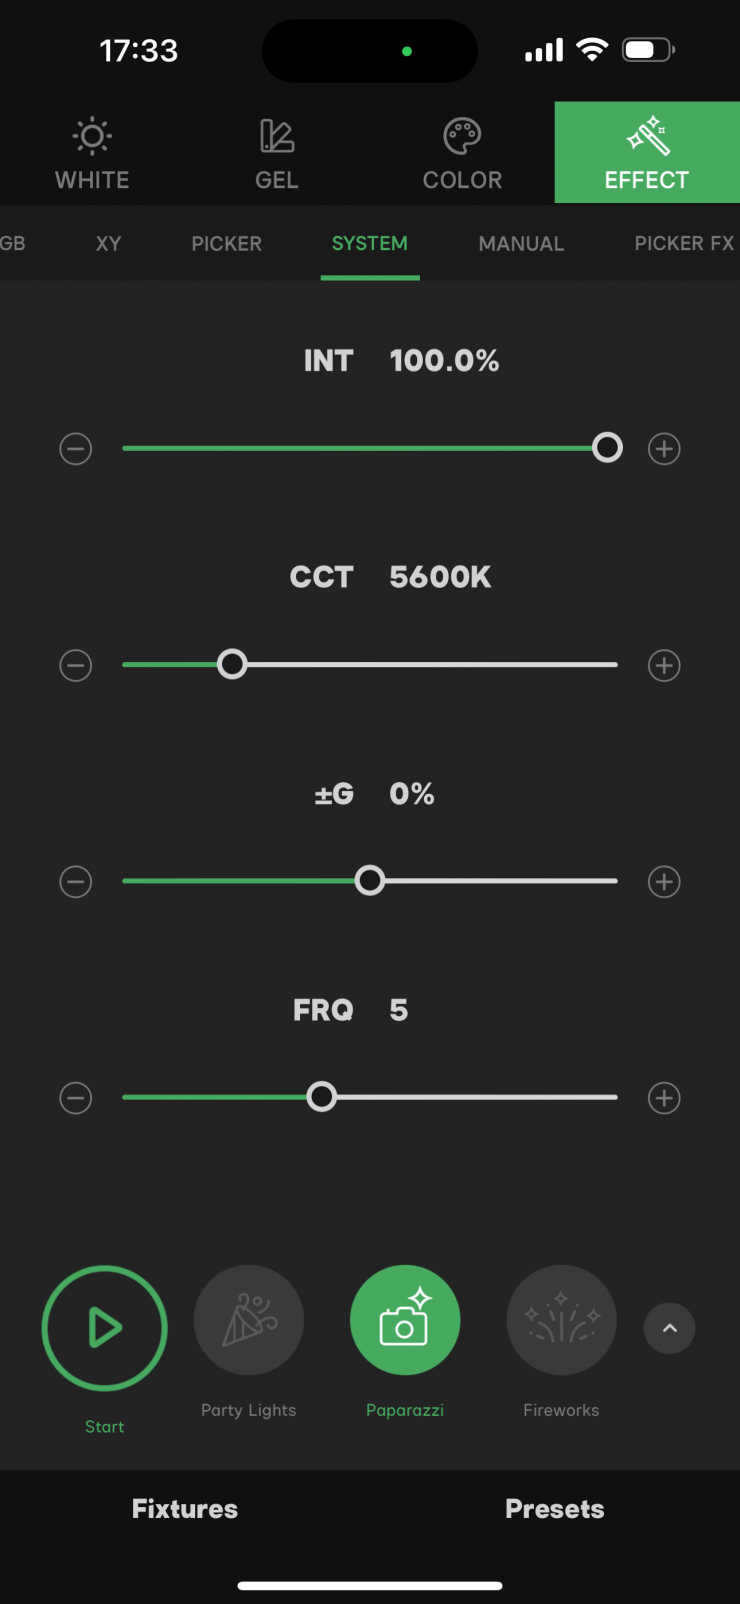
FX
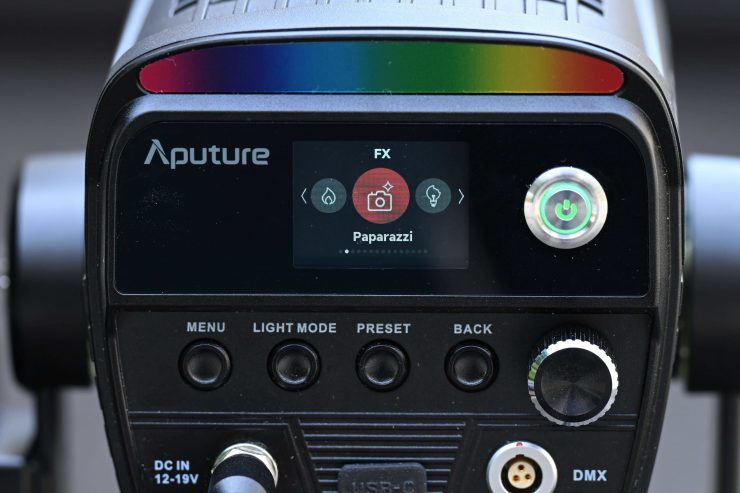
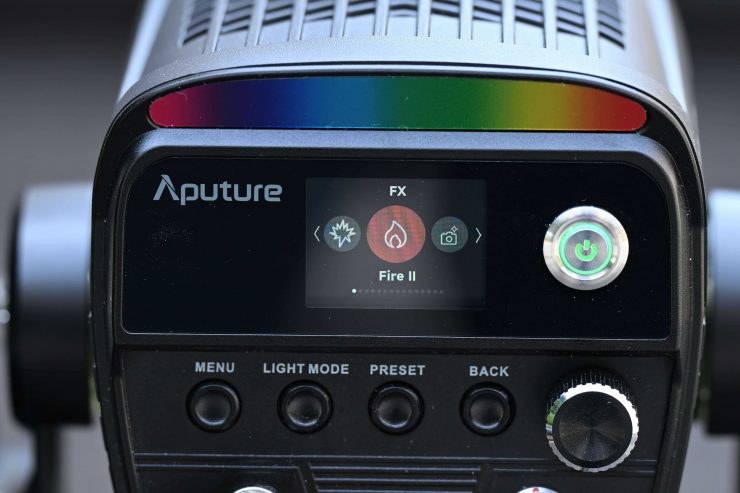
The BLAIR CC light engine allows the fixture to deliver a variety of lighting effects.
Effects mode lets you recreate a wide range of lighting effects that can be handy for certain scenarios. The effects include:
- Fireworks
- Explosions
- Flames
- Paparazzi
- Defective Bulb
- TV
- Pulse
- Party Lights
- Club
- Color Chase
- Candle
- Welding
- Police Car
- Flash
- Lightning
All the effects modes can be individually adjusted and tailored to your lighting needs.
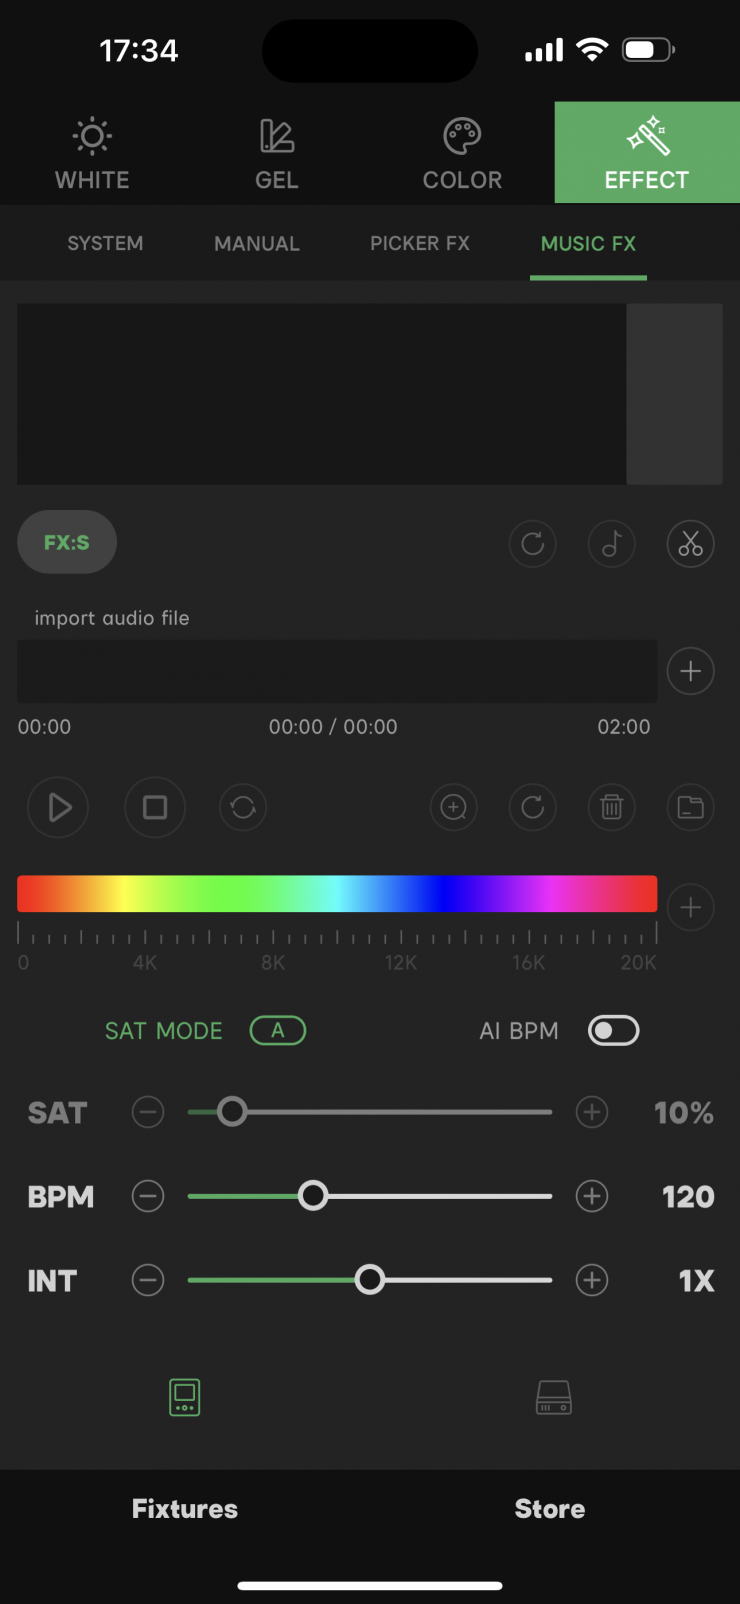
SIDUS FX
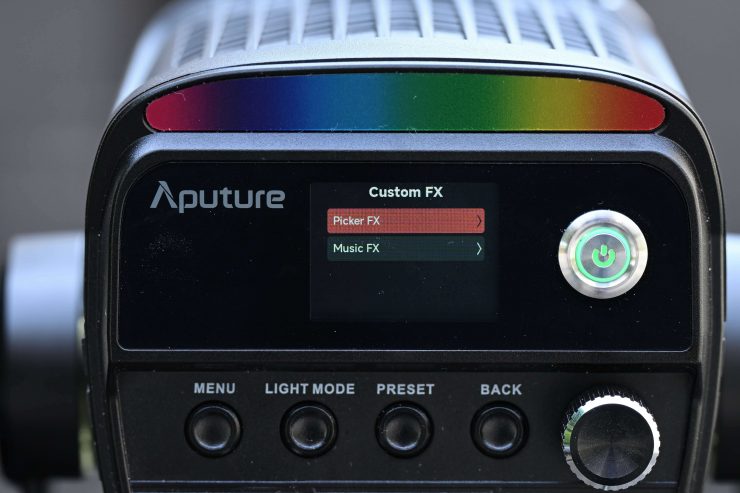
In SIDUS FX, you can choose from Picker FX or Music FX. Both of these modes need to be used in collaboration with the Sidus Link App.
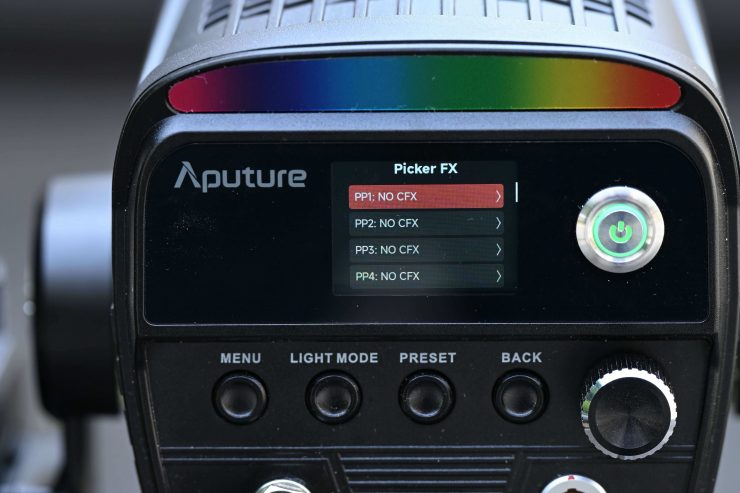
You can store up to 10 Picker FX or Music FX settings (a total of 20).
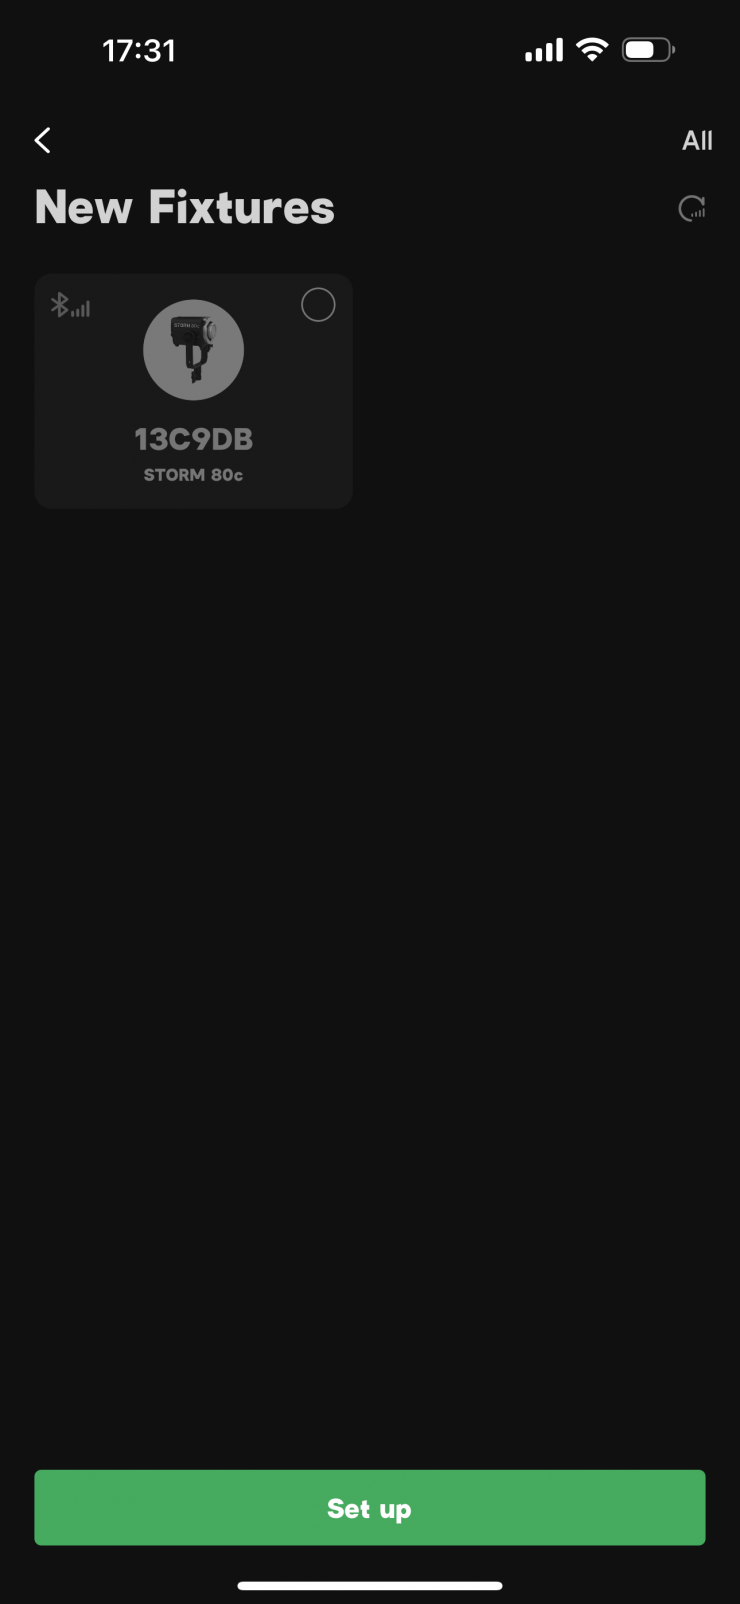
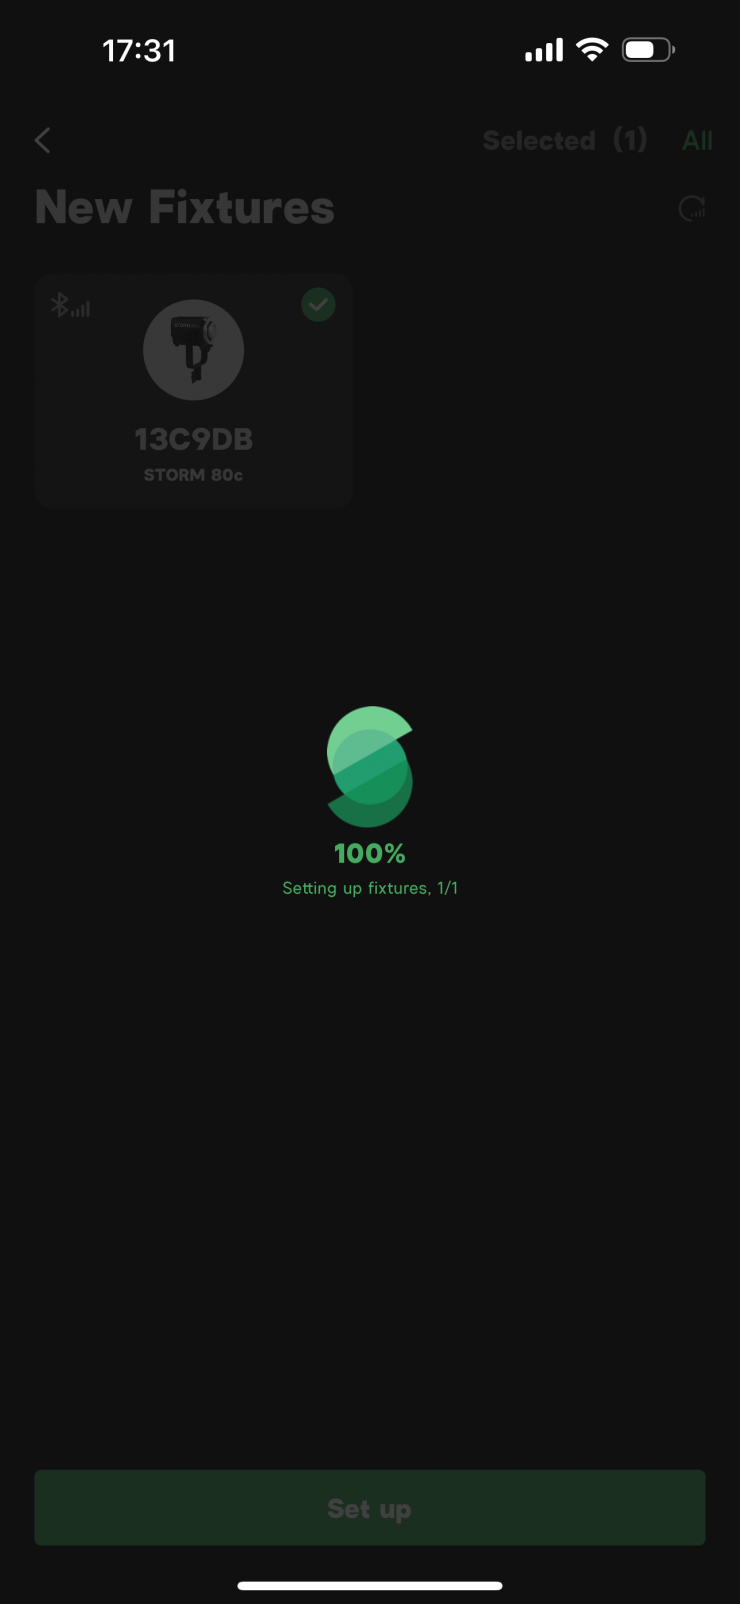
Sidus Link App
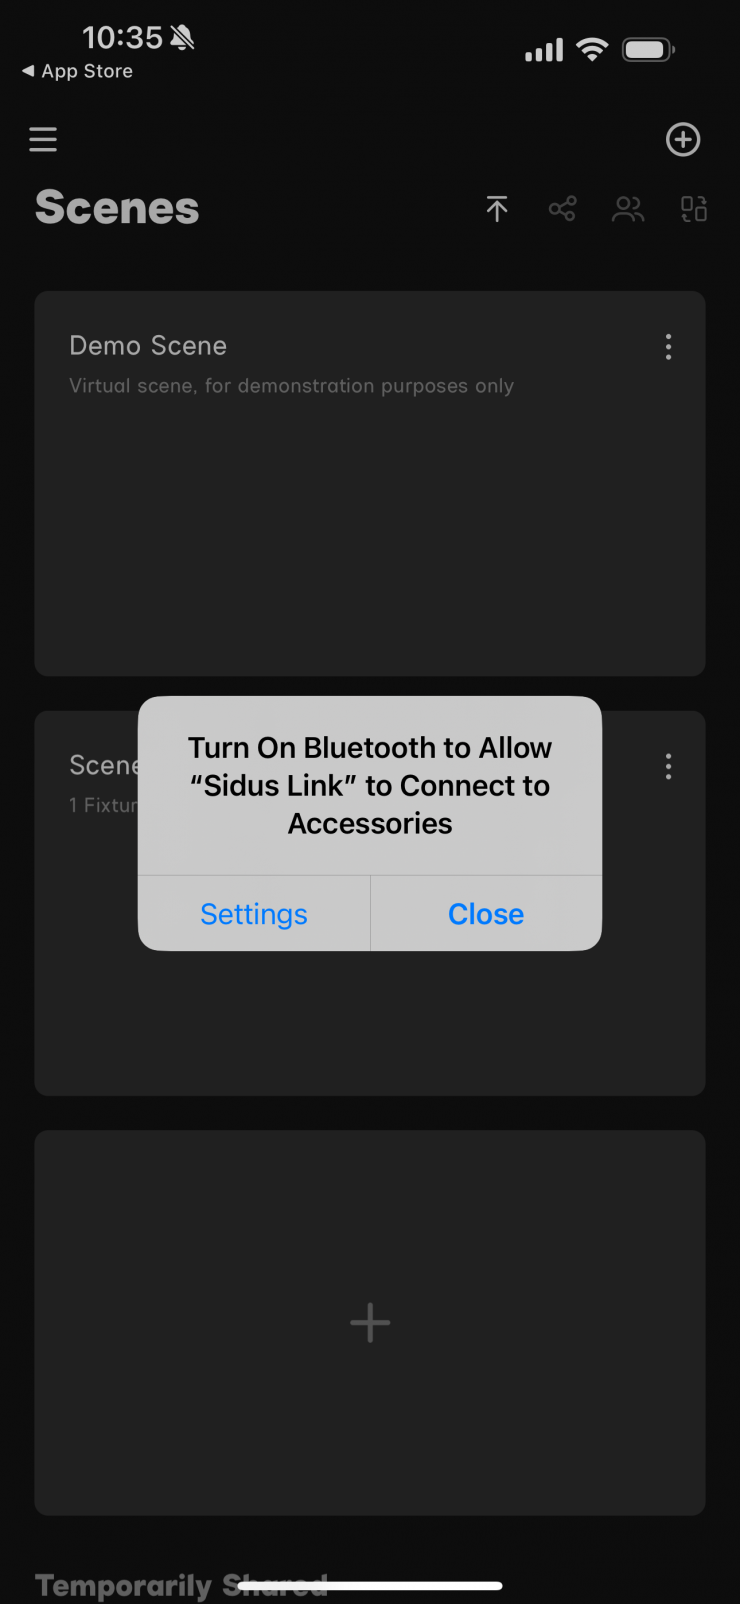
The light can be controlled via Bluetooth using the Sidus Link App.

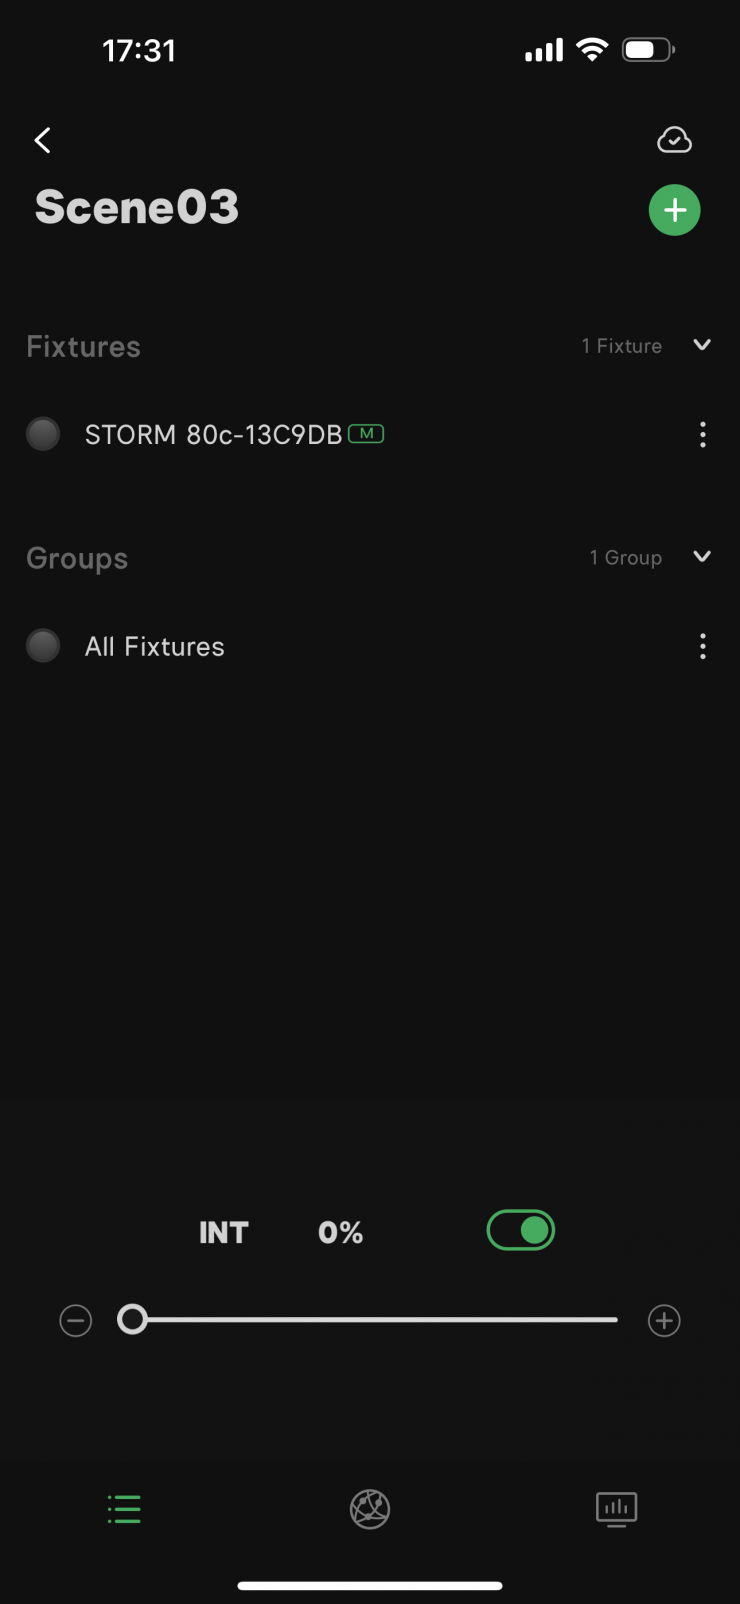
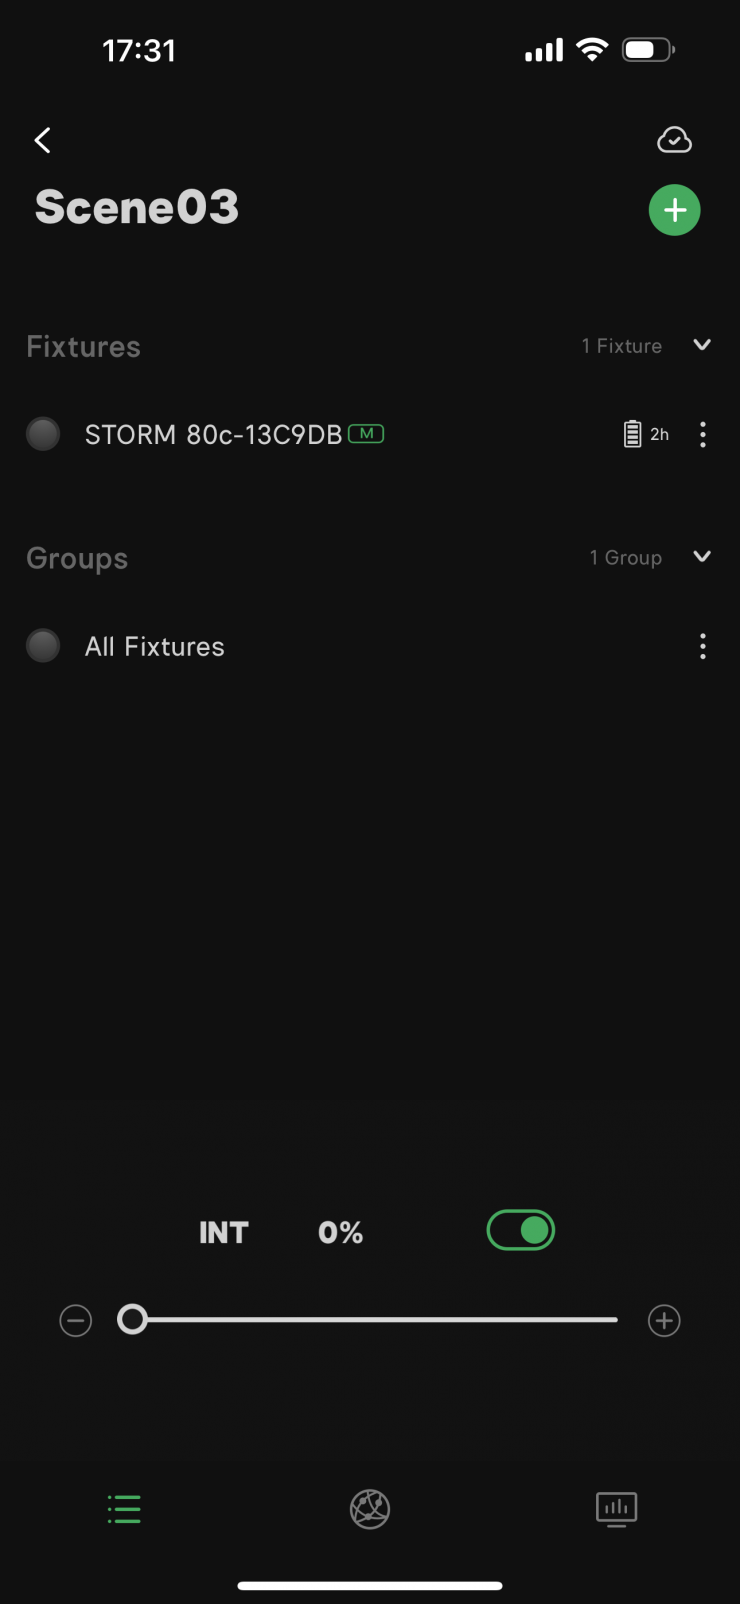
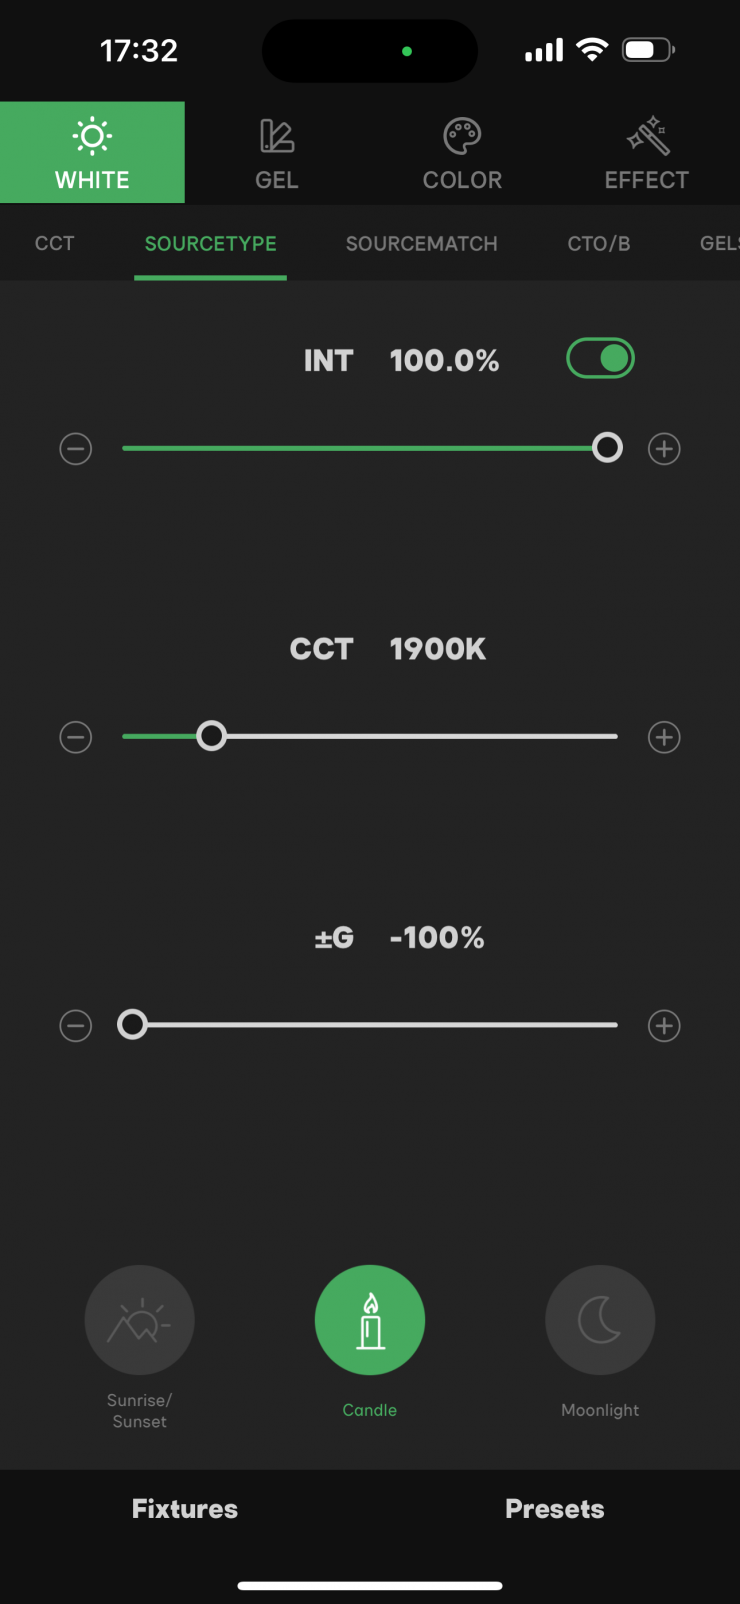


There is a range of parameters that you can adjust using the Sidus Link app.
I also like that you can save favorites and then also bring them back up very quickly.
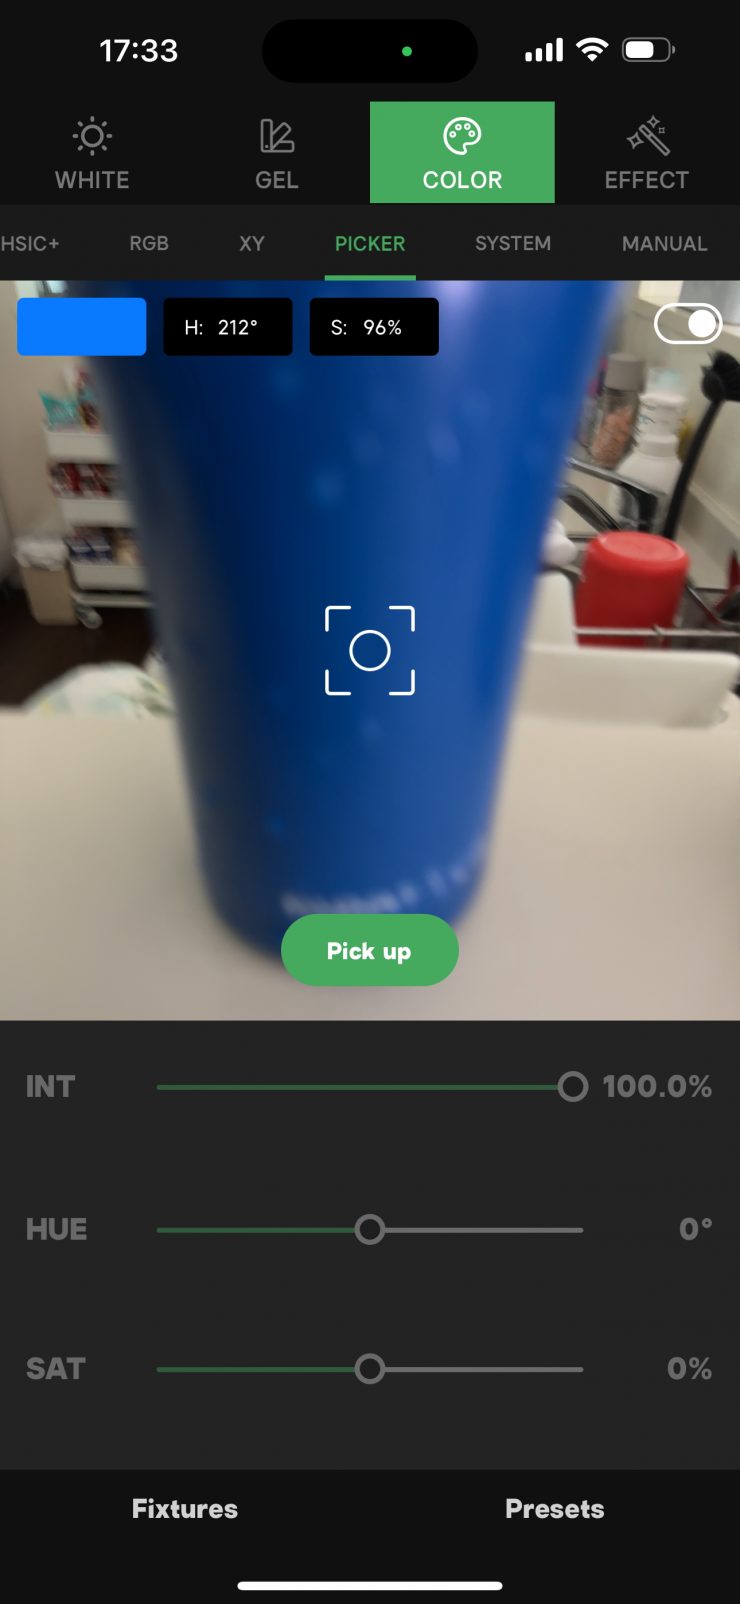
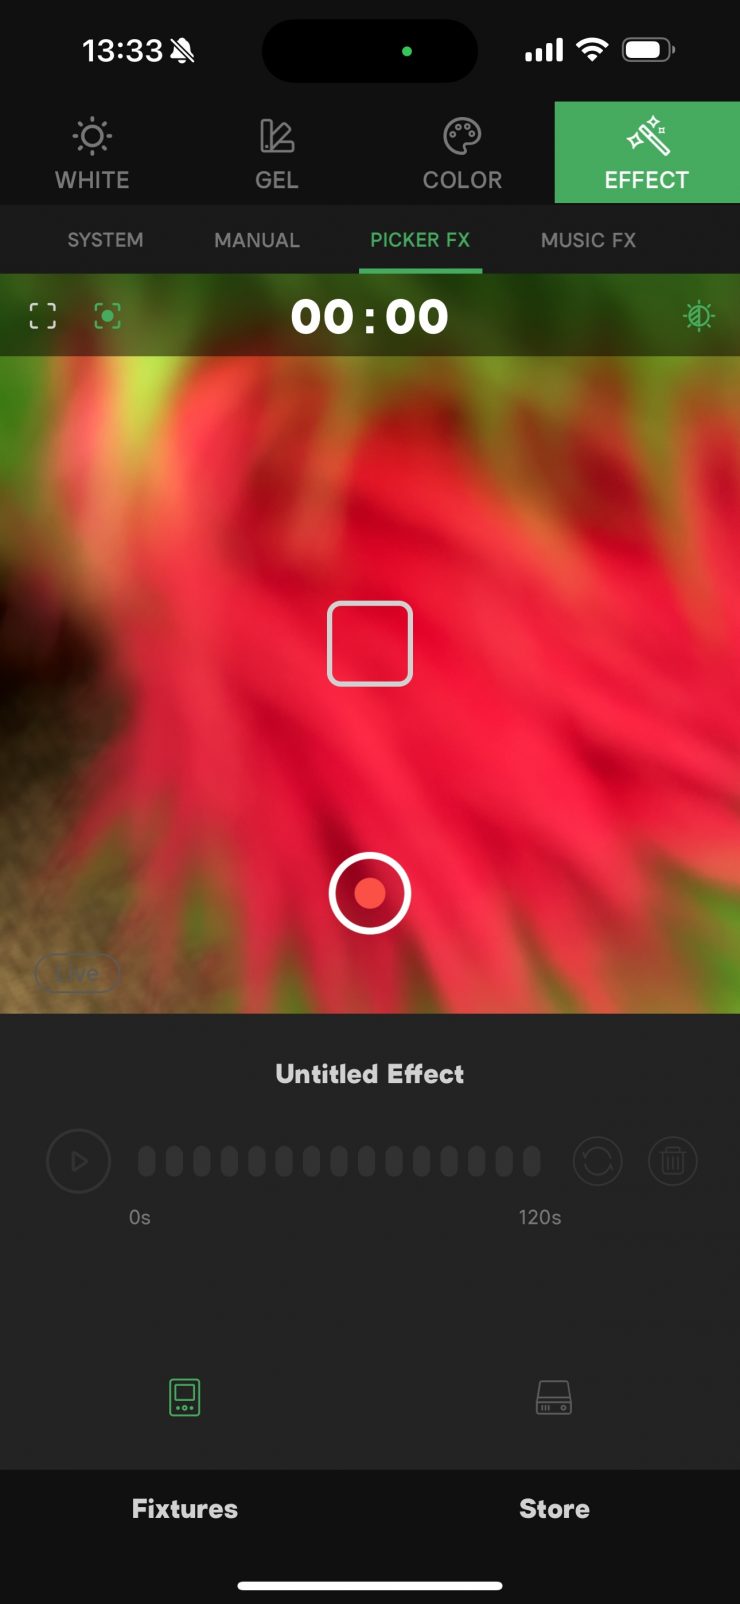
The Picker FX function can only be accessed and utilized within the app. This gives you the ability to do real-time tracking. Essentially, this gives you the ability to use your phone to capture a scene, and the light will mimic it in real-time.
The app is reasonably straightforward and easy to use.
Connectivity
The fixture can communicate using the Sidus Link App, Sidus Link Pro App, DMX/RDM, and CRMX.

The STORM 80c has the following connectivity on the back of the fixture:
- 1x 3-Pin DMX In
- 1x USB-C
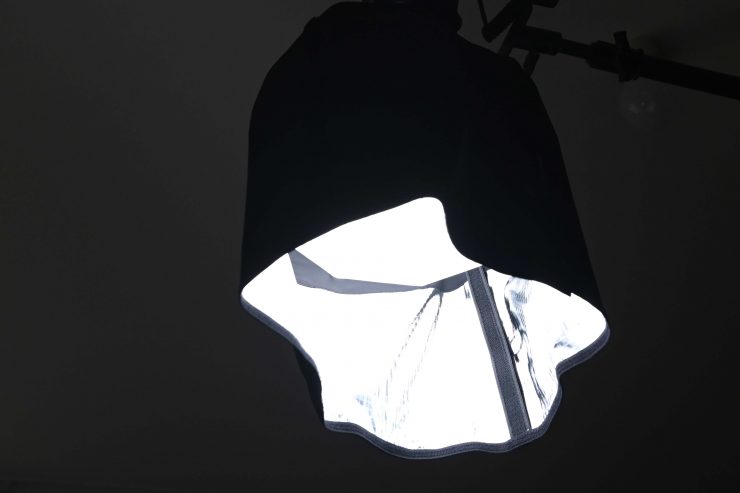
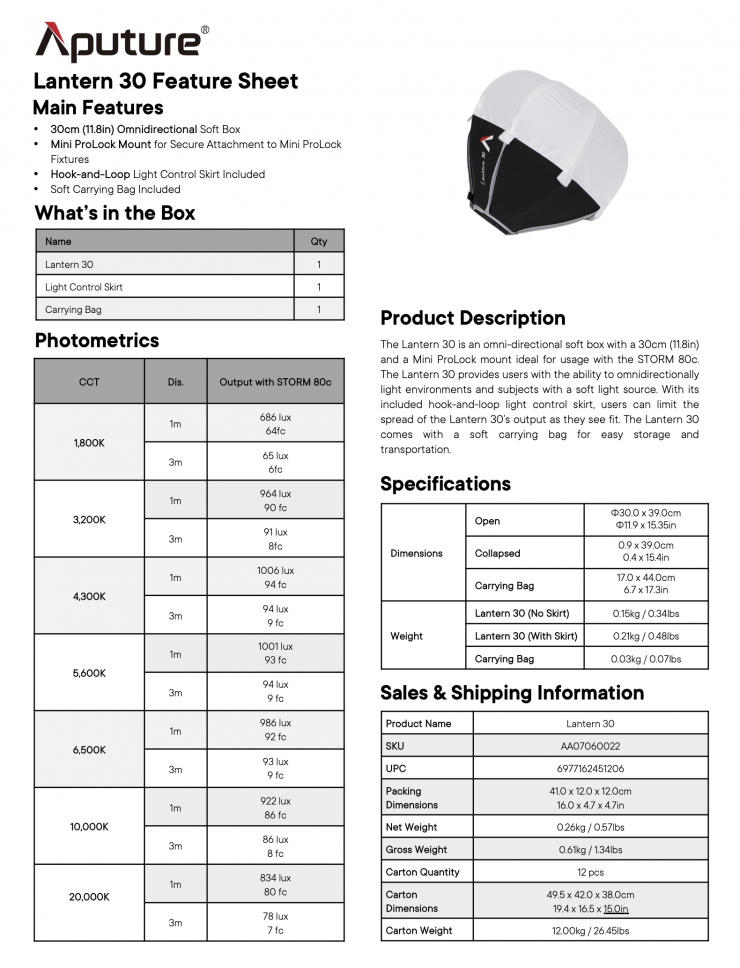
Mini Lantern Diffuser
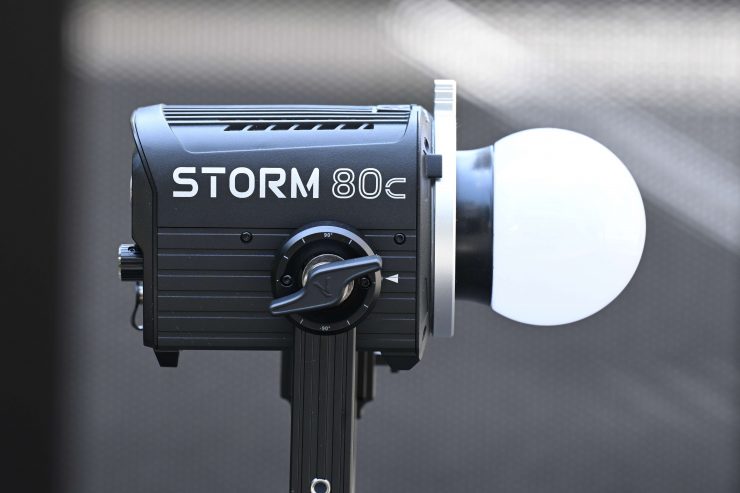
The STORM 80c comes with a Mini Lantern Diffuser. This essentially looks and performs like a lightbulb.

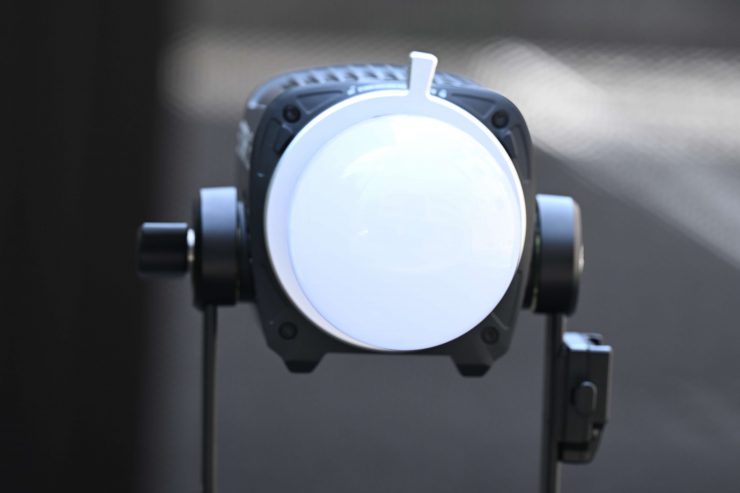
The Mini Lantern Diffuser broadens the beam angle, but it considerably reduces the output.
It is a nice accessory to have, but I wouldn’t recommend using it as a key light, because it can be too bright to look at and it has a very wide beam spread.
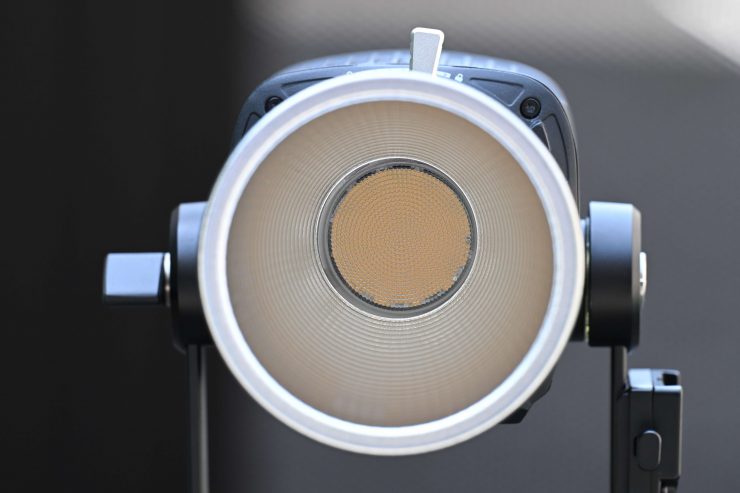
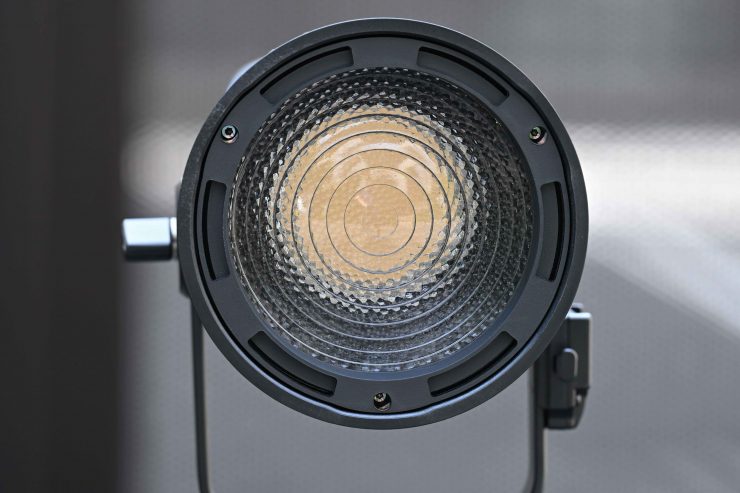
Hyper Reflector
The included Hyper Reflector attaches natively to the fixture. It is useful if you want to create a more concentrated beam angle.
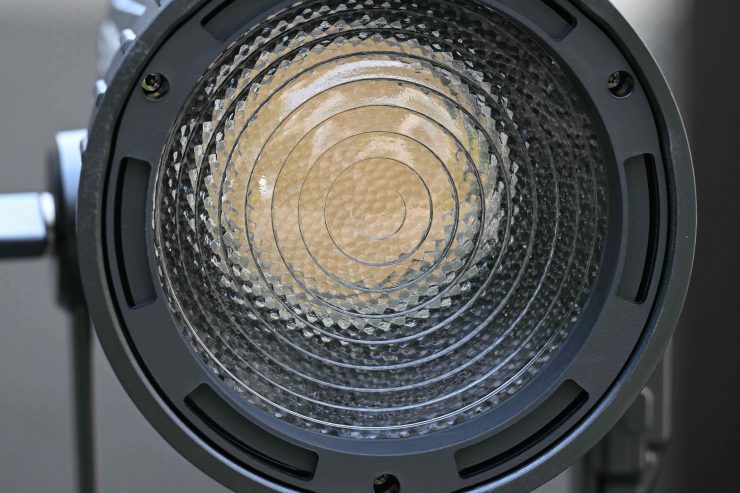
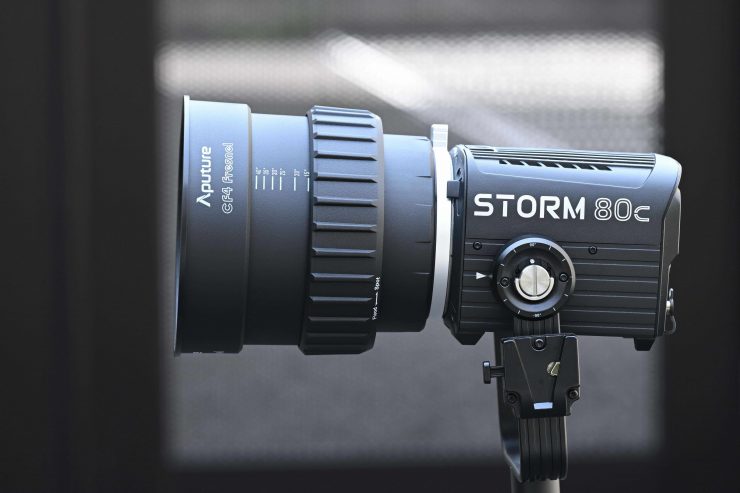
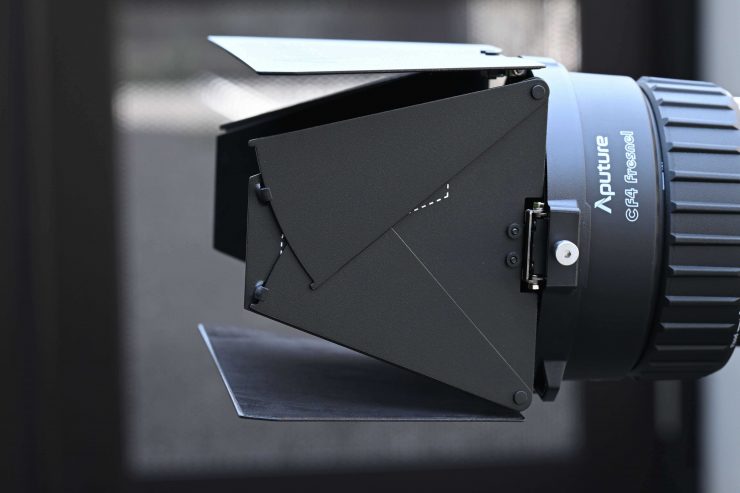
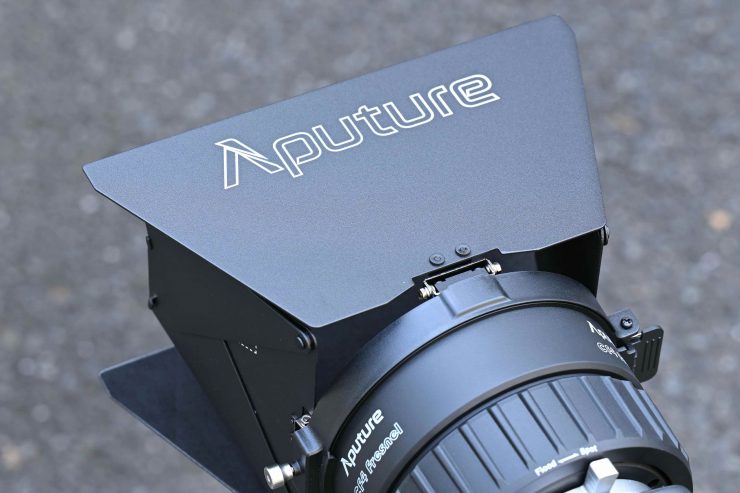
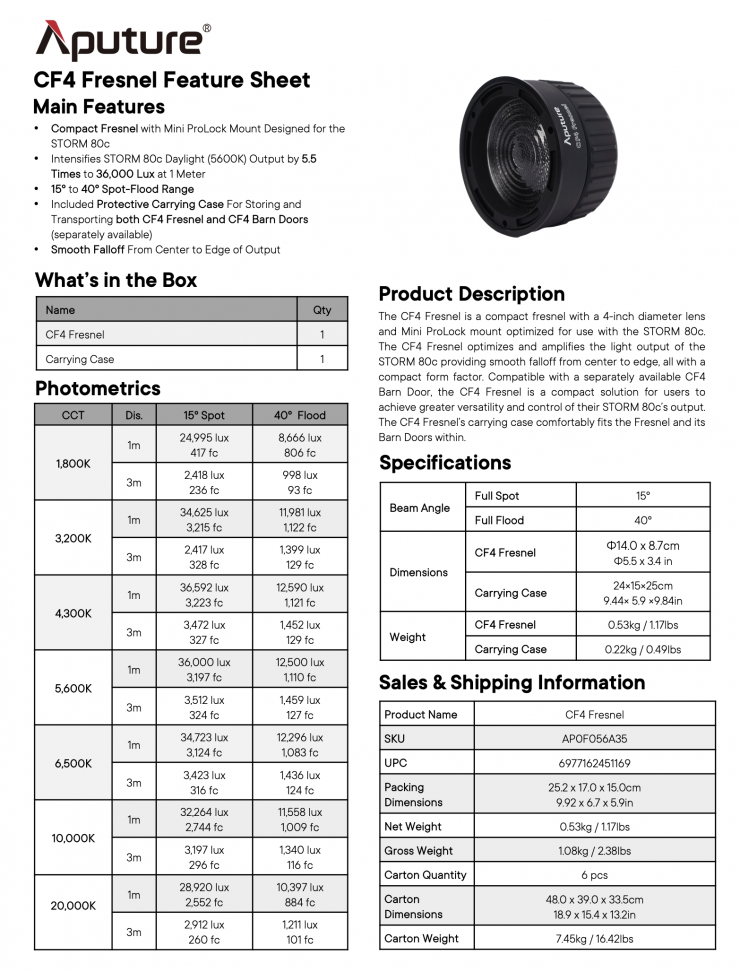
CF4 Fresnel
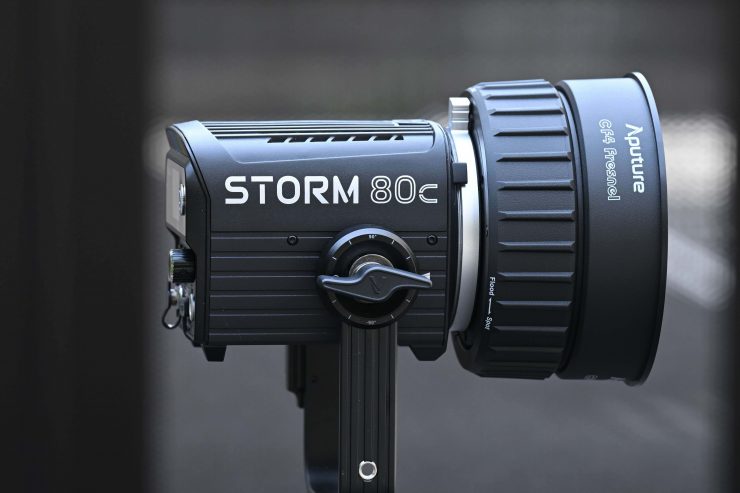
The Aputure CF4 Fresnel for STORM 80c is a very compact, lightweight, and affordable solution for the STORM 80c.
At only $109 USD, this is a good addition to the STORM 80c.
Key features
- For STORM 80c Light
- 15 to 40° Variable Beam Angle
- Intensifies Output by 5.5x to 36,000 Lux
- Smooth Falloff from Center to Edge
- Mini ProLock Mount
- Carrying Case for Fresnel and Barndoors
Designed for the STORM 80c light fixture, the CF4 Fresnel intensifies the light output by 5.5 times, producing a claimed output of up to 36,000 lux.
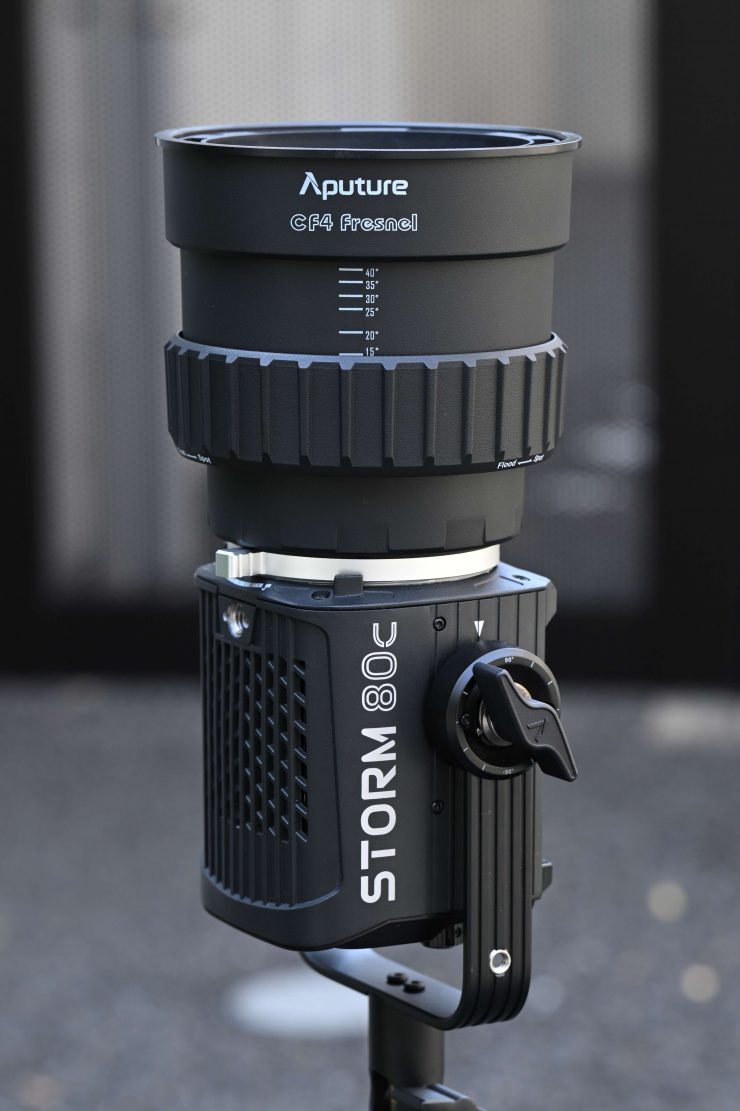
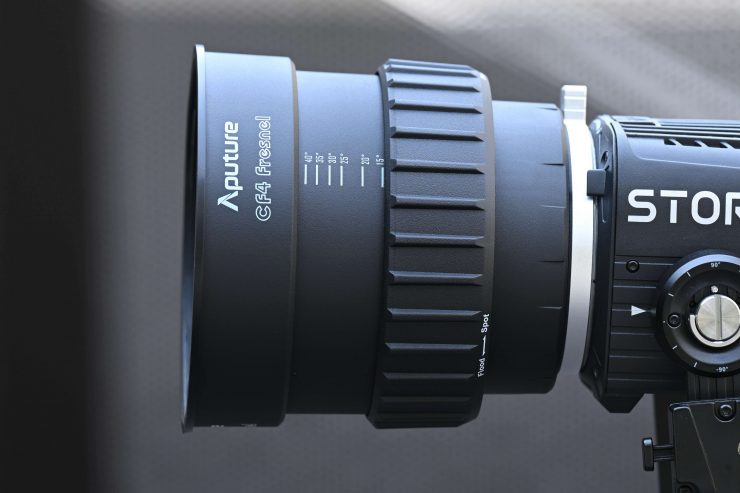
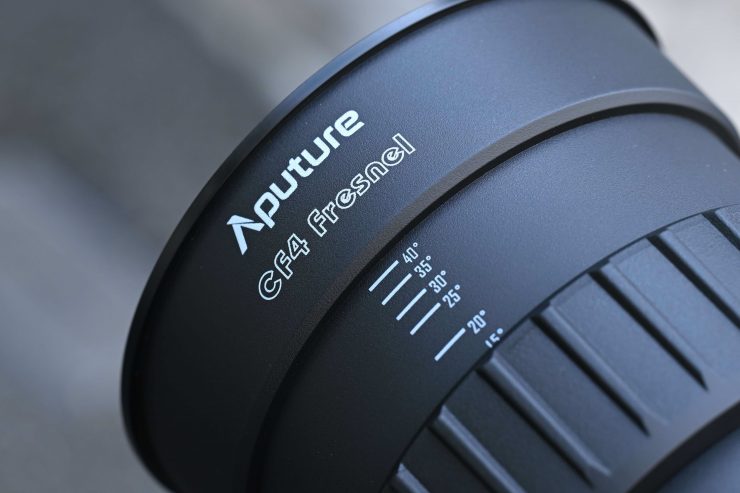
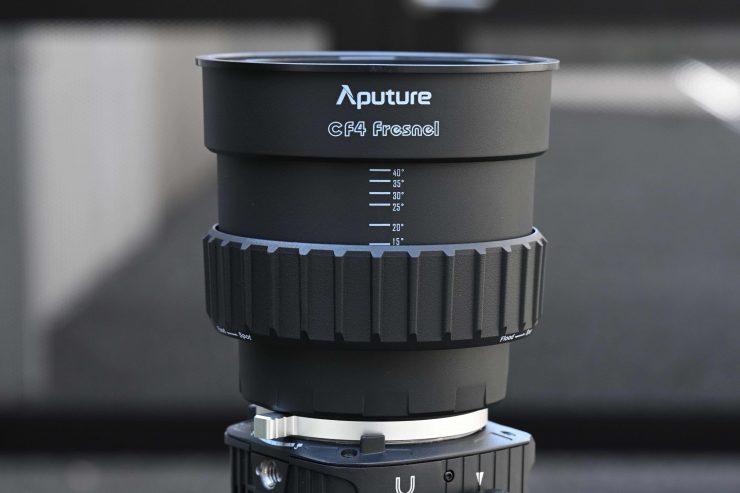
It focuses the light’s beam spread from a tight 15° to a 40° medium flood with smooth falloff from the center to the edge.
Compatible with CF4 barndoors, the CF4 Fresnel has a Mini ProLock mount and comes with a carrying case that can also fit the separately available barndoors.
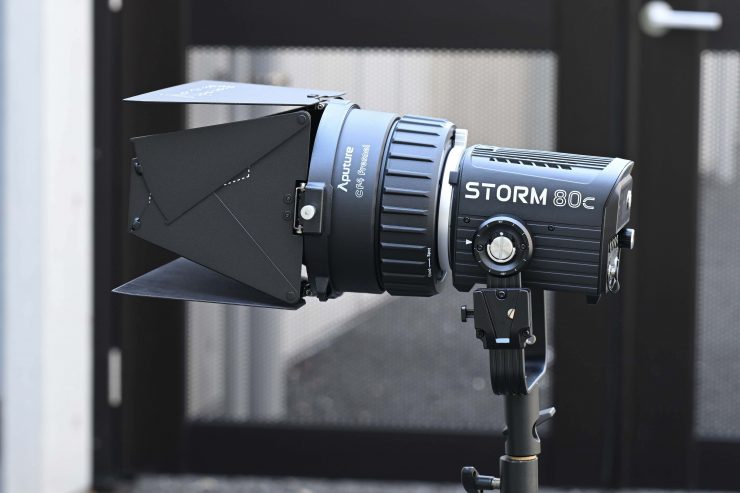
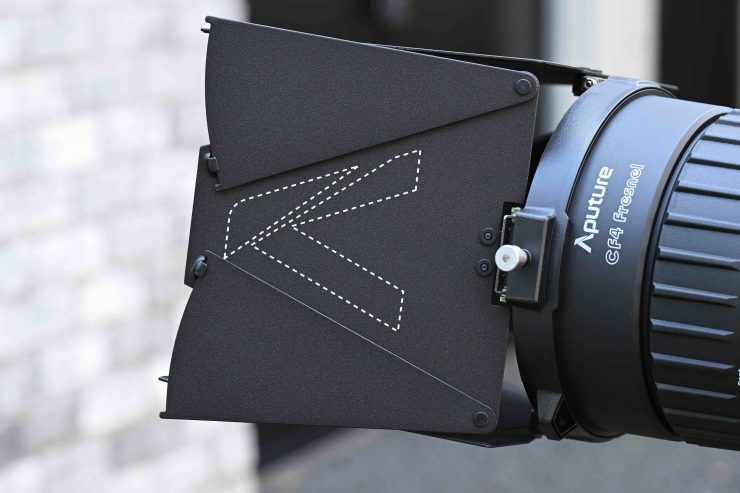
The Aputure Barndoors for CF4 Fresnel are an additional $45 USD. It would have been good to have seen these included with the CF4 Fresnel.
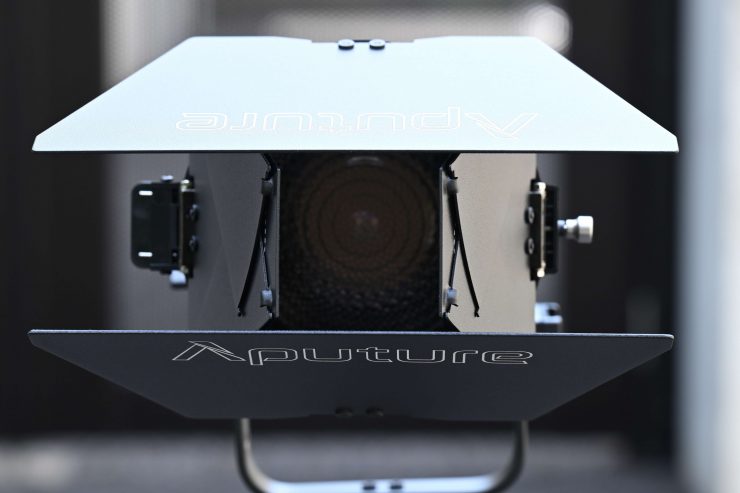
The barndoors work really well, and they simply clip onto the front of the CF4 Fresnel.
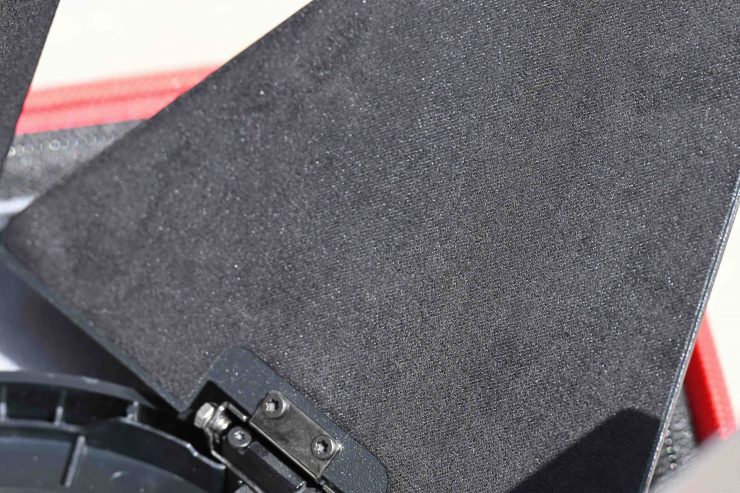
Aputure has put material inside the barndoors, which is a nice touch.
How does the Aputure STORM 80c compare to the Nanlite Forza 60C

Comparing products based on specification sheets never tells you the full story. Below you can see how they compare on paper, but I will let you have my honest opinion at the end of this review after we have looked at all of the data and the various feature sets, etc.
| Nanlite Forza 60C | Aputure STORM 80c | |
| CCT Range | 1800-20,000K | 1800-20,000K |
| Light Engine | RGBLAC | BLAIR-CG |
| +/- GM | Yes | Yes |
| HSI | Yes | Yes |
| Gels | Yes | Yes |
| xy | Yes | Yes |
| Effects | Yes | Yes |
| Mount | FM mount | Bowens-S Mini Mount with Prolock |
| Power Draw | 88W | 100W |
| App Control | Yes | Yes |
| Battery Plate | No, Optional | Yes, but cable is optional |
| Weight | 1.26kg / 2.82 lbs | 1.8kg / 3.88 lbs |
On paper, there is not a huge difference between the two fixtures.
Photometrics
So now let’s get to the photometric results. I always test lights in this way so that I get a reference to how they compare to other fixtures. Results only tell part of the story and should never be used alone to judge a light. I have found from extensive testing over the years that certain lights that have good photometric results don’t always look good, and lights that have worse photometric scores can sometimes look better than their results indicate.
You can’t judge a light from one set of photometric results. You have to look at all of the different results to be able to come to a conclusion. Judging a light on one set of results is like reading one chapter in a book and thinking you know the whole story.
Different lights can also look different depending on what camera you happen to be using.
Output & Color Temperature Accuracy
The fixture utilizes advanced diode color mixing that allows it to more effectively utilize each diode’s light output.
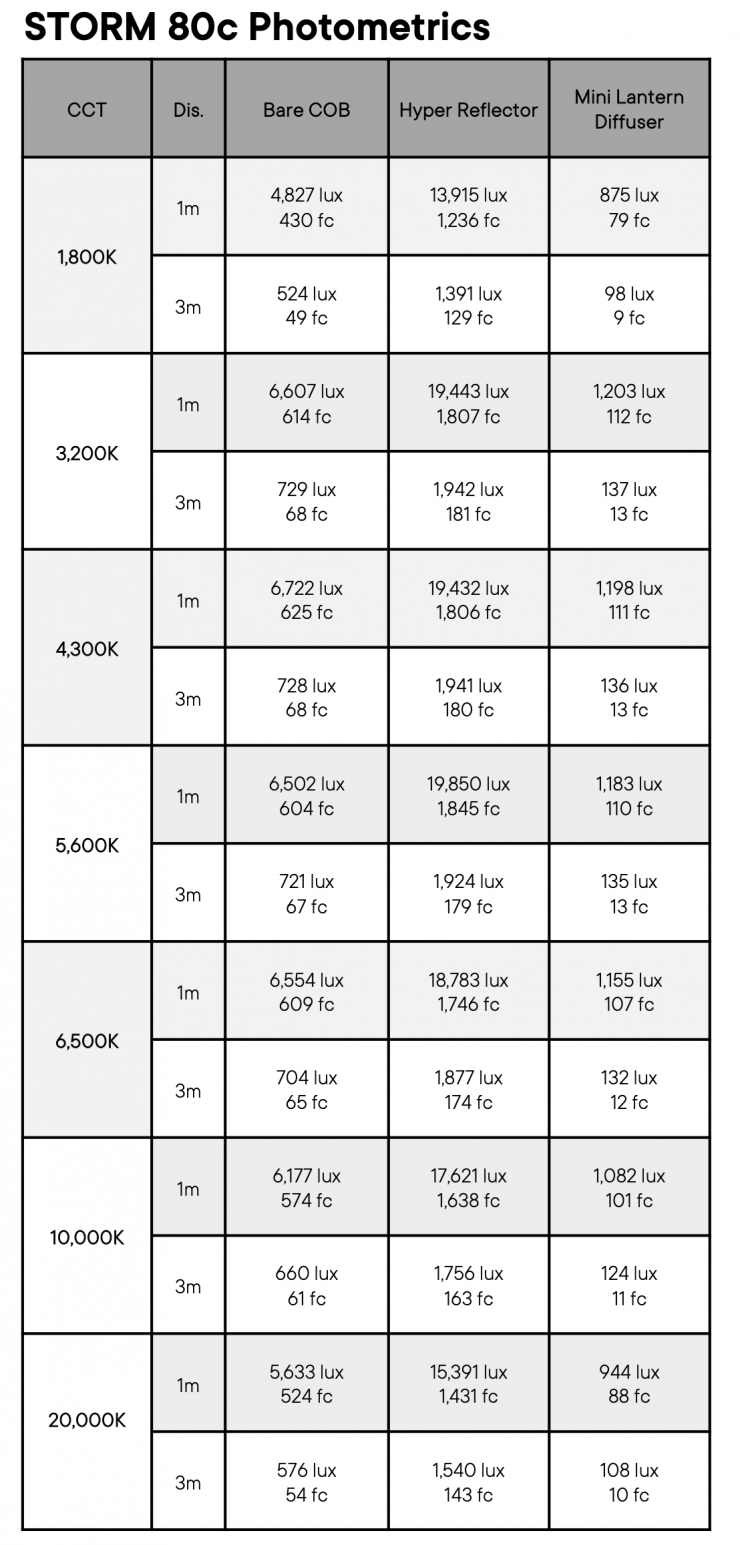
Aputure claims that the light has an output of 19,850 lux @1m / 3.3′ (5600K) with the included hyper reflector.
I tested the STORM 80c at a variety of CCT settings with a Sekonic C-800 Spectrometer to find out how much output the light had and how accurate the CCT reproduction was. All readings are taken at a distance of 1m (3.3ft) in a controlled environment. The readings were all taken directly from the lighting source. In the case of using the light with a reflector, the readings were taken from the edge of those attachments. This is how I test all lights, and this is why you will sometimes see a discrepancy between claimed figures and my measured figures.
For these tests, the STORM 80c was set in its CEI Daylight white light mode.
So just how much output does it have, and how CCT accurate is it? Well, let’s find out.
Aputure STORM 80c 5600K Max. Output (open face)
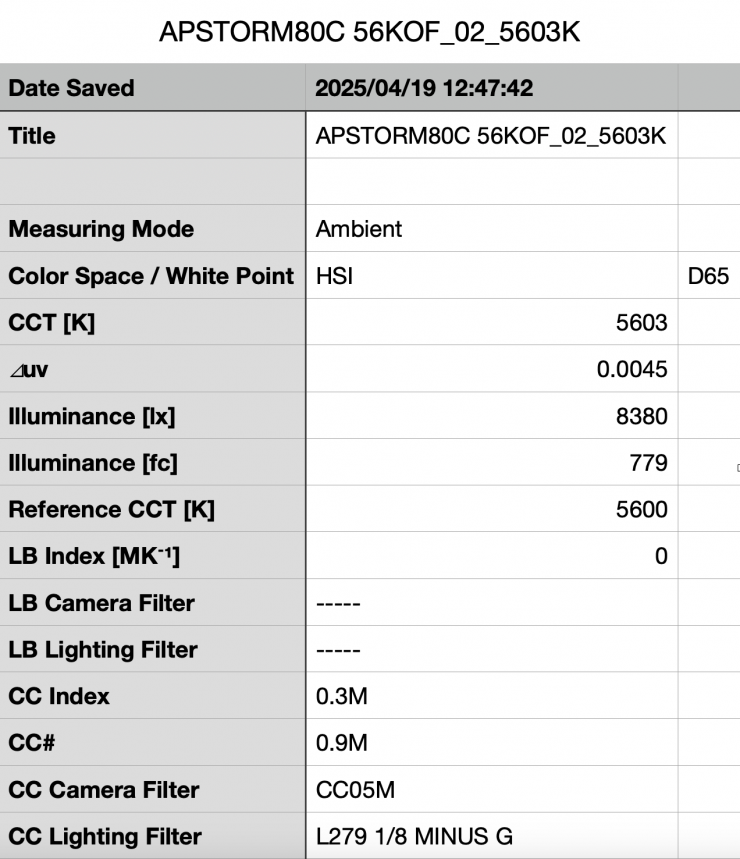
Above, you can see the STORM 80c recorded an output of 8,380 lx (779 fc) when set at 5600K and used open face. The reading of 8,380 lx @ 1m exceeded the claimed figures listed by Aputure.

The light recorded a CCT reading of 5603K, which was almost a perfect result.
Aputure STORM 80c 3200K Max. Output (open face)
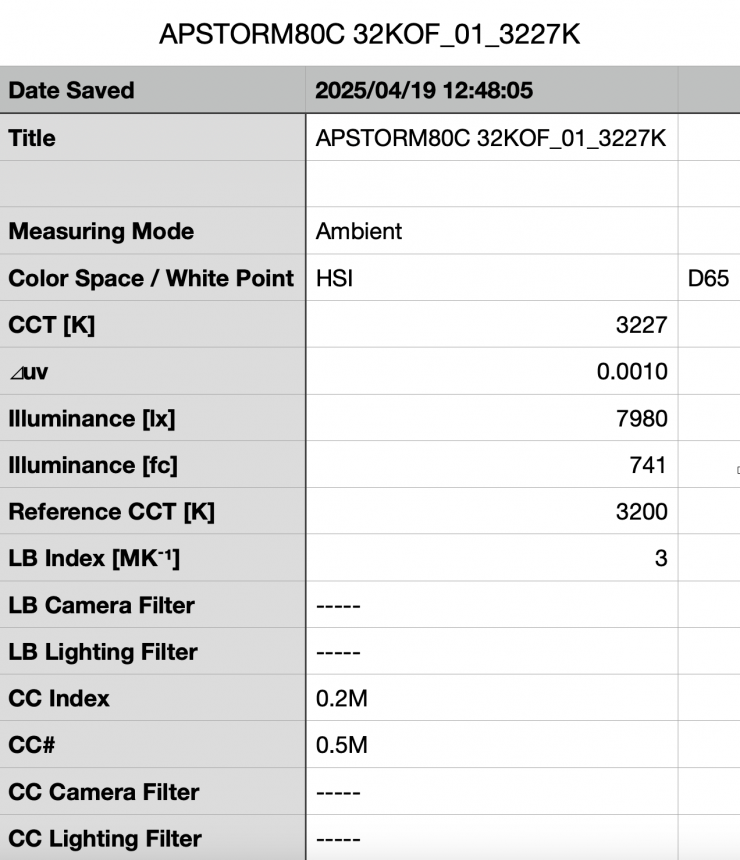
Above, you can see that the light’s output when it was set at 3200K in the open face configuration was 7980 lx (741 fc). This was 4.77% less than it output when used at 5600K.

As far as CCT accuracy goes, it recorded an excellent reading of 3227K.
Summary of results (Open Face)
| SETTING | OUTPUT @1m | CCT READING |
| 2500K | 7370 lx | 2520K |
| 3200K | 7980 lx | 3227K |
| 4500K | 8300 lx | 4601K |
| 5600K | 8380 lx | 5603K |
| 6500K | 8040 lx | 6733K |
| 8000K | 7540 lx | 8453K |
| 10000K | 7300 lx | 10746K |
These results show me that the light’s output varies by 12.88% depending on what CCT temperature you are using.
The CCT accuracy across the range wasn’t great. From 2500K to 5600K it was excellent, but it started to fall off above 6500K.
So, let’s have a look at how the output @1m / 3.3′ compares to the Nanlite Forza 60c.
Open Face
5600K
| Output at 5600K | CCT (K) | |
| Aputure STORM 80c | 8380 lx | 5603K |
| Nanlite Forza 60c | 5450 lx | 5685K |
3200K
| Output at 3200K | CCT (K) | |
| Aputure STORM 80c | 7980 lx | 3227K |
| Nanlite Forza 60c | 5330 lx | 3189K |
As you can see, the STORM 80c has more output than the Nanlite; however, it does draw slightly more power. The Nanlite Forza 60c has a 56.5° beam angle when used open face, and the STORM 80c is 60°.
Hyper Reflector 35° Max. Output
So, now let’s see how much output the light has when used with its wide 35° hyper reflector in its Max. Output mode.
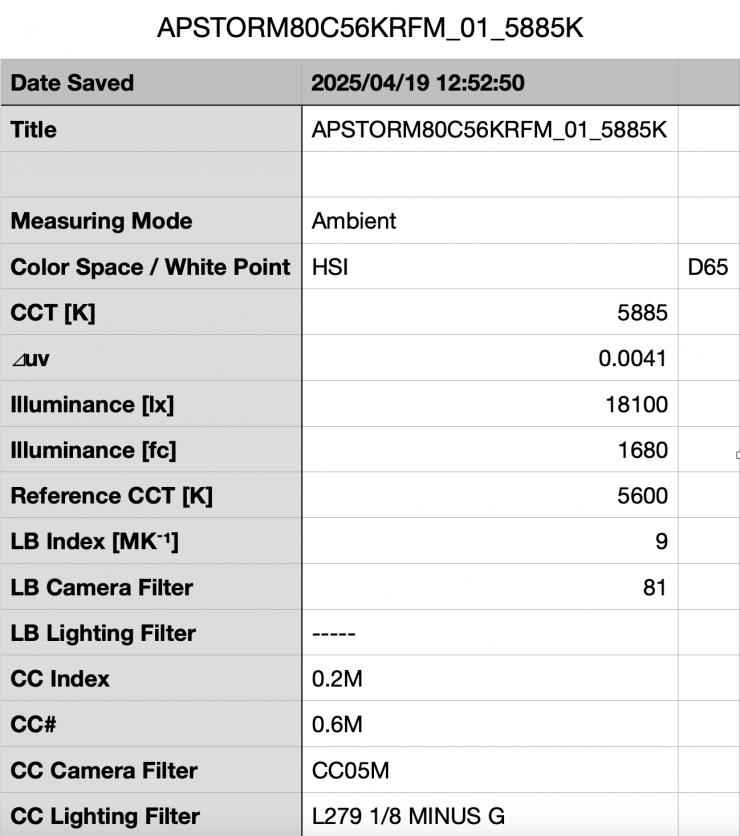
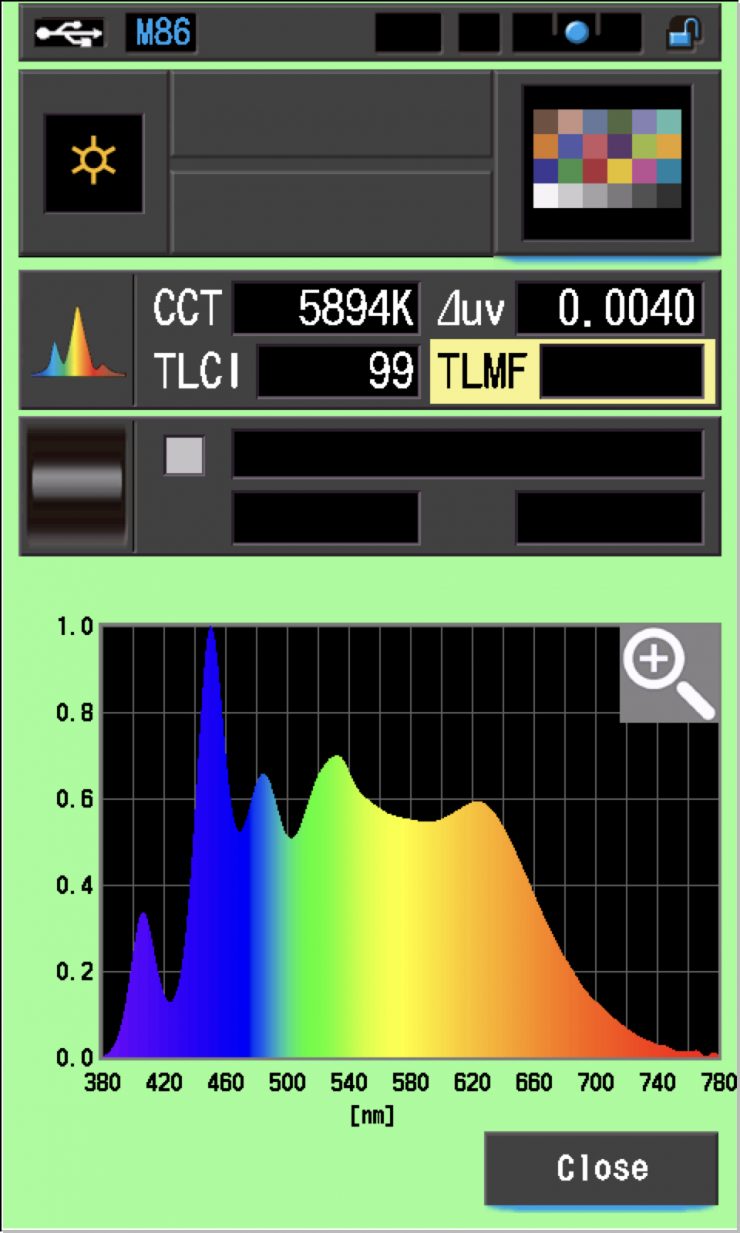
Aputure STORM 80c 5600K Max. Output (Hyper reflector 35°)
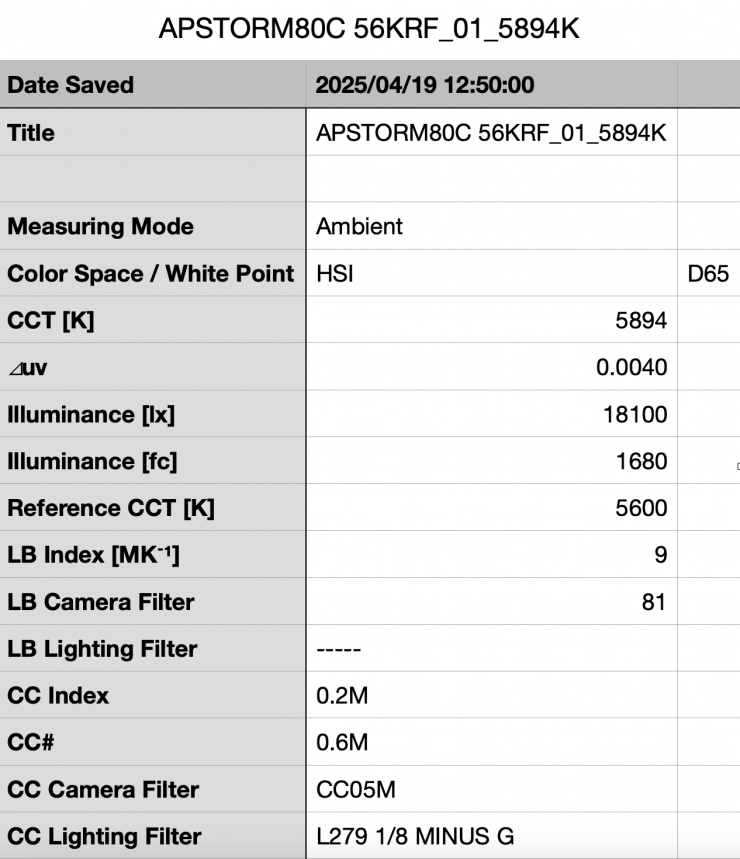
Above you can see the light’s output when it was set at 5600K with the hyper reflector was 18,100 lx (1680 fc) @1m 3.3′. This was 116% more than the 8380 lx it produced at 5600K when used open face. It is important to note that this measurement was made from the edge of the reflector.
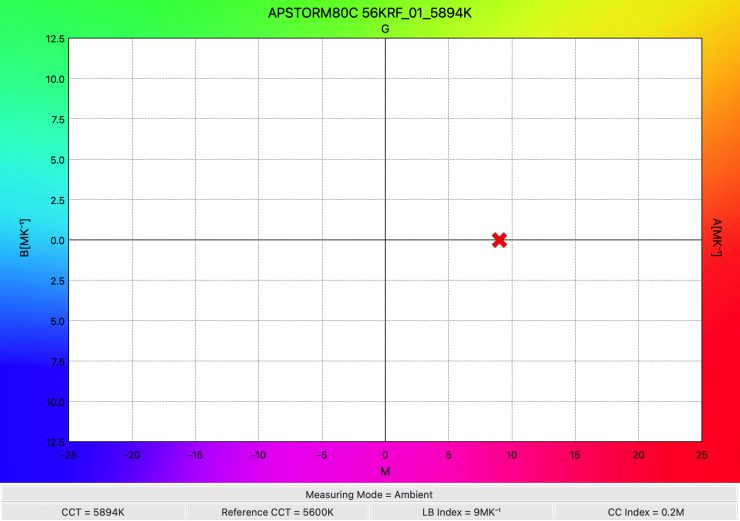
As far as CCT accuracy goes, it recorded a reading of 5894K, which was almost 300 off being correct. The CCT accuracy when using the hyper reflector was considerably worse than when the light was used open face.
Aputure STORM 80c 3200K Max. Output (Hyper reflector 35°)
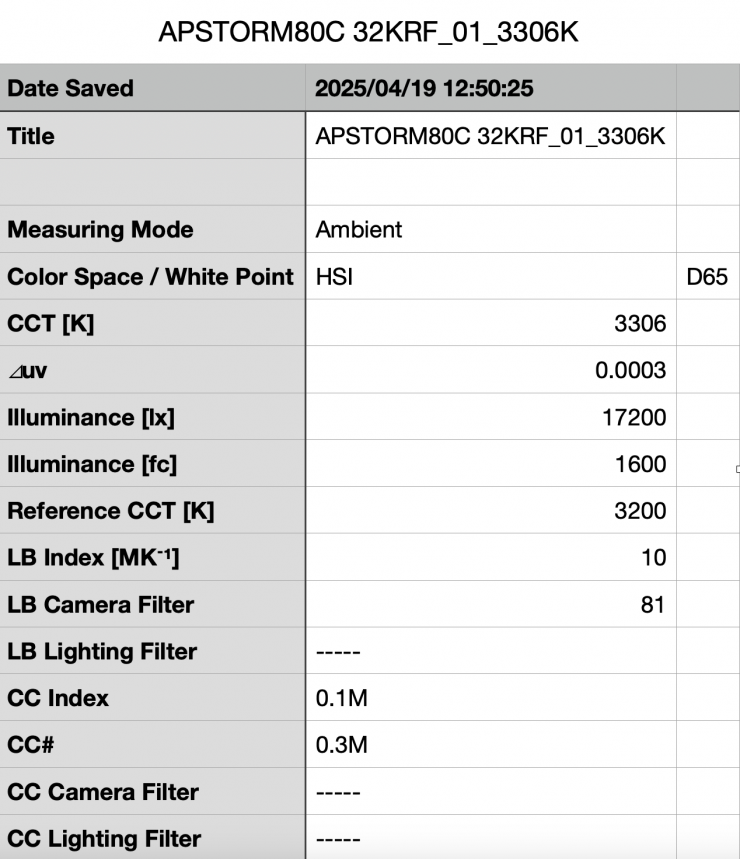
Above you can see the light’s output when it was set at 3200K with the wide reflector was 17,200 lx (1600 fc) @1m 3.3′, which was just 4.97% less than what it output at 5600K.

As far as CCT accuracy goes, it recorded a pretty good reading of 3306K.
Summary of results (Hyper reflector 30°)
| SETTING | OUTPUT @1m | CCT READING |
| 2500K | 16,000 lx | 2562K |
| 3200K | 17,200 lx | 3306K |
| 4500K | 18,400 lx | 4670K |
| 5600K | 18,100 lx | 5894K |
| 6500K | 17,900 lx | 6864K |
| 8000K | 17,000 lx | 8541K |
| 10000K | 16,800 lx | 10670K |
These results show me that the light’s output varies by 13% depending on what CCT temperature you are using.
The CCT accuracy across the range was good up until about 4500K. At 5600K and above, it did start to fall off. This surprised me, because when I reviewed the STORM 1200x, the results when used with its reflector with the best I had ever seen from any light.
So, let’s have a look at how the output compares to the Nanlite Forza 60c.
Hyper Reflector 35°
5600K
| Output at 5600K | CCT (K) | |
| Aputure STORM 80c | 18,100 lx | 5894K |
| Nanlite Forza 60c | 13,000 lx | 5709K |
3200K
| Output at 3200K | CCT (K) | |
| Aputure STORM 80c | 17,200 lx | 3306K |
| Nanlite Forza 60c | 12,800 lx | 3226K |
What you clearly need to remember is that the STORM 80c has a slightly higher power draw, and the reflector’s beam angle is very narrow at 35°. Just for your information, the Nanlite’s reflector is 45°
These lights were tested under the exact same conditions, so you get a real-world, honest assessment of how the lights compare when used open face and when used with reflectors that have a similar beam angle. Now, you need to factor in that the power draws are different, and some of these lights are daylight only. Please note that my measurements are always made from the end of the reflector and not from the COB, and that is why my measured figures will sometimes be lower than those quoted manufacturer figures.
Hyper Reflector 35° Constant Output
Aputure STORM 80c 5600K Constant Output (Hyper reflector 35°)
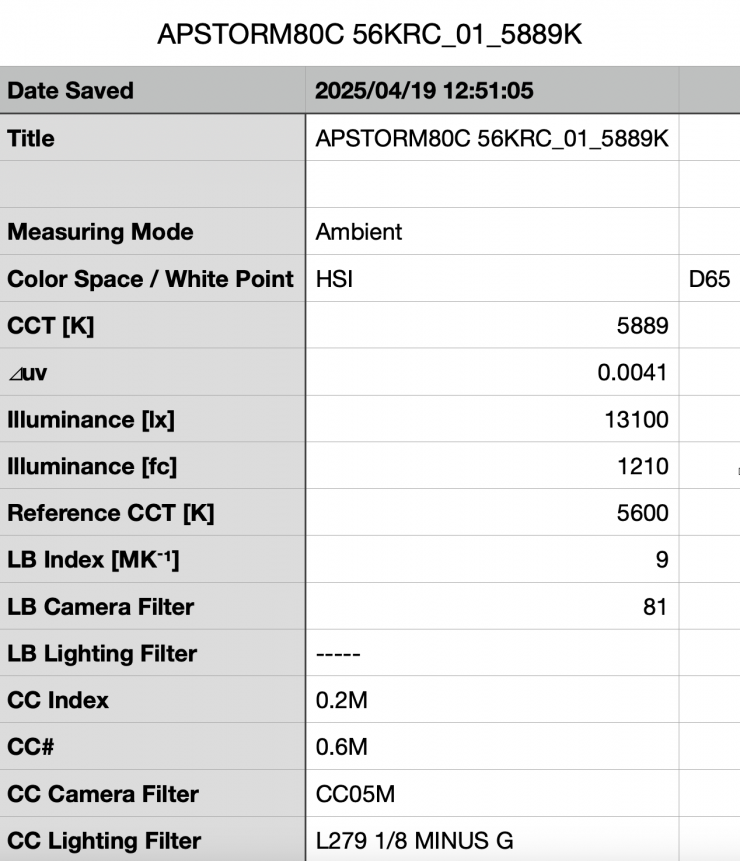
Above you can see the light’s output when it was set at 5600K in its Constant Output mode, with the hyper reflector was 13,100 lx (1210 fc) @1m 3.3′. This was 28.8% less than the 18,400 lx it produced at 5600K when used in its Max. Output mode. It is important to note that this measurement was made from the edge of the reflector.

As far as CCT accuracy goes, it recorded a pretty ordinary reading of 5889K. The CCT accuracy when using the light in its Constant Output was almost identical to that when used in its High Output mode.
Aputure STORM 80c 3200K Constant Output (Hyper reflector 35°)
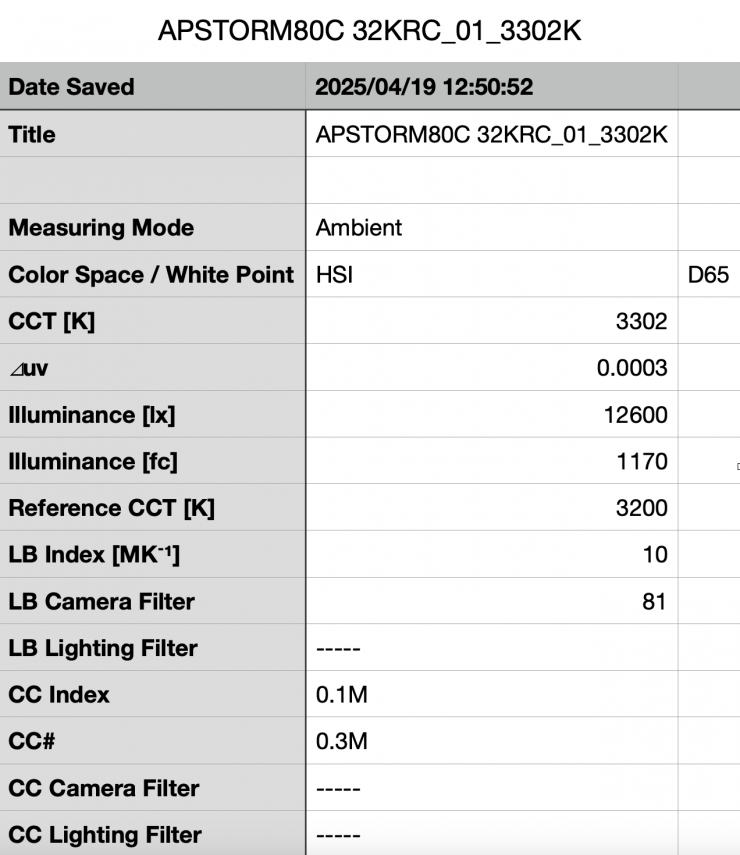
Above you can see the light’s output when it was set at 3200K with the wide reflector was 12,600 lx (1170 fc) @1m 3.3′, which was 26.74% less than what it output at 3200K in its Max. Output mode.

As far as CCT accuracy goes, it recorded a decent reading of 3302K.
Summary of results Constant Output (Hyper reflector 35°)
| SETTING | OUTPUT @1m | CCT READING |
| 2500K | 12,900 lx | 2555K |
| 3200K | 12,600 lx | 3302K |
| 5600K | 13,100 lx | 5889K |
| 10000K | 12,600 lx | 10925K |
These results show me that the light’s output varies by just 3.8% from 2500-10,000K.
Just like when used in its Max. Output mode, the CCT accuracy across the range was a bit of a mixed bag.
These results tell me that the light’s CCT performance isn’t affected regardless of whether you are using the High Output or Constant Output modes.
Hyper Reflector 35° Fan set to Silent
I was also interested to see how much output the STORM 80c had when you run the light in its Silent fan setting. Now, in this mode, the output is limited to just 20W, so it isn’t realistically going to be a mode you can use for a lot of lighting applications.
Aputure STORM 80c 5600K Fan set to Silent (Hyper reflector 35°)

Above you can see the light’s output when it was set at 5600K with the hyper reflector, when the fan was set to Silent was 3840 lx (357 fc) @1m 3.3′, which was 78.78% less than what it output at 5600K with the fan set to Smart.

As far as CCT accuracy goes, the light recorded a decent reading of 5692K.
Aputure STORM 80c 5600K Fan set to Medium / Max. Output (Hyper reflector 35°)
Above you can see the light’s output when it was set at 5600K with the wide reflector, when the fan was set to Medium was 18,100 lx (1680 fc) @1m 3.3′. This shows me that you can get the maximum output from the fixture with the fan speed set to Medium.
Diffusion Bulb
Aputure STORM 80c 5600K Max. Output (Diffusion Bulb)

Above you can see the light’s output when it was set at 5600K with the diffusion bulb was 1200 lx (111 fc) @1m 3.3′, which was 85.68% less than what it output at 5600K when used open face.

As far as CCT accuracy goes, the light recorded a decent reading of 5530K.
Output & accuracy when generating saturated colors
With most RGB lights if you use them to generate or create colors, the output gets massively reduced. So, how does the STORM 80c fare?
I decided to do a test to see how much output the light had when I created super-saturated colors.
Aputure STORM 80c Max Output & Hyper Reflector RED 0° (@1m / 3.3′)
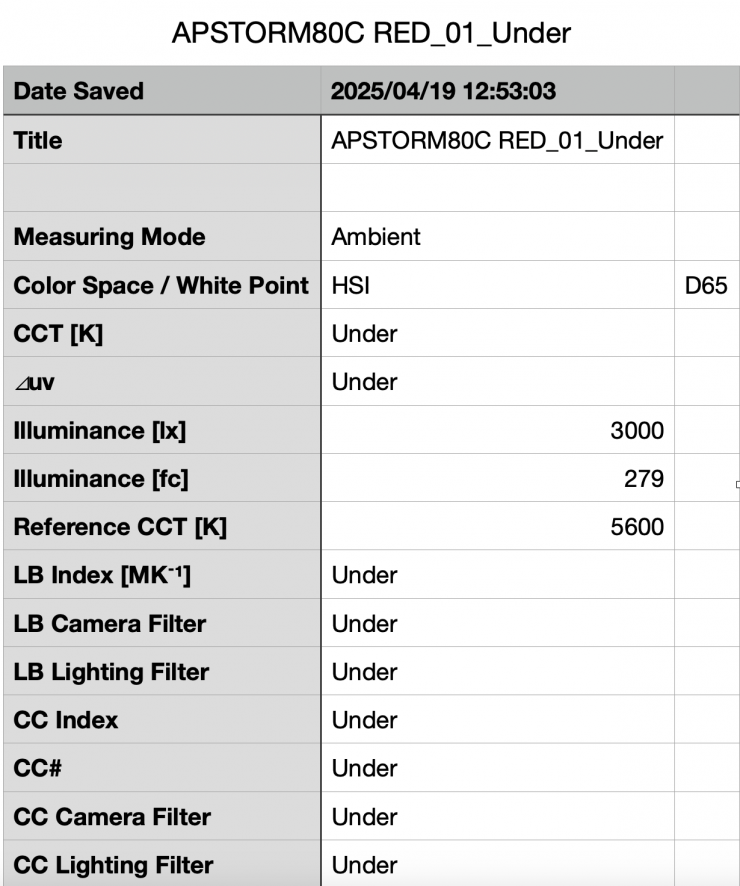
Above, you can see that when it was in the HSIC+ mode, choosing a 0° saturated RED, and set to 100% output @1m /3.3′, the light recorded 3000 lx / 279 fc. What you need to be clearly aware of when trying to generate some super-saturated colors is that the output is going to be significantly lower than when using the light in CCT mode.

As far as being able to accurately create a super saturated RED, the STORM 80c was 2 degrees off with a reading of 2°.
Aputure STORM 80c Max Output & Hyper Reflector GREEN 120° (@1m / 3.3′)

Above, you can see that when it was in the HSIC+ mode, choosing a 120° saturated GREEN, and set to 100% output @1m / 3.3′, the light recorded 8980 lx / 834 fc.
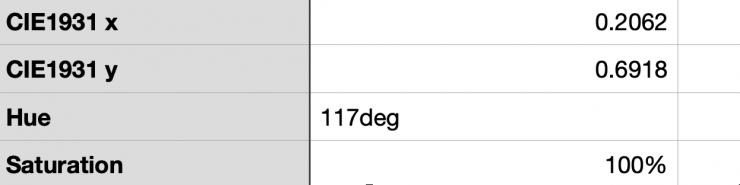
As far as being able to accurately create a super saturated GREEN, the STORM 80c was 3 degrees off with a reading of 117°.
Aputure STORM 80c Max Output & Hyper Reflector BLUE 240° (@1m / 3.3′)
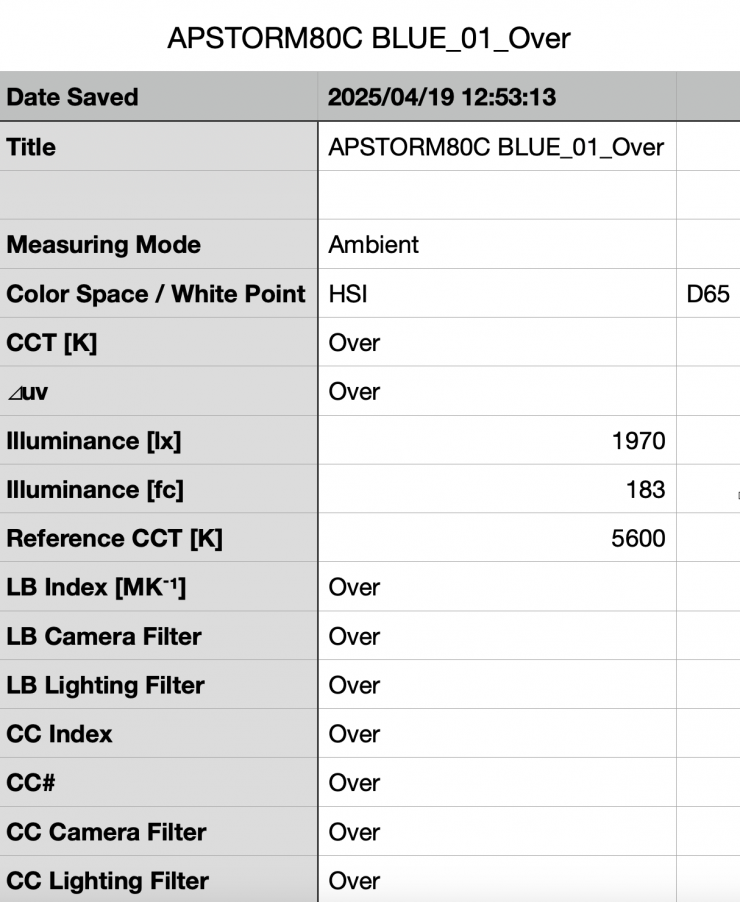
Above, you can see that when it was in the HSIC+ mode, choosing a 240° saturated BLUE, and set to 100% output @1m / 3.3′, the light recorded 1970 lx / 183 fc.
As far as being able to accurately create a super saturated BLUE, the STORM 80c was spot on with a reading of 240°.
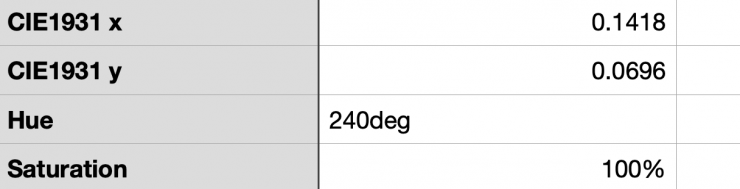
Aputure STORM 80c Max Output & Hyper Reflector YELLOW 40° (@1m / 3.3′)
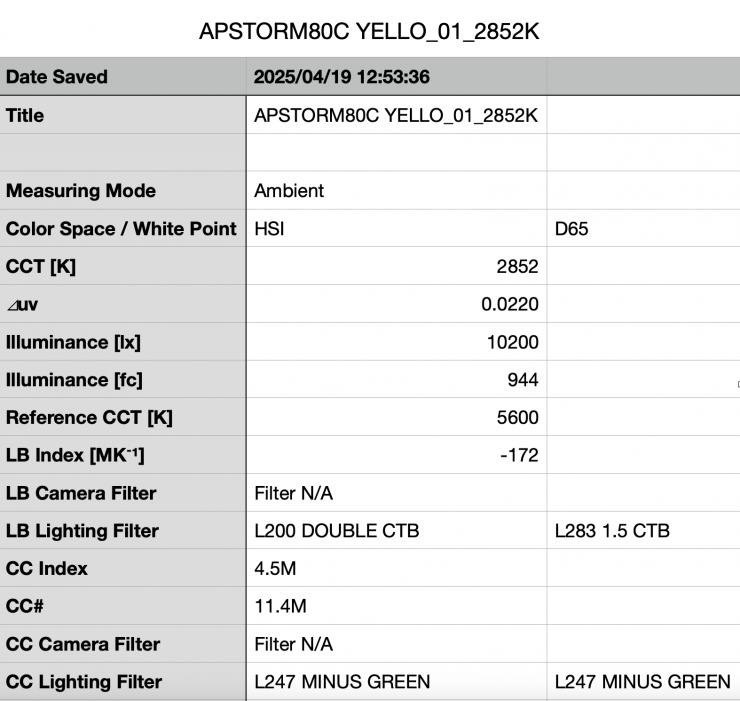
Above, you can see that when it was in the HSIC+ mode, choosing a 40° saturated YELLOW and set to 100% output @1m / 3.3′, the light recorded 10,200 lx / 944 fc.

As far as being able to accurately create a super saturated YELLOW, the STORM 80c was 1° off with a reading of 41°.
The STORM 80c was pretty good at replicating accurate colors with a full spectrum, although it could have been slightly better when creating red and green. It was just 1° off when trying to create a super-saturated yellow, which was impressive, as most lights struggle to do that.
CCT consistency & linear output when dimming the light
Now, what you should always do when testing lights is to see if the CCT remains consistent when dimming the light. Just because you set a light at say 5600K, that doesn’t mean that the CCT will remain stable as you start dimming the fixture down. I also wanted to see how linear the dimming curve was.
The Aputure STORM 80c has several dimming modes, as I previously mentioned in the review.
I decided to do a series of tests at 100%/75%/50%/25%10% to see if the CCT being recorded changed. This was performed at a distance of 1m / 3.3′ using a Sekonic C-800. These tests were done at 5600K with the 30° Hyper reflector and the light set in its Linear dimming mode.
| CCT READING | OUTPUT | INTENSITY % |
| 5894K | 18,100 lx | 100 |
| 5850K | 12,300 lx | 75 |
| 5917K | 8290 lx | 50 |
| 5596K | 4250 lx | 25 |
| 5597K | 1760 lx | 10 |
The STORM 80c had good CCT consistency as you started to dim it down to 50%. Below 50%, it started to change by around 300K. My testing showed that the CCT readings varied by 320K. This shows me that you need to be aware of the CCT change as you dim the light below 50%.
As far as how linear the output is when you start dimming the light, at 50% output it had 54.19% less output than when used at 100%. At 25%, it had 76.51% less output than when used at 100%. At 10% output, it had 90.26% less output than when used at 100%. This shows me that the light’s dimming curve is pretty linear.
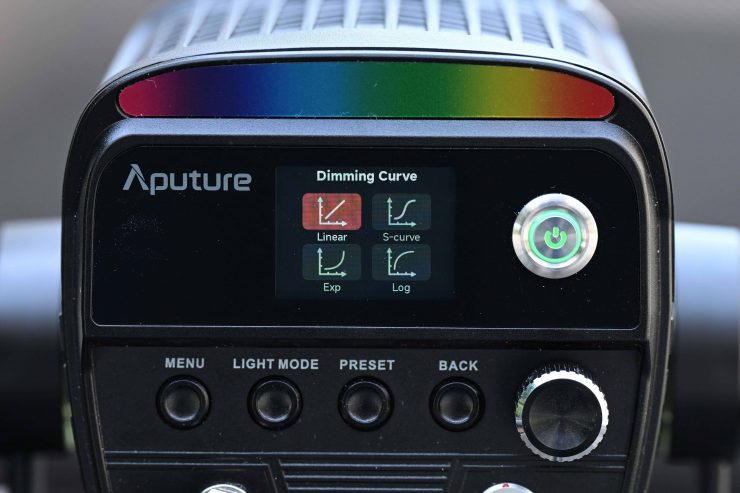
Above, you can see the various dimming curve options that are available.
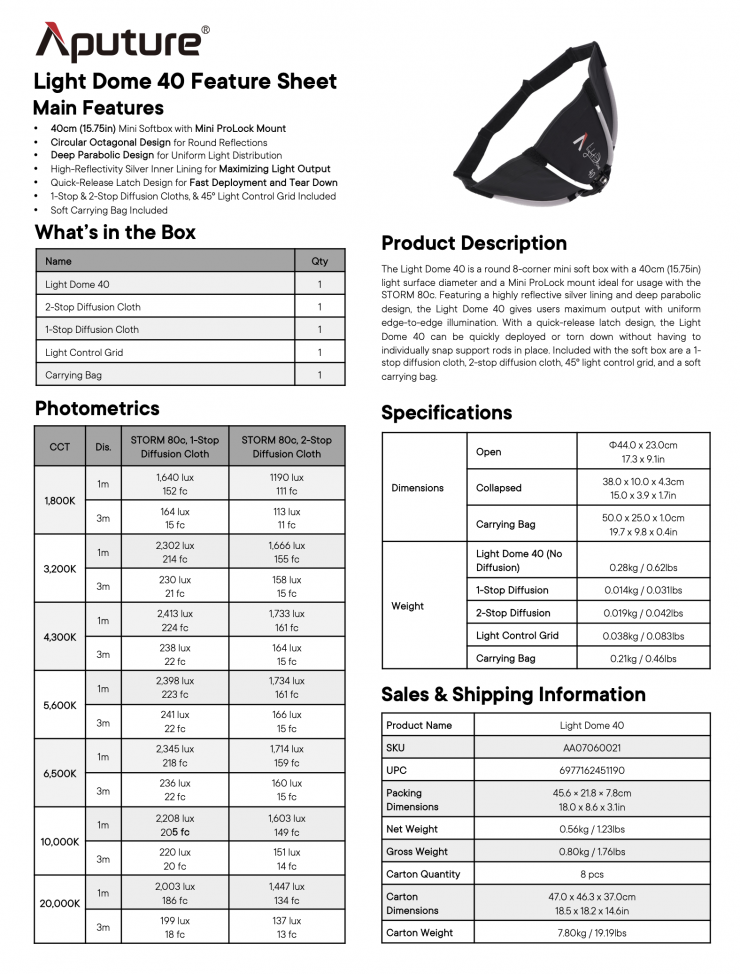
Output when using the Aputure Light Dome 40 with Grid for STORM 80c (15.7″)
I also wanted to see how much output the STORM 80c had when using its optional Aputure Light Dome 40 with Grid for STORM 80c (15.7″).
Aputure STORM 80c 5600K (Light Dome 40- Stronger Diffusion)
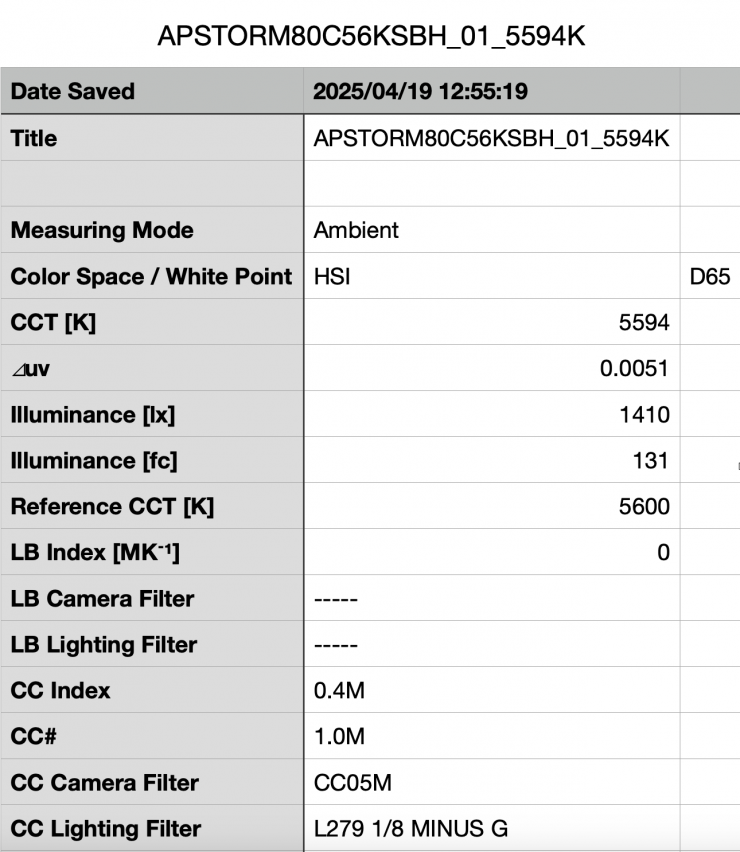
Above you can see the light’s output when it was set at 5600K with the Light Dome 40 and stronger diffusion was 1410 lx (131 fc) @1m / 3.3′. It is important to note that this measurement was made from the end of the softbox.

As far as CCT accuracy goes, it recorded a reading of 5594K, which was almost perfect. This shows me that when using the optional Aputure Light Dome 40 with Grid for STORM 80c (15.7″), you get very good CCT accuracy.
Aputure STORM 80c 5600K (Light Dome 40- Lighter Diffusion)
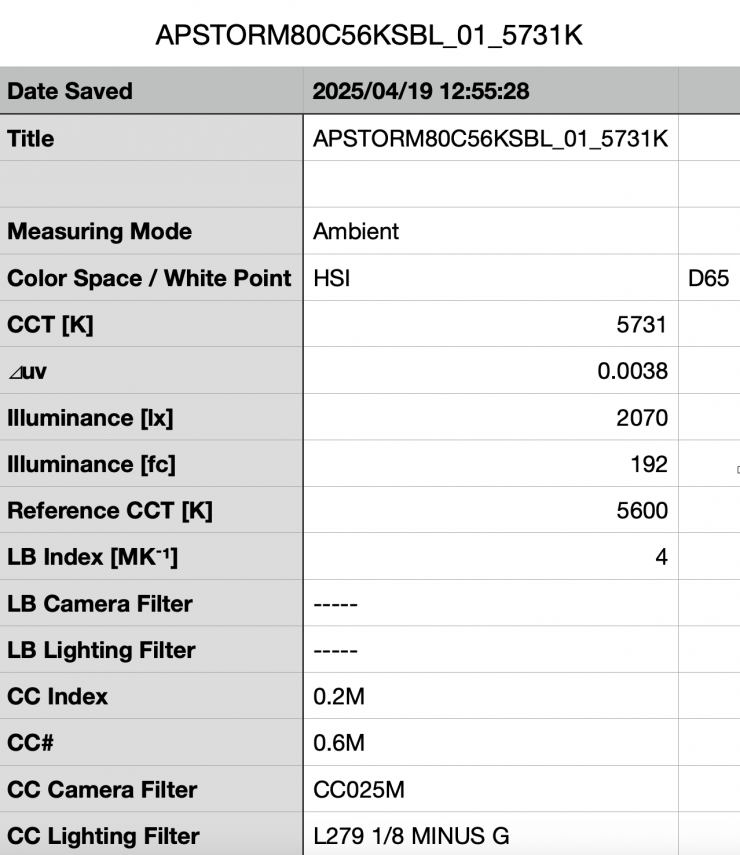
Above you can see the light’s output when it was set at 5600K with the Light Dome 40, and lighter diffusion was 2070 lx (192 fc) @1m / 3.3′. It is important to note that this measurement was made from the end of the softbox.
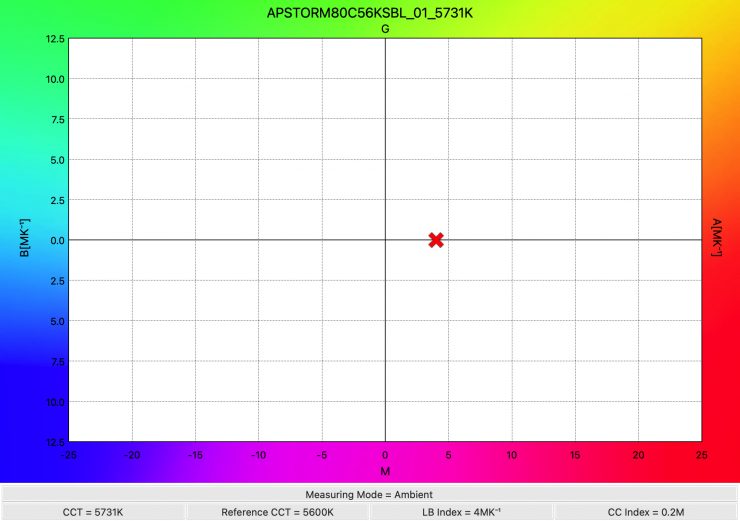
As far as CCT accuracy goes, it recorded a reading of 5731K, which wasn’t nearly as good as when you use the heavier diffusion.
Aputure STORM 80c 3200K (Light Dome 40- Stronger Diffusion)
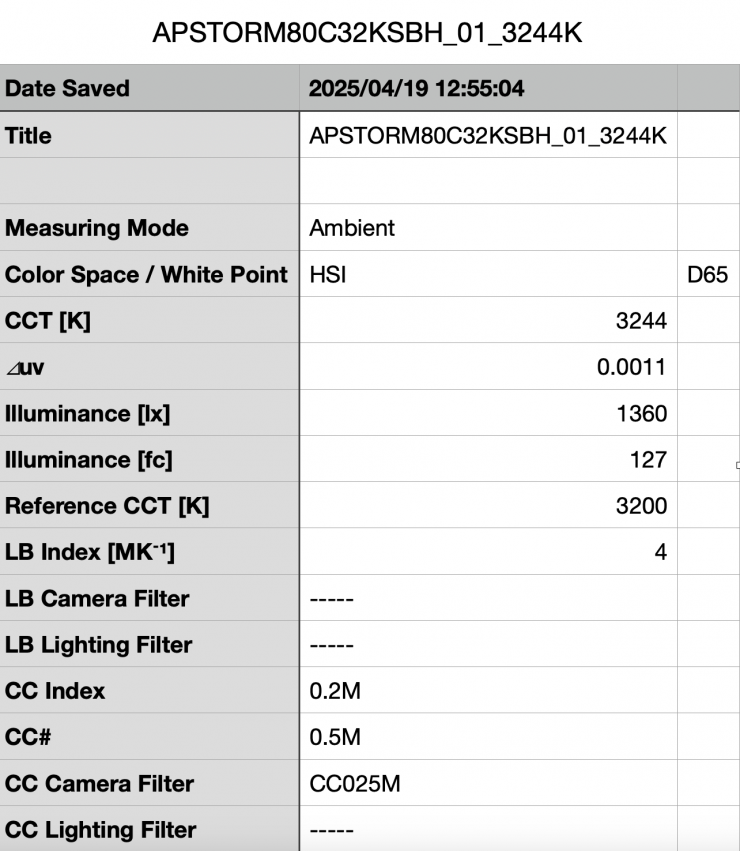
Above you can see the light’s output when it was set at 3200K with the Light Dome 40 and stronger diffusion was 1360 lx (127 fc) @1m / 3.3′. It is important to note that this measurement was made from the end of the softbox.

As far as CCT accuracy goes, it recorded a reading of 3244K, which was excellent. This shows me that when using the optional Aputure Light Dome 40 with Grid for STORM 80c (15.7″), you get very good CCT accuracy.
Aputure STORM 80c 3200K (Light Dome 40- Lighter Diffusion)

Above you can see the light’s output when it was set at 5600K with the Light Dome 40, and lighter diffusion was 1960 lx (182 fc) @1m / 3.3′. It is important to note that this measurement was made from the end of the softbox.

As far as CCT accuracy goes, it recorded a reading of 3282K.
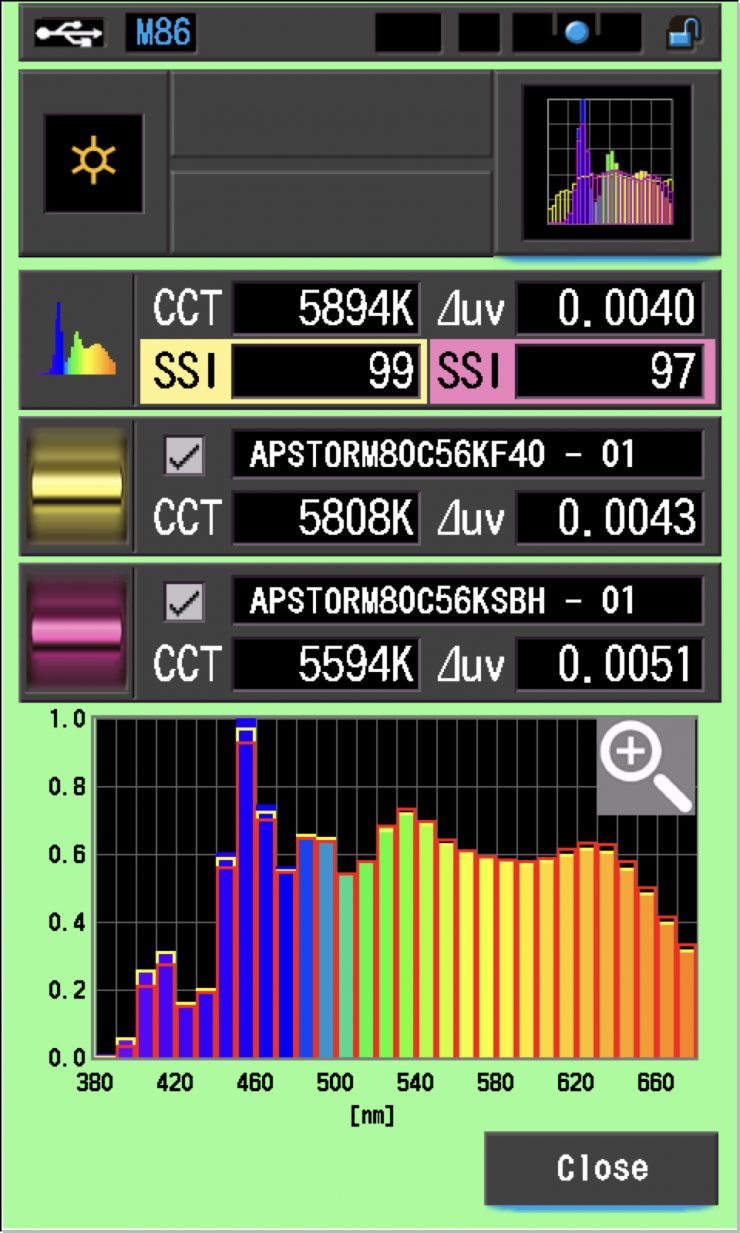
Aputure CF4 Fresnel for STORM 80c
Aputure STORM 80c 5600K (Aputure CF4 Fresnel for STORM 80c 40°)
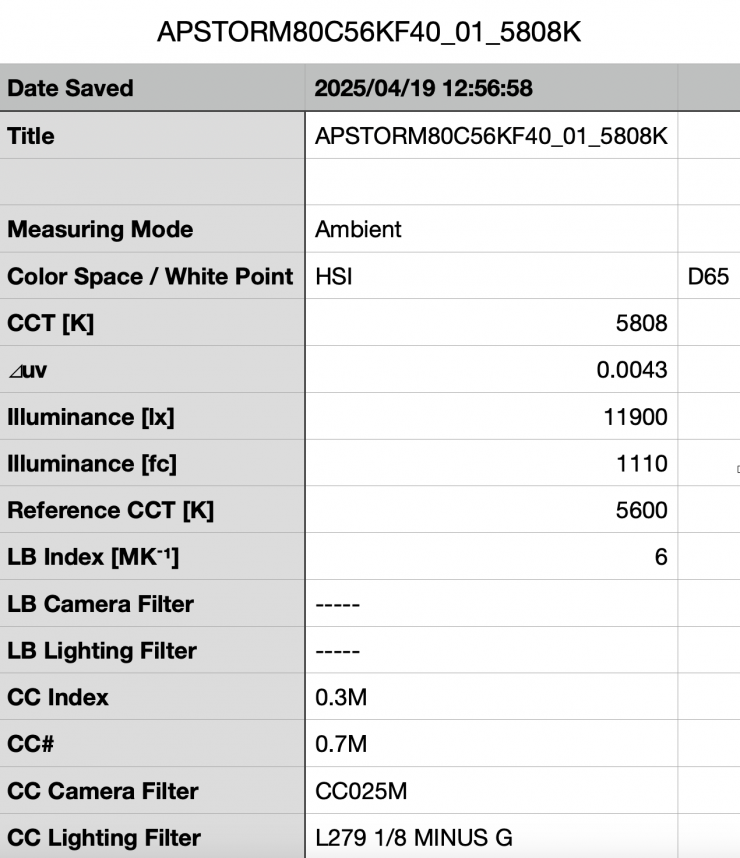
Above, you can see the light’s output when it was set at 5600K with the Aputure CF4 Fresnel at 40 degrees was 11,900 lx (1110 fc) @1m / 3.3′. It is important to note that this measurement was made from the end of the Fresnel.

As far as CCT accuracy goes, it recorded a reading of 5808K, which was more than 300K from being correct.
Aputure STORM 80c 5600K (Aputure CF4 Fresnel for STORM 80c 15°)
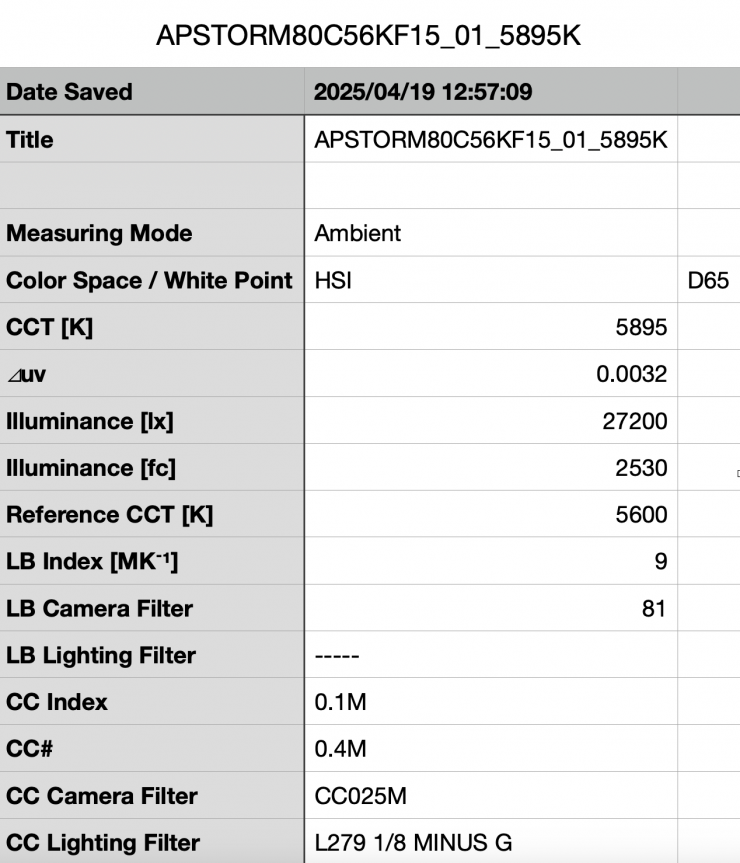
Above, you can see the light’s output when it was set at 5600K with the Aputure CF4 Fresnel at 15 degrees was 27,200 lx (2530fc) @1m / 3.3′. It is important to note that this measurement was made from the end of the Fresnel.

As far as CCT accuracy goes, it recorded a reading of 5895K, which was almost 400K from being correct.
Color Rendering
So now that we have seen how much output the Aputure STORM 80c produces, how does it perform when it comes to replicating accurate colors?
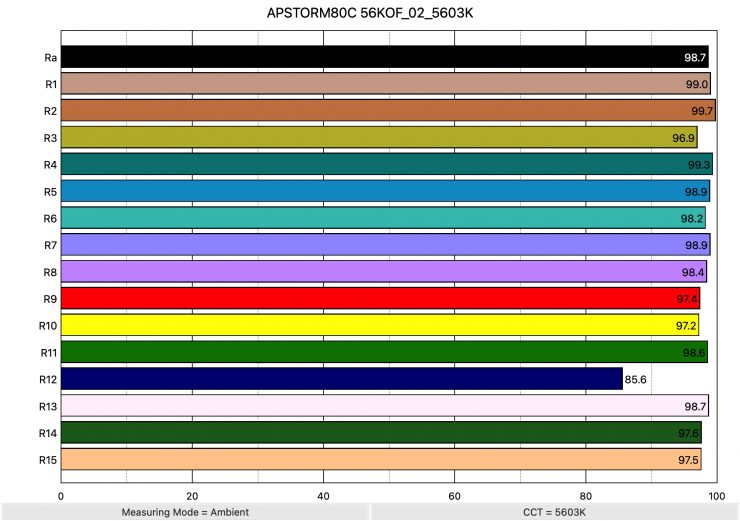
Aputure STORM 80c 5600K Max. Output (Hyper reflector 35°)
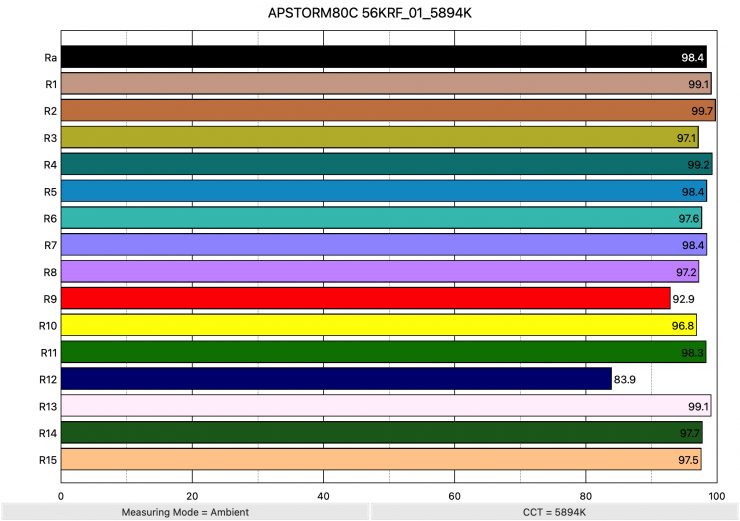
Above, you can see that when the light was set at 5600K using the hyper reflector, it recorded an average CRI (R1-R8) of 98.4 and an extended CRI (R1-R15) of 97.34. For replicating accurate skin tones, it recorded 92.9 for R9 (Red), 99.1 for R13 (closest to caucasian skin tones), and 97.5 for R15 (closest to Asian skin tones). These are very good results, and only R12 (Blue) was under 90.
| EXTENDED CRI | R9 | R13 | R15 | |
| Aputure STORM 80c | 96.86 | 92.9 | 99.1 | 97.5 |
| Nanlite Forza 60c | 96.10 | 98.8 | 99.2 | 97.6 |
| Aputure STORM 1200x | 97.34 | 95.5 | 97.9 | 98.4 |
As a comparison, above you can see how the results for the STORM 80c compare to the Nanlite Forza 60c. I have also included the very good Aputure STORM 1200x as another reference.
The Aputure STORM 80c, when set at 5600K, recorded a TLCI score of 99.
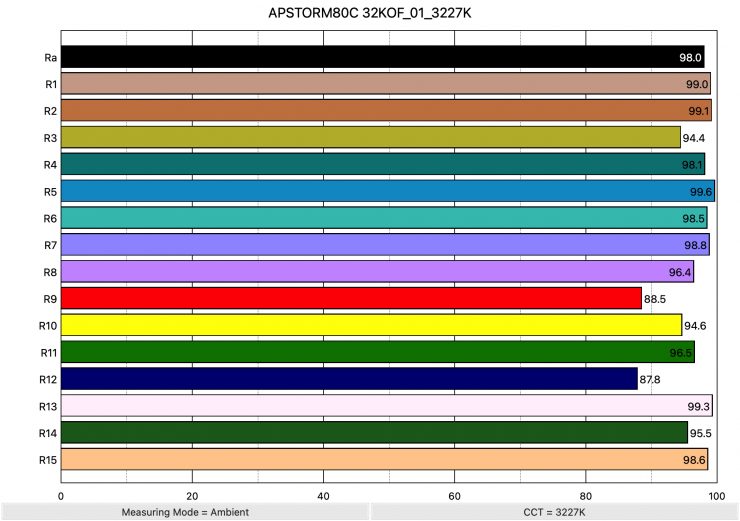
Aputure STORM 80c 3200K Max. Output (Hyper reflector 35°)
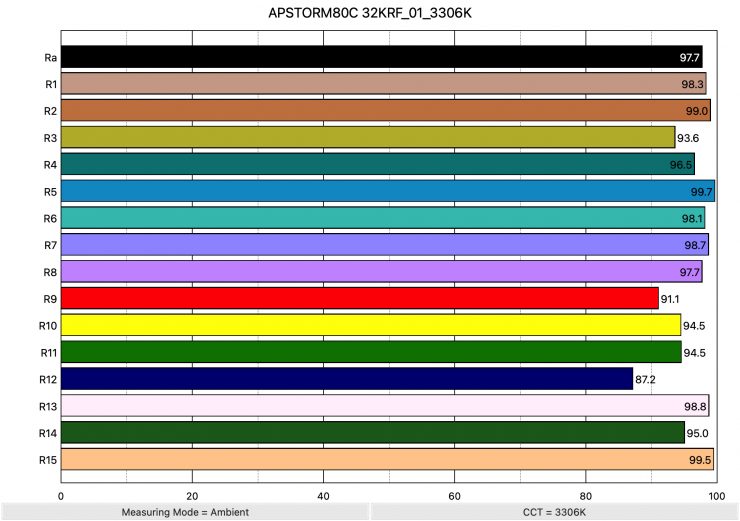
Above, you can see the scores for when the light was used at 3200K. It recorded an average CRI (R1-R8) of 97.7 and an extended CRI (R1-R15) of 96.14. For replicating accurate skin tones, it recorded 91.1 for R9 (Red), 98.8 for R13 (closest to caucasian skin tones), and 99.5 for R15 (closest to Asian skin tones). These were excellent results, and only R12 (Blue) was marginally below 90.

The Aputure STORM 1200x, when set at 3200K, recorded a TLCI score of 97.
| EXTENDED CRI | R9 | R13 | R15 | |
| Aputure STORM 80c | 96.14 | 91.1 | 98.8 | 99.5 |
| Nanlite Forza 60c | 96.10 | 92.3 | 97.7 | 96.4 |
| Aputure STORM 1200x | 93.52 | 94.4 | 93.3 | 97.2 |
As a comparison, above you can see how the results for the STORM 80c compare to the Nanlite Forza 60c. I have also included the very good Aputure STORM 1200x as another reference.
Open Face
Aputure STORM 80c 5600K Max. Output (Open Face)
Above you can see that when the light was set at 5600K and used open face it recorded an average CRI (R1-R8) of 98.7 and an extended CRI (R1-R15) of 97.36. For replicating accurate skin tones, it recorded 97.4 for R9 (Red), 98.7 for R13 (closest to caucasian skin tones), and 97.5 for R15 (closest to Asian skin tones). Again, these are outstanding results, and only R12 (Blue) was slightly below 90.
The Aputure STORM 80c, when set at 5600K, recorded a TLCI score of 99.
Aputure STORM 80c 3200K Max. Output (Open Face)
Above, you can see the scores for when the light was used at 3200K. It recorded an average CRI (R1-R8) of 98.0 and an extended CRI (R1-R15) of 96.31. For replicating accurate skin tones, it recorded 88.5 for R9 (Red), 99.3 for R13 (closest to caucasian skin tones), and 98.6 for R15 (closest to Asian skin tones). These were very good results; however, R9 (Red), and R12 (Blue) were both below 90.
The Aputure STORM 1200x, when set at 3200K, recorded a TLCI score of 97.
Unlike the STORM 1200x, the light is fairly similar when it comes to color rendering at 5600K and 3200K.
CC Index & ⊿uv
The CC Index displays the CC correction value and whether any magenta or green need to be added or subtracted. 1 CC corresponds to 035 Kodak CC values or 1/8 Rosco filter values. Any reading less than +1.00 or -1.00 and you’re probably not going to need to make any kind of adjustment. The ⊿uv is the value to show how much this light is away from being an ideal light source (black body radiation = incandescent lamp). As with the CC Index you want this number to theoretically be zero. Kelvin is not a linear value, so we need to convert from Kelvin to MK-1 to compare the values of color temperature. To calculate from Kelvin to Mired is MK-1= 1*1000000/Kelvin. While this may sound confusing, it is the only way of measuring if the Kelvin shift is significant enough to warrant having to use a filter for correction. Below are the results for the Aputure STORM 80c:
Aputure STORM 80c Kelvin Vs MK-1 (Max Output Open Face)
| Kelvin | Difference in K | MK-1 | Difference in MK-1 | |
| SET VALUE | 2500K | 0 | 400 | 0 |
| ACTUAL READING | 2520K | 20 | 396.82 | 3.18 MK-1 |
| SET VALUE | 3200K | 0 | 312.5 | 0 |
| ACTUAL READING | 3227K | 27 | 309.88 | 2.62 MK-1 |
| SET VALUE | 4500K | 0 | 222.22 | 0 |
| ACTUAL READING | 4601K | 101 | 217.34 | 4.88 MK-1 |
| SET VALUE | 5600K | 0 | 178.57 | 0 |
| ACTUAL READING | 5603K | 3 | 178.47 | -0.10 MK-1 |
| SET VALUE | 6500K | 0 | 153.84 | 0 |
| ACTUAL READING | 6733K | 233 | 148.52 | 5.32 MK-1 |
| SET VALUE | 8000K | 0 | 125 | 0 |
| ACTUAL READING | 8453K | 453 | 118.30 | 6.7 MK-1 |
| SET VALUE | 10000K | 0 | 100 | 0 |
| ACTUAL READING | 10746K | 746 | 93.05 | 6.95 MK-1 |
These figures might look confusing, but what they tell me is that the light is very CCT color-accurate at most temperatures. The score at 5600K was close to being perfect.
Any MK-1 score that is under -9/9 means you wouldn’t have to use any color correction gels. Unlike the MK-1 scores for the STORM 1200x, which were the best I have ever seen from any light, period, the STORM 80c scores weren’t quite as good. Any MK-1 score that is under -6/6 is a very good result.
Ok, now let’s look at the CC INDEX & ⊿uv.
Aputure STORM 80c CC INDEX & ⊿uv (Max Output Open Face)
| CC INDEX | ⊿uv | |
| 2500K | 0.0 | 0.0008 |
| 3200K | 0.2M | 0.0010 |
| 4500K | 0.2M | 0.0018 |
| 5600K | 0.3M | 0.0045 |
| 6500K | 0.1M | 0.0038 |
| 8000K | 0.2G | 0.0038 |
| 10000K | 0.6G | 0.0038 |
These were ok results across the board. There was nothing here that anyone should be concerned about.
TM-30
TM-30 is a relatively new color rendering standard that was developed to deal with the limitations of CRI. TM-30 looks at 99 individual colors. These 99 colors are categorized into seven groups: nature, skin color, textiles, paints, plastics, printed material, and color systems.
TM-30 scores go from 0 – 100. The higher the score, the more accurately a light is at producing colors. Any TM-30 Rf score in the ’90s is considered to be good. What is interesting and something that you need to be very aware of is that two separate light sources with the exact same CRI scores can render colors very differently. A light with a high CRI rating could have a low TM-30 score. Conversely, a light with a good TM-30 score could have a bad CRI score.
Now, there are two measurements associated with TM-30, Rf and Rg.
Rf (Color Fidelity)
Rg (Color Gamut)
With Rf value, ideally, you want a score in the 90’s.
With Rg value, a score below 100 indicates that the light source renders colors with less saturation than the reference source. So, ideally, you want this score to be 100 or slightly above.

2500K 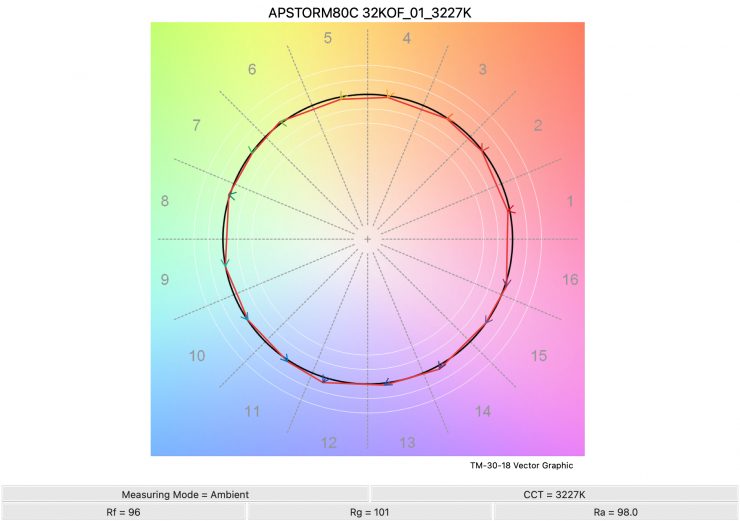
3200K 
4500K 
5600K 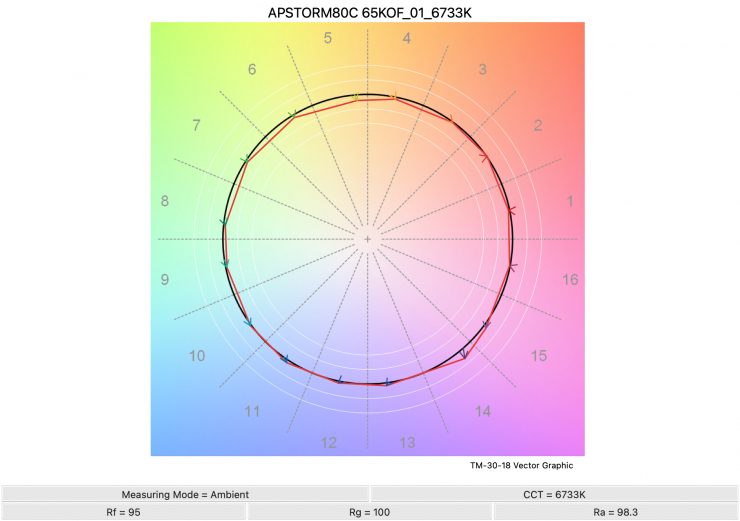
6500K 
8000K 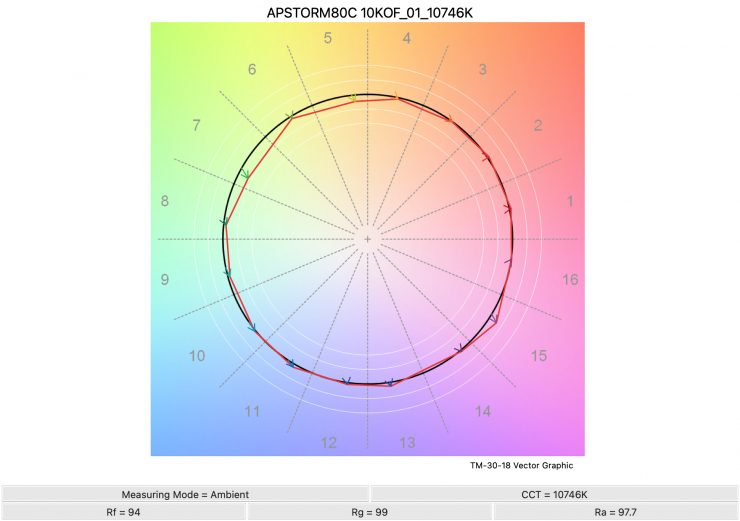
Above, you can see the scores for the Aputure STORM 80c at various CCT settings. Below, I have listed the figures as well.
Here are the results:
| Rf | Rg | |
| 2500K | 95 | 101 |
| 3200K | 96 | 101 |
| 4500K | 95 | 99 |
| 5600K | 96 | 100 |
| 6500K | 95 | 100 |
| 8000K | 94 | 99 |
| 10000K | 94 | 99 |
The TM-30 scores are all good and very consistent across the CCT range. This shows me that the light is pretty consistent at replicating accurate colors with full saturation.
SSI
SSI (Spectral Similarity Index) was developed by the Sci-Tech Council of the Academy. SSI gives me the ability to set any light as a standard, or use predefined standards (such as CIE D55), and then give other lights an SSI score based on how well they will match standards such as CIE D55. This way I can measure spectral response and compare it directly against an ideal light source. This is actually a much better test than recording CRI scores, but it won’t tell you everything you need to know.
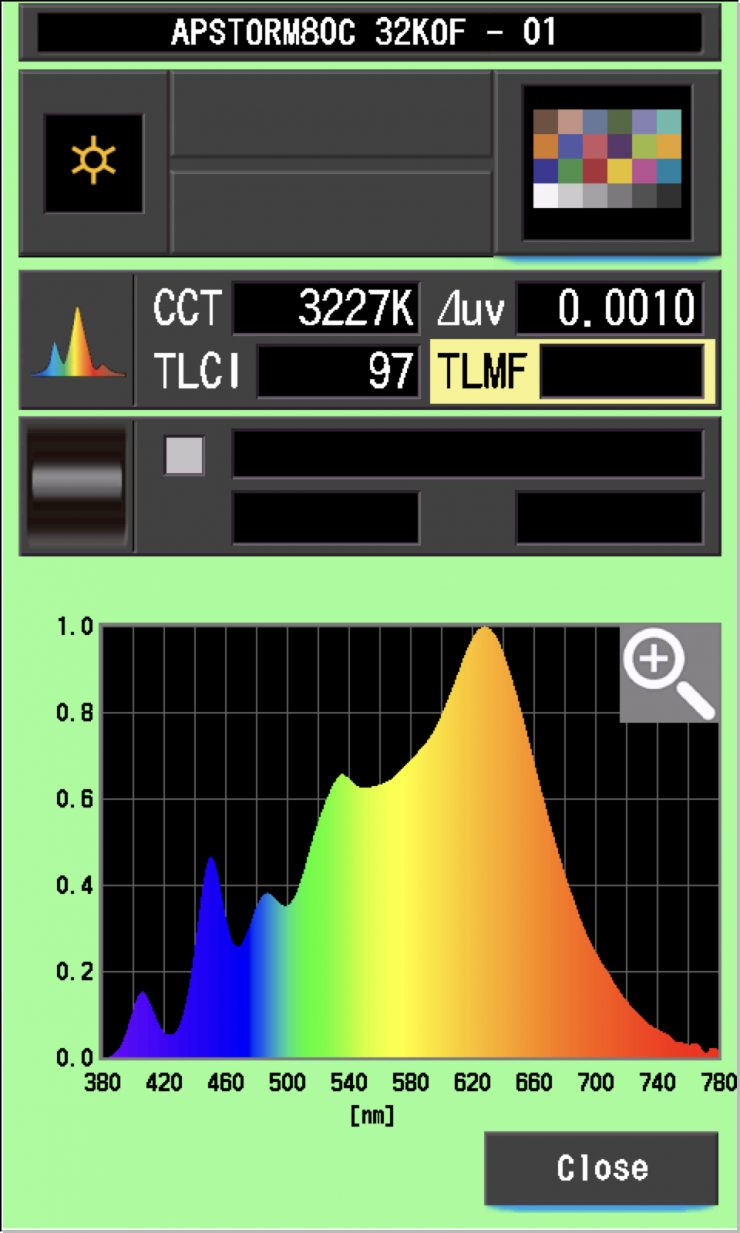
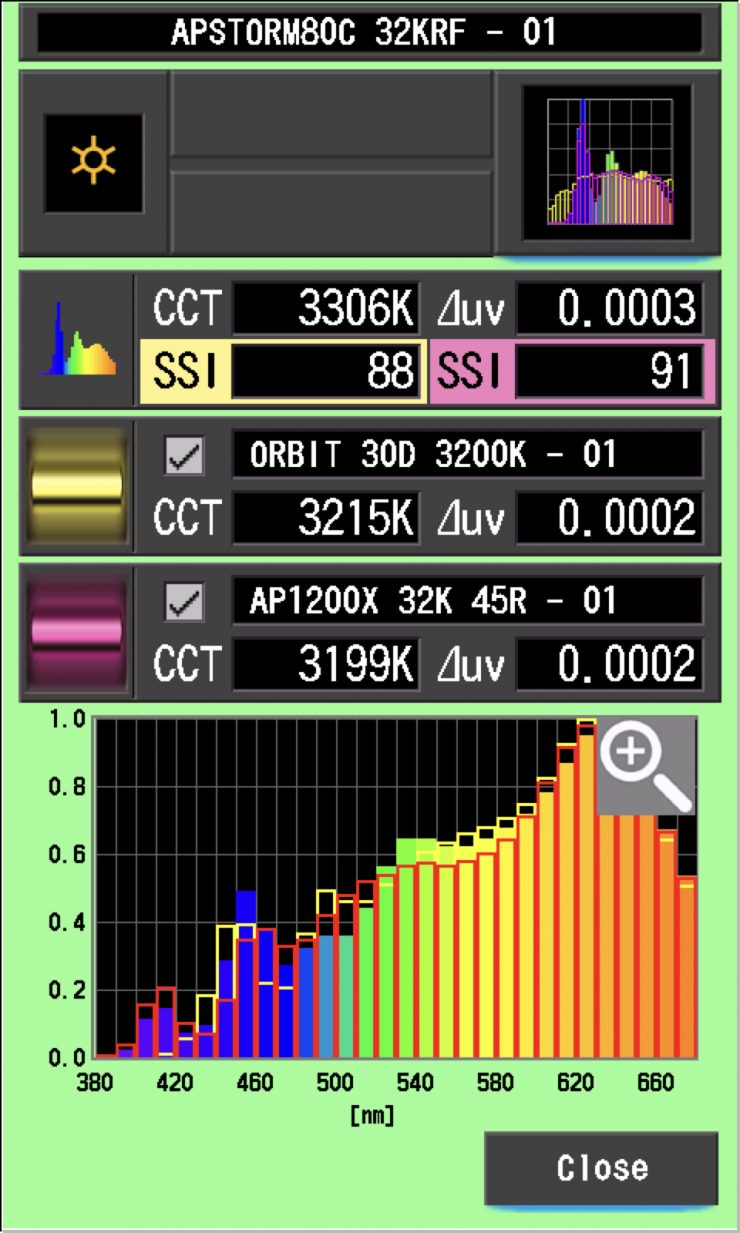
Aputure STORM 80c 3200K Max. Output Mode (Hyper reflector 30°)
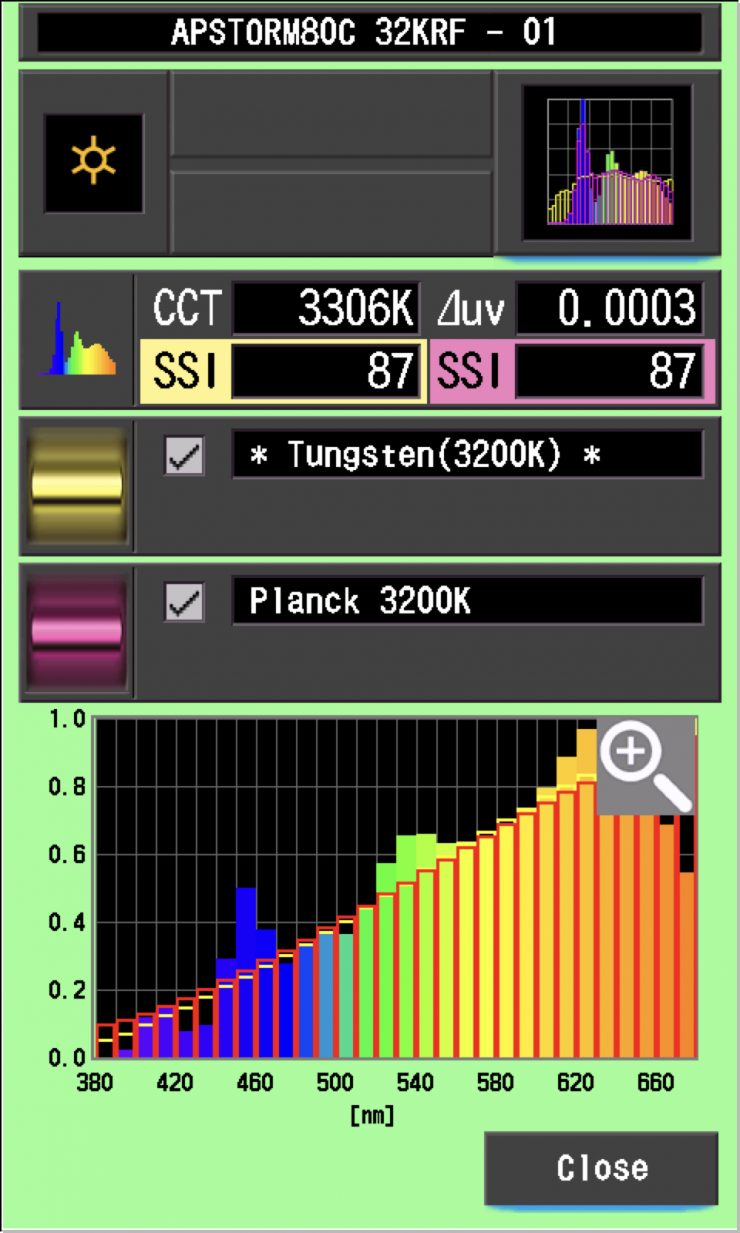
In this graph, the red bars indicate a perfect Planck 3200K source. The gold bars indicate a perfect 3200K Tungsten source. This lets us compare how close to a perfect 3200K lighting source the Aputure STORM 80c is. Any SSI score in the high 70’s, low ’80s is very good for a 3200K LED light. The results for the Aputure STORM 80c were excellent when used at 3200K.
Nanlite Forza 60c
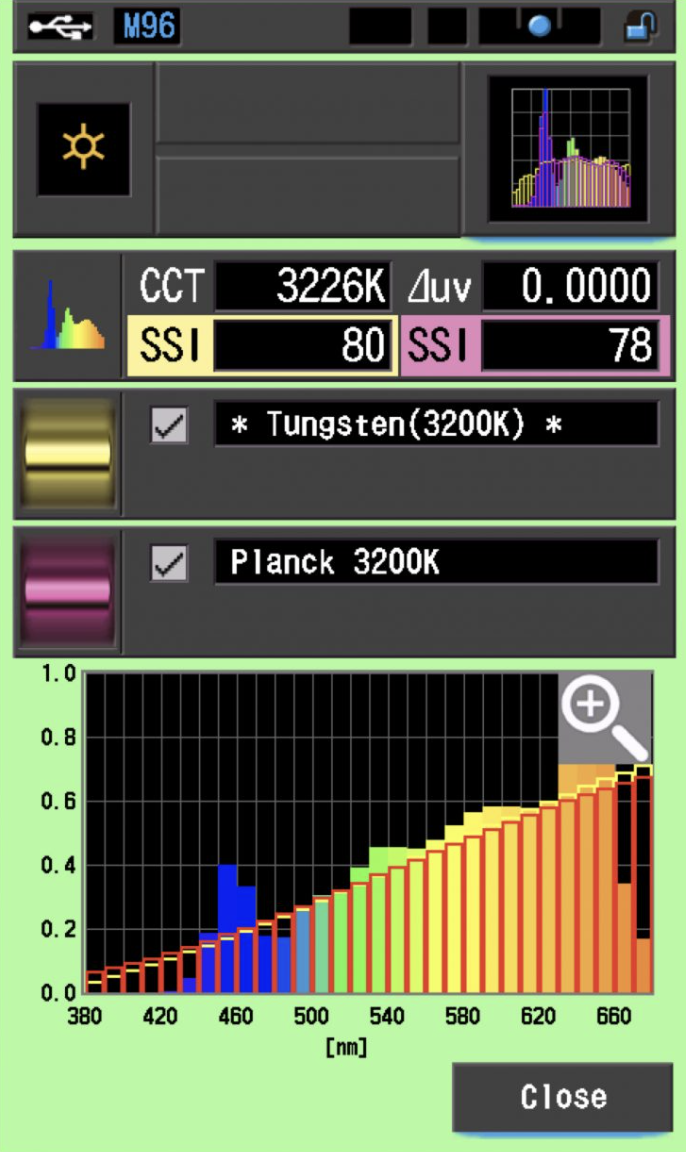
As a comparison, let’s have a look at the Nanlite Forza 60c. In this graph, the red bars indicate a perfect Planck 3200K source. The gold bars indicate a perfect 3200K Tungsten source. As you can see, this light has a hard time replicating colors below about 450nm.
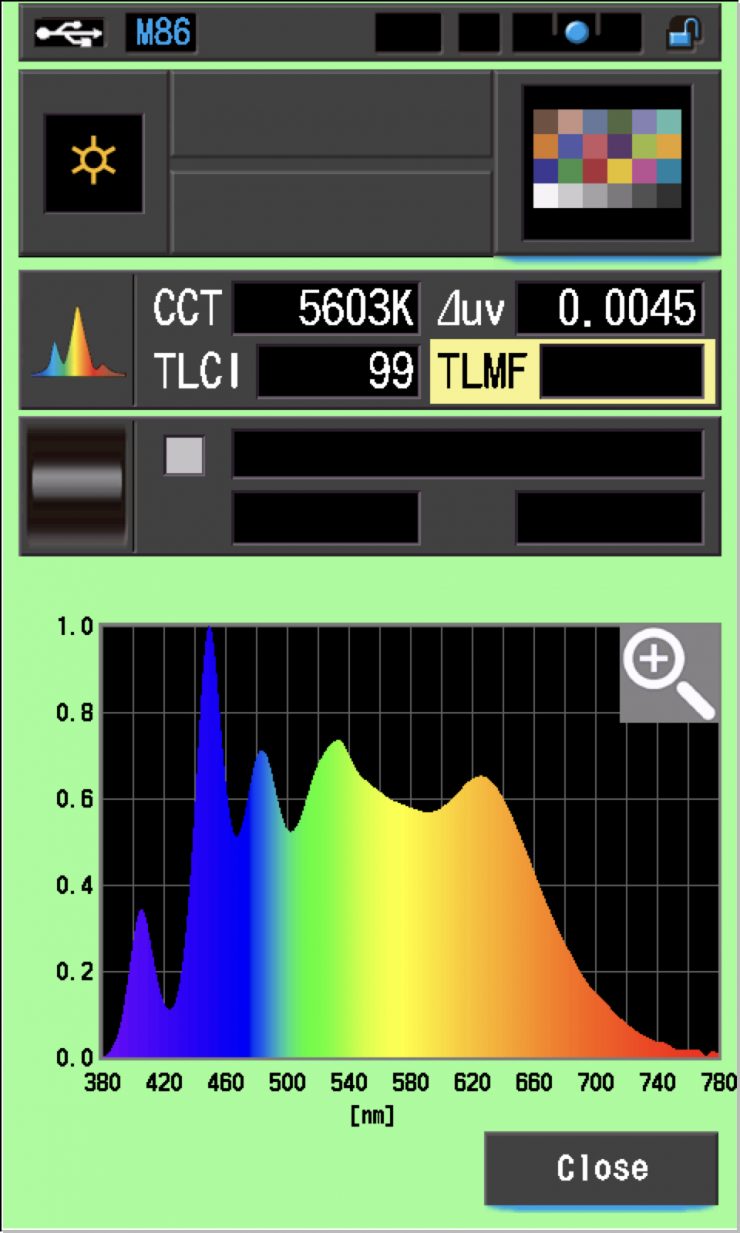
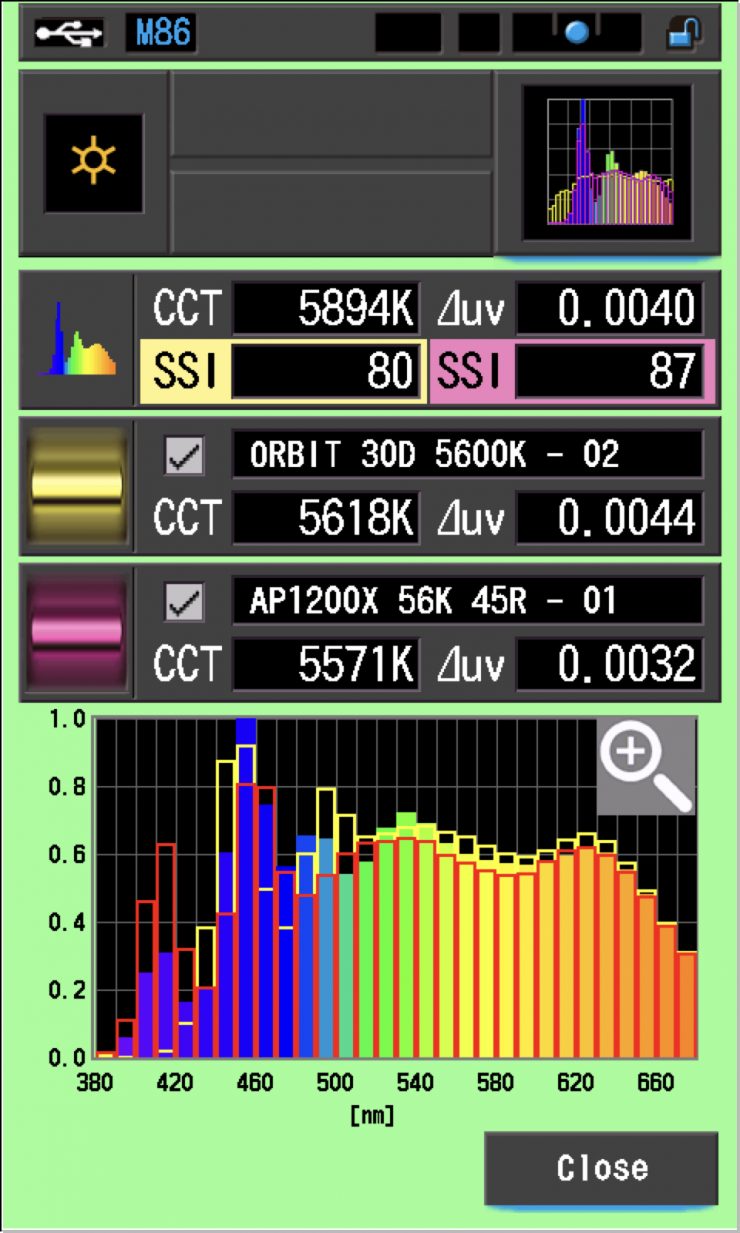
Aputure STORM 80c 5600K Max. Output Mode (Hyper reflector 35°)
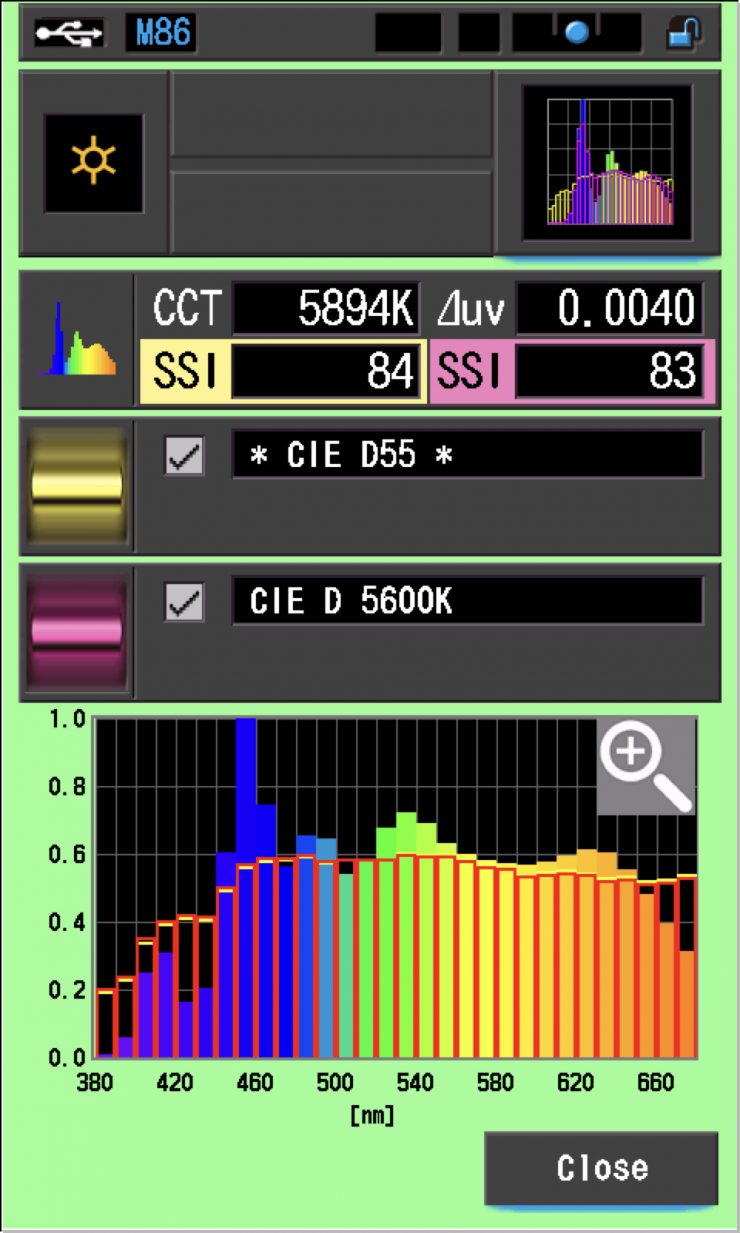
In the graph above, the gold bars indicate a perfect CIE D55 source. The red bars indicate a perfect CIE D 5600K source. This lets us compare how close to a perfect 5600K lighting source the Aputure STORM 80c is. A score in the low 70’s is typical for a 5600K LED source; the STORM 80c recorded a score of 84, which was very good. The reason for this great score has to do with the Indigo emitter in the BLAIR CC light engine. You can clearly see that the STORM 80c is able to produce colors below 450nm whereas most lights can’t.
It wasn’t the highest SSI score at 5600K I have ever recorded, nor as good as the 88 that the STORM 1200x recorded, but nonetheless, it was still very good.
Nanlite Forza 60c
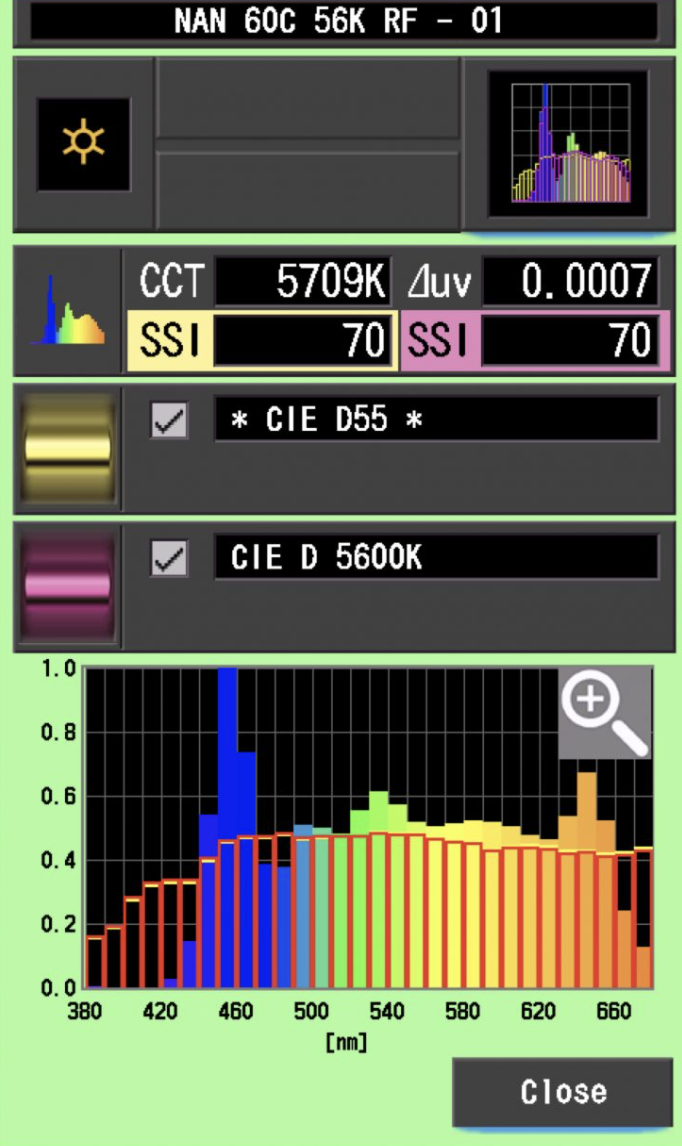
In the graph above the gold bars indicate a perfect CIE D55 source. The red bars indicate a perfect CIE D 5600K source. This lets us compare how close to a perfect 5600K lighting source the Nanlite Forza 60c is. A score in the low 70’s is typical for a 5600K LED source.
SSI Comparisons
The main reason we want to record SSI scores is so we can see how well they match with other lights. As an example, I wanted to see how well the Aputure STORM 80c matched the ARRI Orbiter and the Aputure STORM 1200x . Below you can see the results.
As you can see, neither light was a super close match to the Aputure STORM 80c. Any score in the high ’80s and low 90s would be considered reasonably good. It was interesting to see that the STORM 80c only has a matching score of 87 against the STORM 1200x. I would have thought that they would have been a bit closer.
As another test, I thought I would compare those same lights against the Aputure STORM 80c at 3200K. Below you can see the results.
As you can see, both the ARRI and the Aputure were a reasonably close match to the STORM 80c. Very few lights from different manufacturers are ever going to be an exact match, and even lights from the same manafacturer are not always going to match either.
Let’s now do a test where we compare the light against itself when it is using the optional Dome and also the Fresnel.
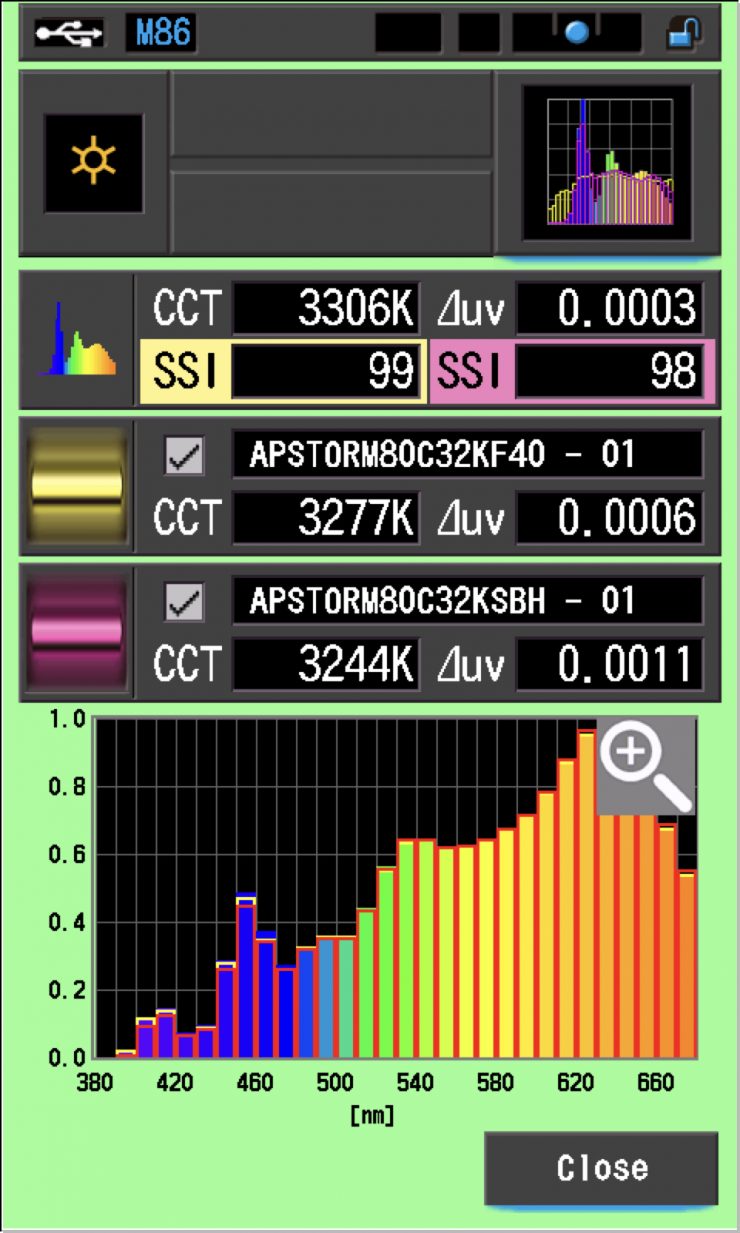
As you can see, the light was almost a perfect match to itself when used with either the Dome or the Fresnel.
Again, when using the Dome or the Fresnel, the light is almost a perfect match.
SSI tests are a great way of telling you what lights you own or use will work well together.
Spectral Distribution
5600K
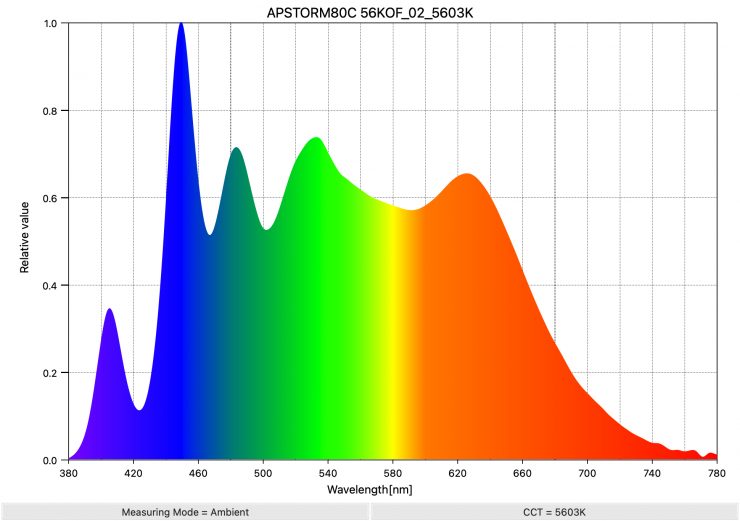
Above, you can see the spectral distribution of the Aputure STORM 80c when it is set at 5600K. The spectral distribution is reasonably full, and you can clearly see the extra blue spike, which is the result of the Indigo emitter in the BLAIR CC light engine. You can see the extra information that is between 380-420nm, which you don’t see on other fixtures.
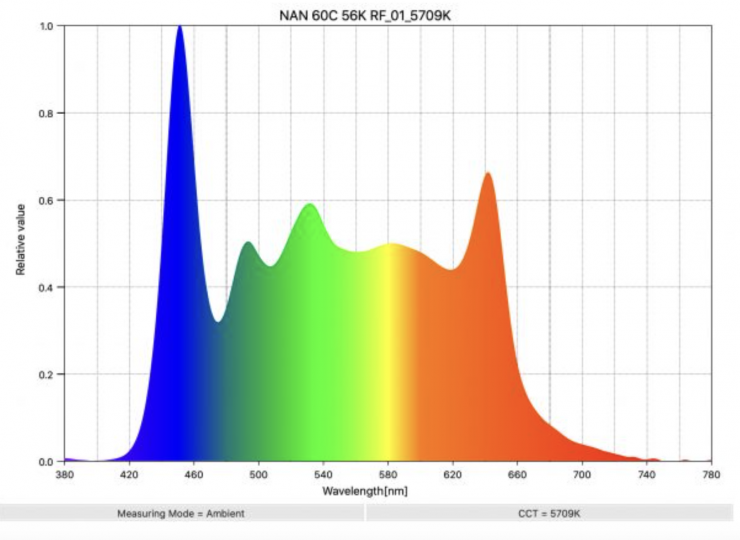
As a comparison, above you can see the spectral distribution of the Nanlite Forza 60c when it is set at 5600K. The spectral distribution is ok, but you can see an orange spike.
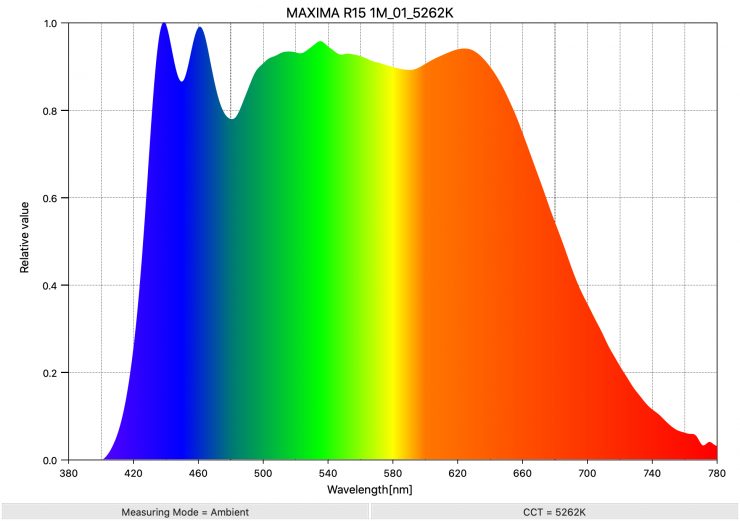
If you want to see what a really good full spectral response looks like for a spotlight at 5600K, above is the result for the Maxima 3.
3200K
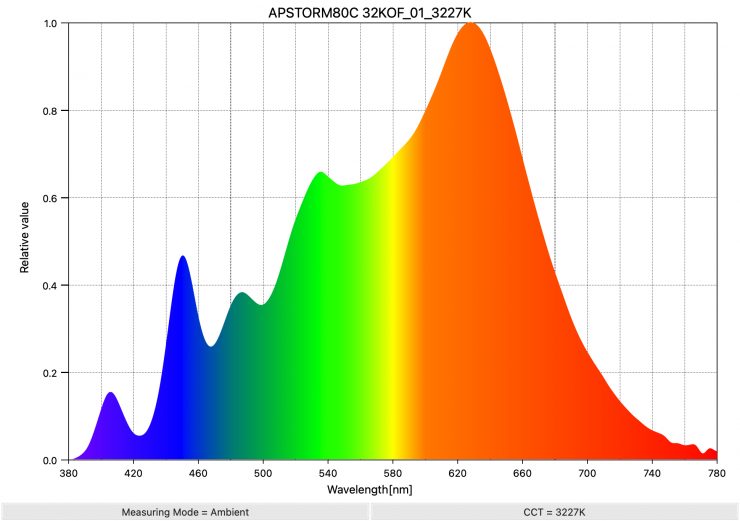
Above, you can see the spectral distribution of the Aputure STORM 80c when it is set at 3200K. The spectral distribution only has a very marginal push towards green, but overall, it is reasonably good.
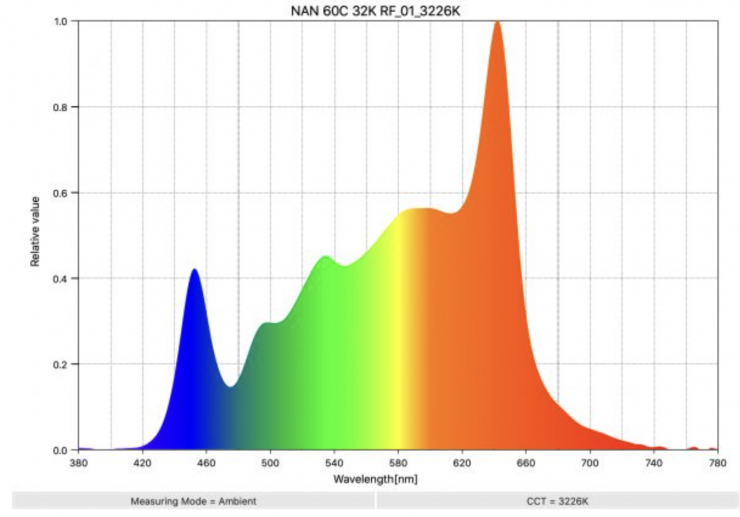
As a comparison, above you can see the spectral distribution of the Nanlite Forza 60c when it is set at 3200K. The spectral distribution only has a very marginal push towards green, but overall, it is reasonably good.
Real-World Performance & Quality of Light
As I always say, photometric scores only tell you part of the story. So let’s find out if the scores from the Aputure STORM 80c translate into good real-world performance.
The photometric results can only give me scientific data, and it is much more important for me to see how the light looks and performs. Contrary to popular belief, if you are in the business of making lights, you don’t want to try and achieve perfect scores because perfect scientific scores don’t necessarily equate to a light looking good. A good light should look good to a camera because, after all, that is what is capturing the image. Cameras and our eyes see differently, and ideally, you want to use a light that looks good to your camera. There’s a bit of alchemy in knowing what to prioritize in order to render colors that appear accurate, natural, and pleasing. It’s not just about hitting certain numbers.
It is important to note that almost all of the LED lights that have come to market in the last couple of years are very good, and they can all produce good results. Just because something is new doesn’t necessarily mean it is better, nor does it mean that you have to throw your older lights out.
Lighting really comes down to how you use the light, and having a great light isn’t suddenly going to produce better results unless you know what you are doing.
One of my primary aims when testing the light was to see how the BLAIR CC light engine performed, especially when used as a daylight source. The only way to do this and not get caught up in the hype is to test it against another fixture in real-world conditions.
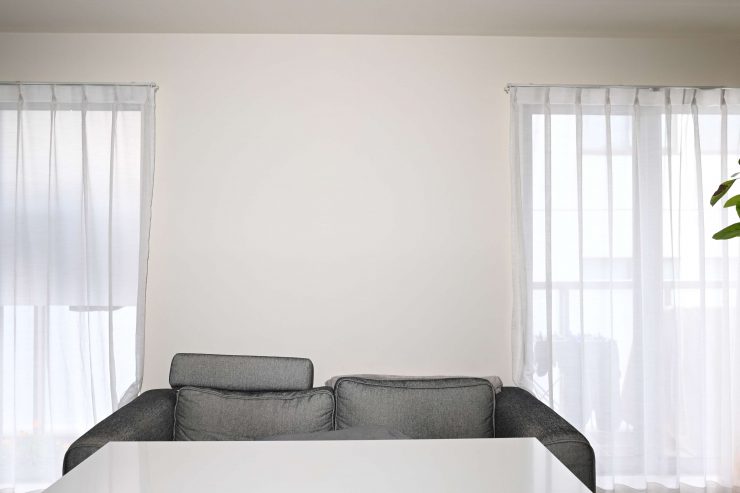
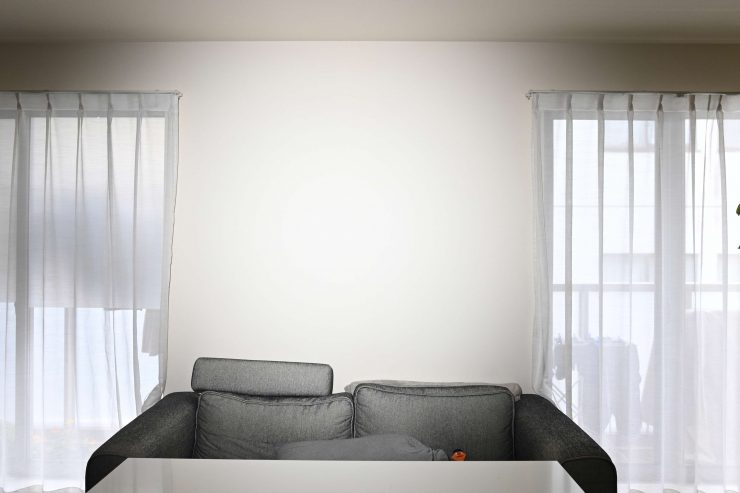
Aputure STORM 80c set @5600K, camera set at 5600K 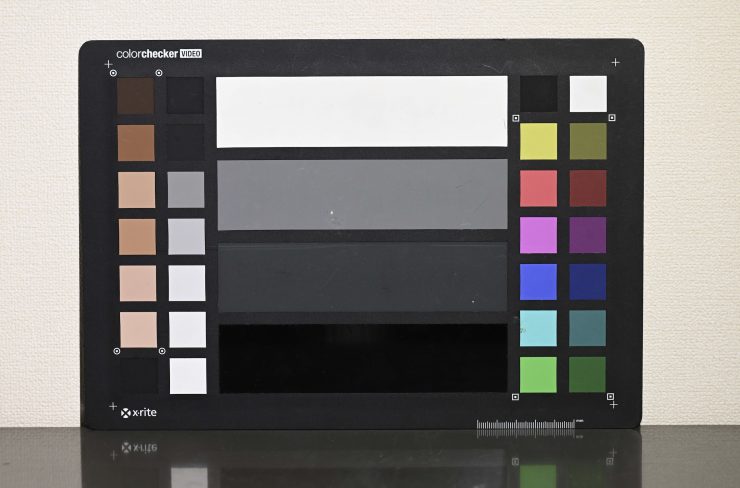
Nanlite Forza 60c set @5600K, camera set at 5600K 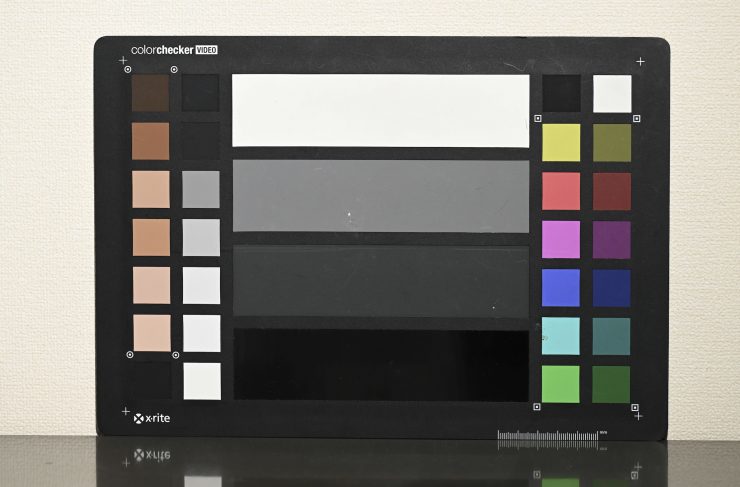
Aputure STORM 80c set @5600K, camera WB 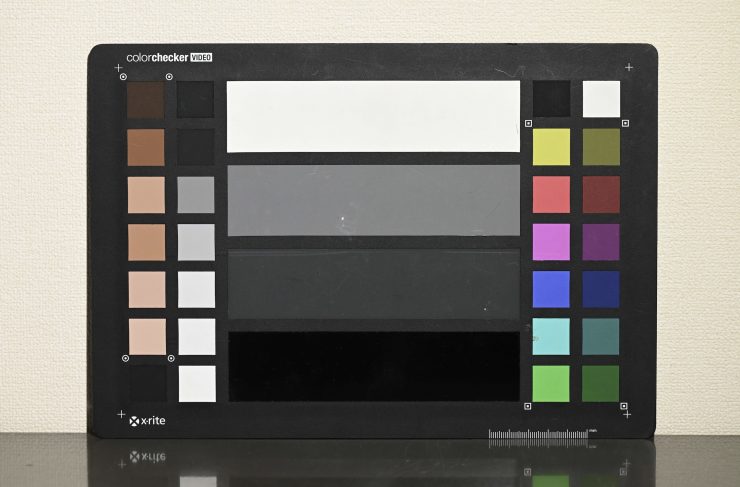
Nanlite Forza 60c set @5600K, camera WB 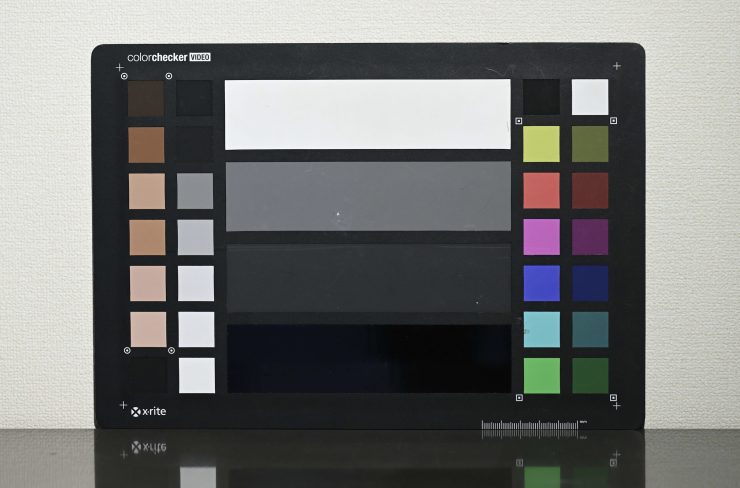
Aputure STORM 80c set @3200K, camera set at 3200K 
Nanlite Forza 60c set @3200K, camera set at 3200K 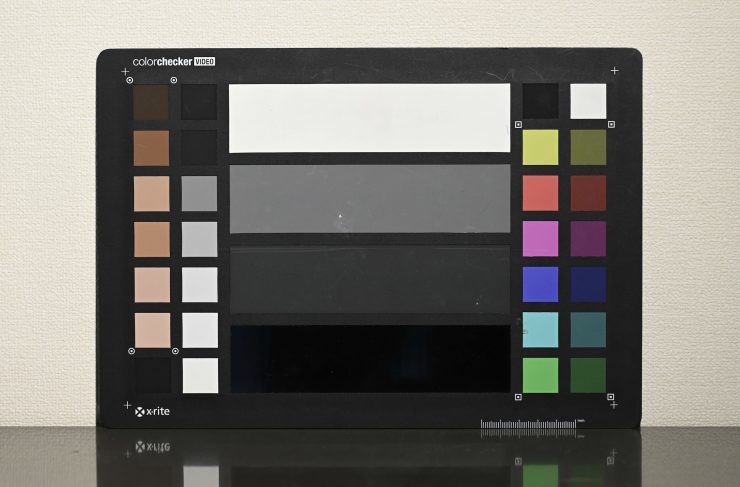
Aputure STORM 80c set @3200K, camera WB 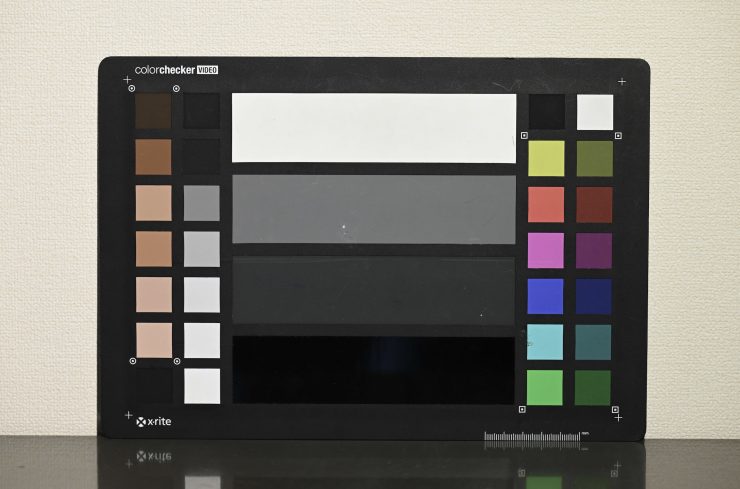
Nanlite Forza 60c set @3200K, camera WB
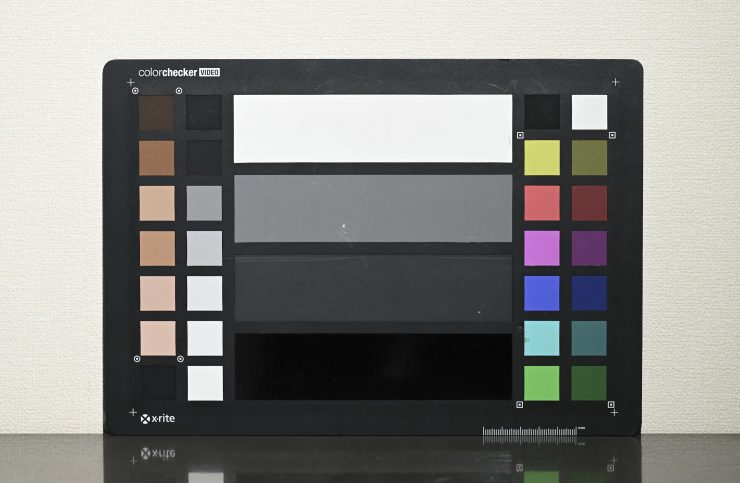
Above, you can see some tests where I compared the STORM 80c against the Nanlite Forza 60c at 5600K and 3200K when shooting a color checker chart (which has seen better days!). Both lights were set at 5600K and 3200K, and I have set the camera at preset 5600K and 3200K WB, and then I have also done a manual WB so you can see the differences.
There is not a massive difference between the two lights, but you can clearly see that the background wall where the color checker chart is placed is a different color. With the Nanlite, it has a slight magenta lean, while with the Aputure it is more neutral.
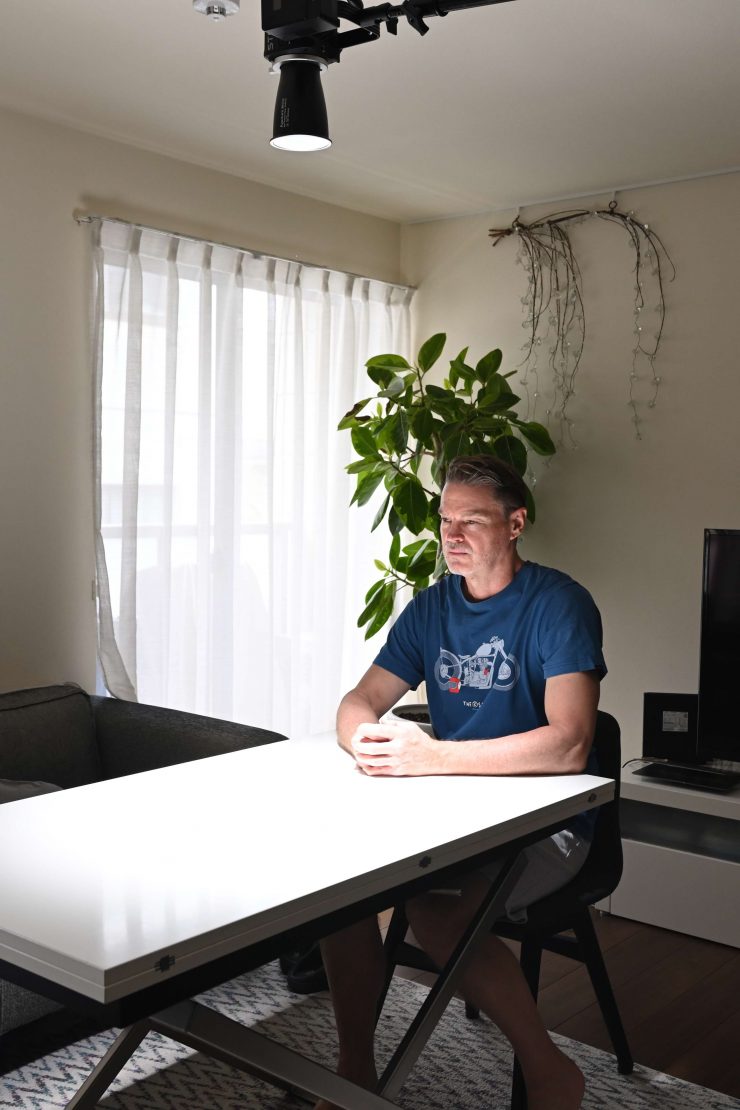
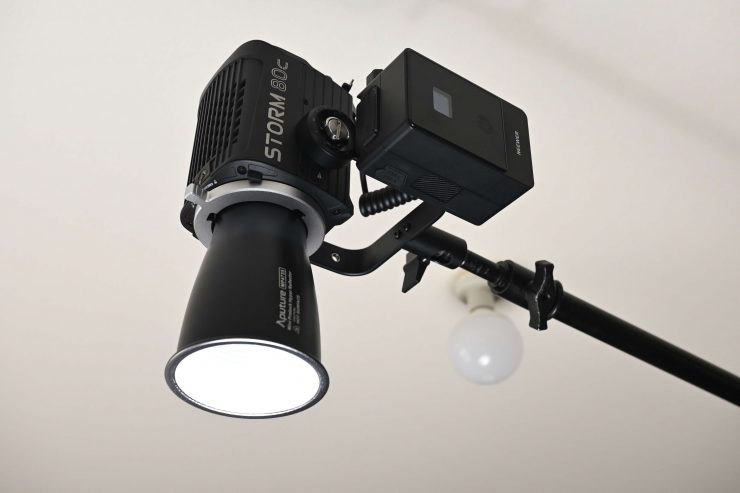
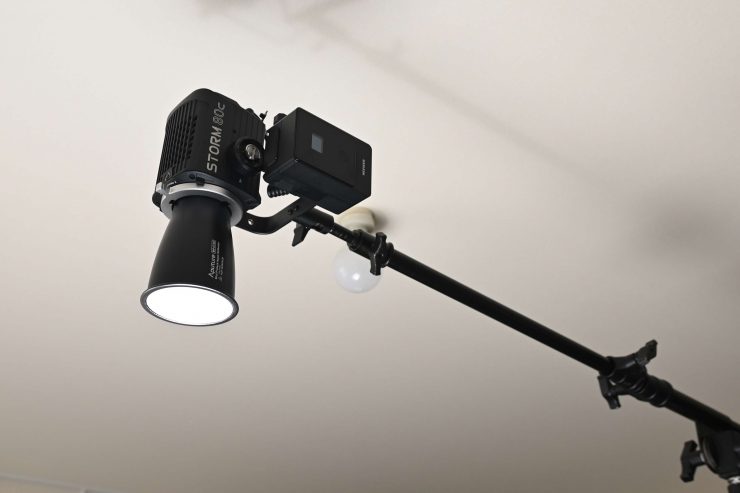
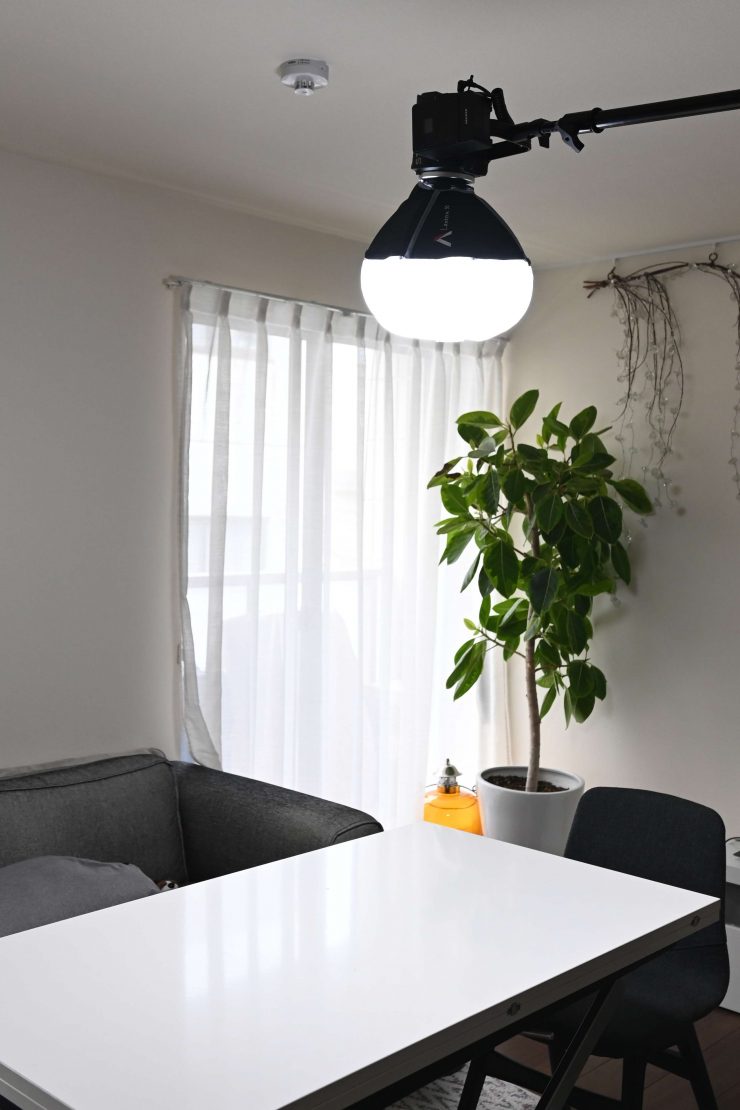
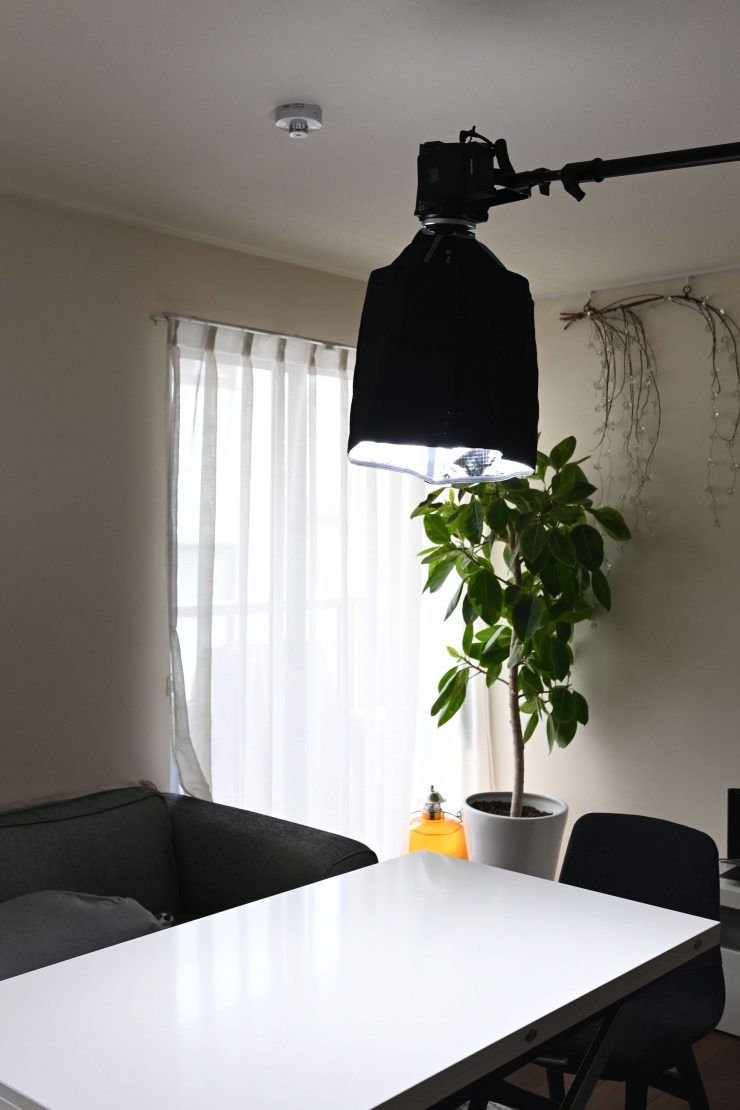
Above you can see some photos I took where I placed the light on a boom arm above a table and used it with its Hyper reflector, and the optional Lantern. Because the STORM 80c doesn’t weigh much it is easy to rig in this way and it works well if you need to put some overhead light down onto a table.
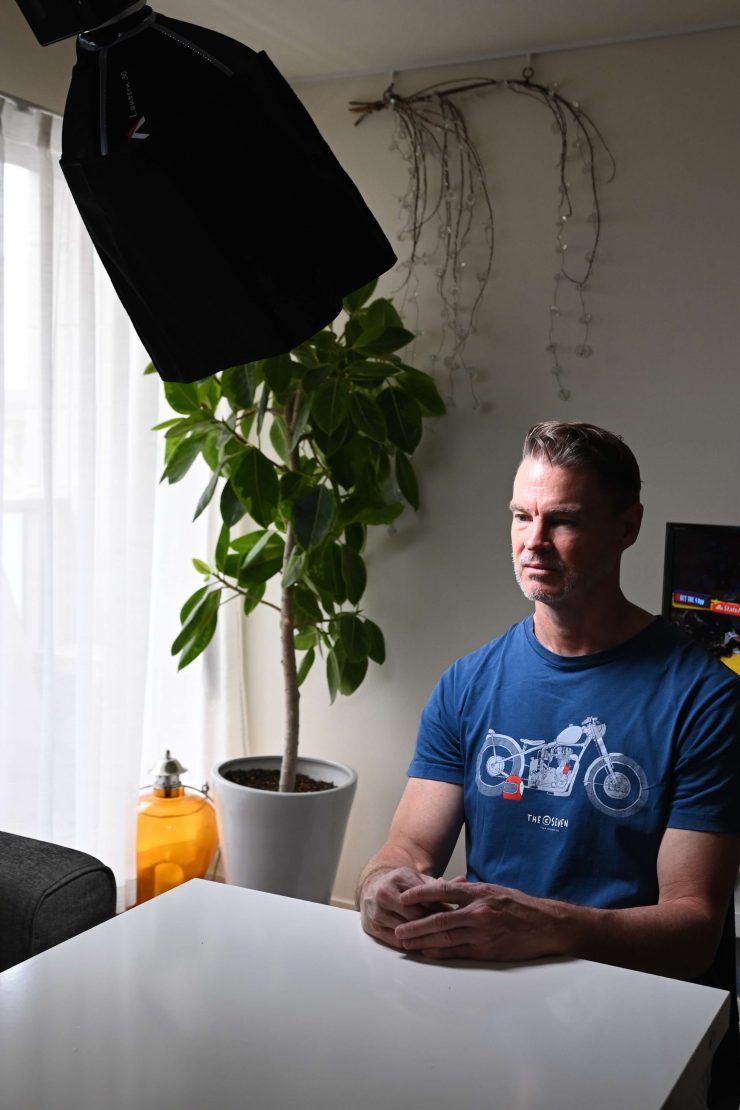

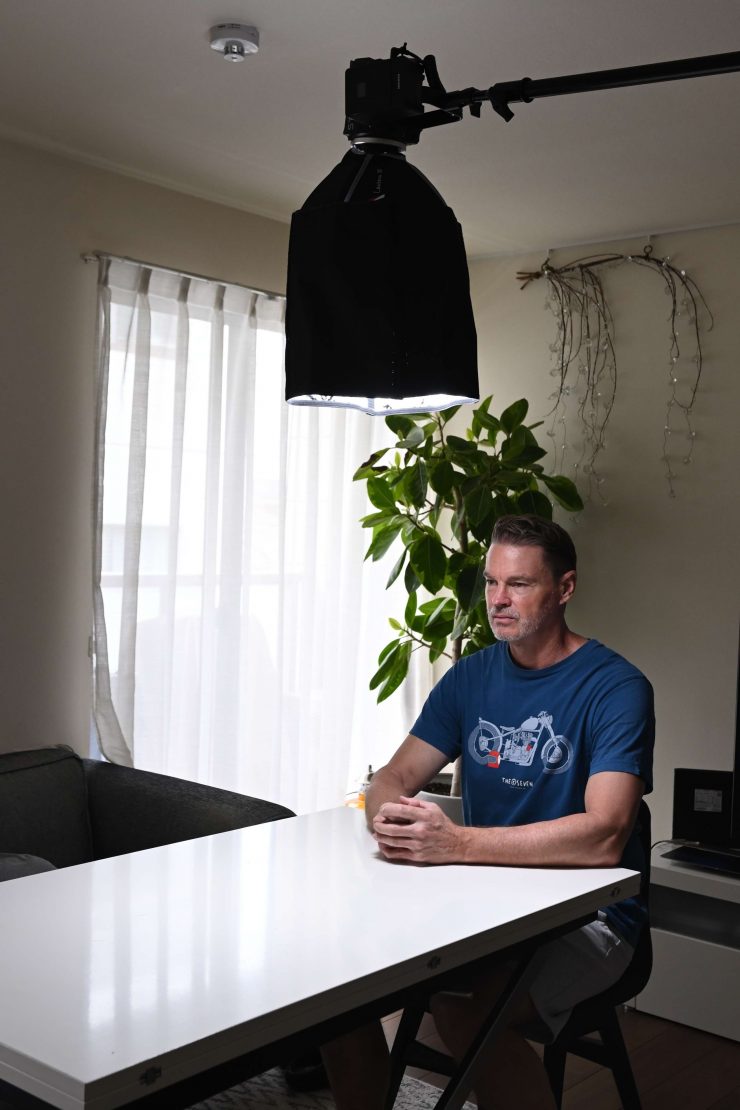
Above, you can see if I use the STORM 80c and Lantern with its skirt and angle it slightly, I can easily create some modeled, motifited light.
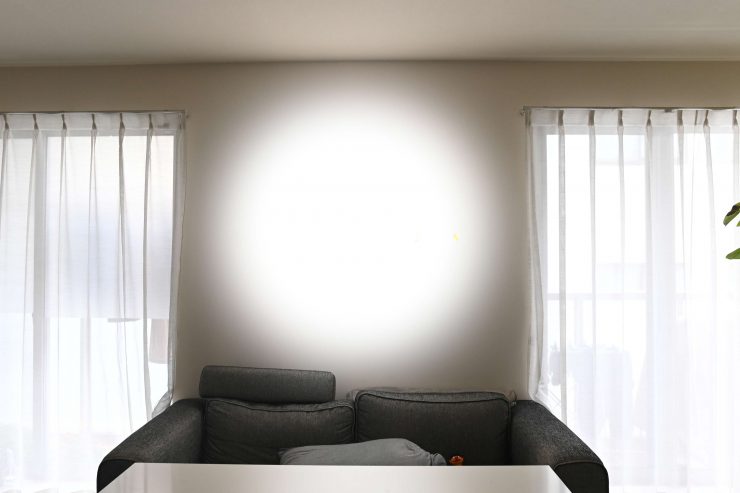
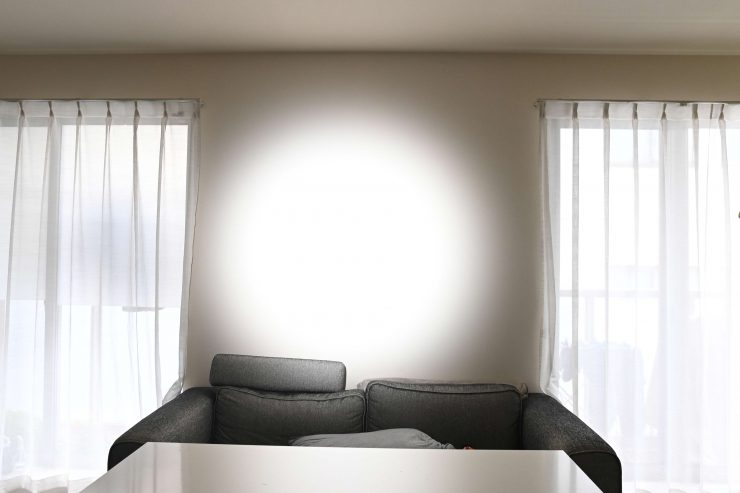
Open Face 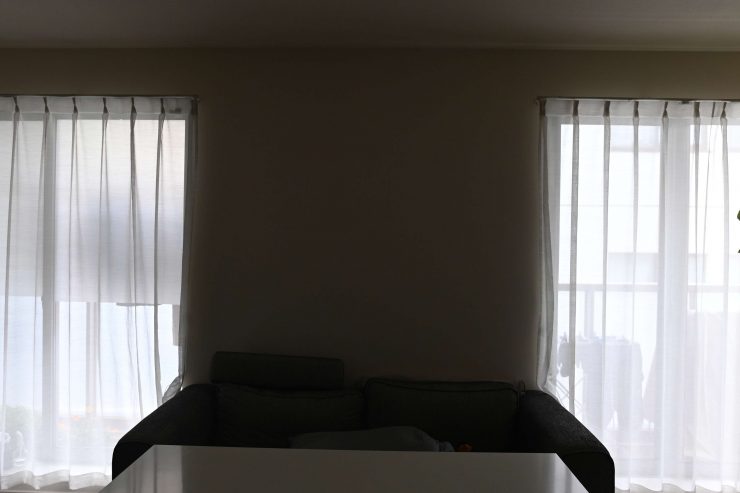
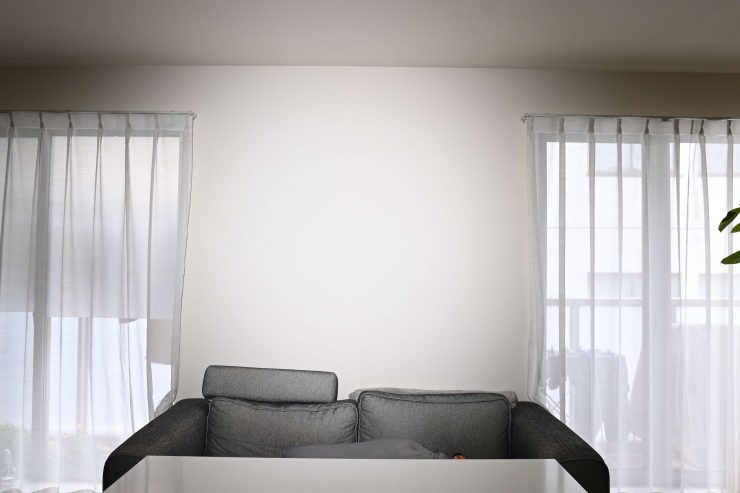
Light Off 
Hyper Reflector 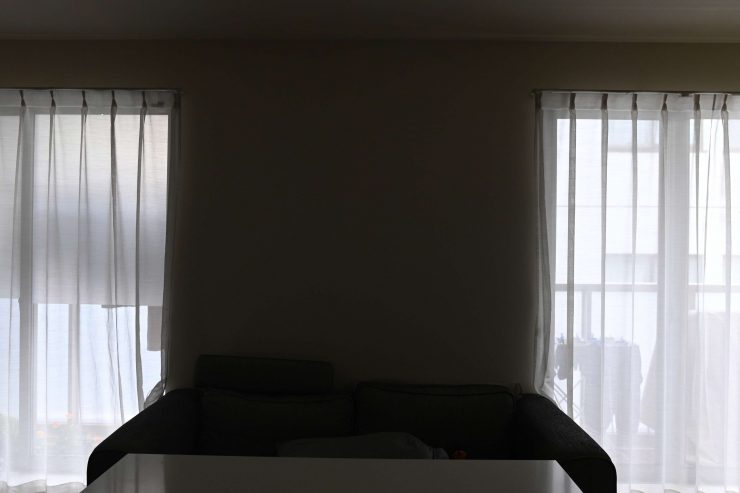
Light Off 

CF4 Fresnel @40 Degrees 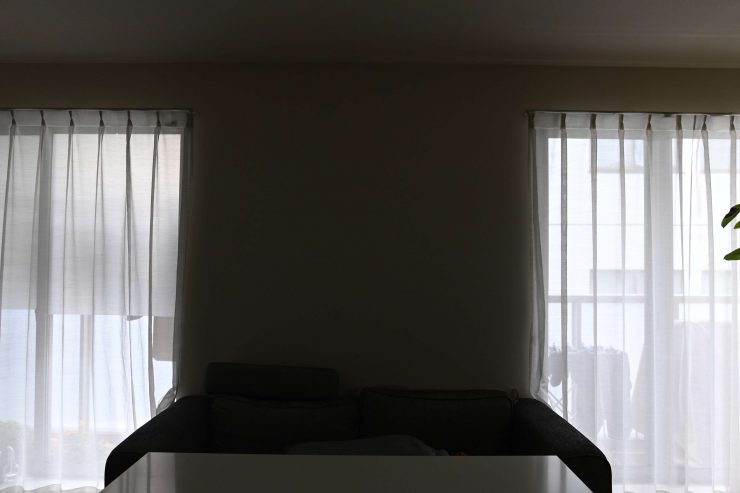
Light Off 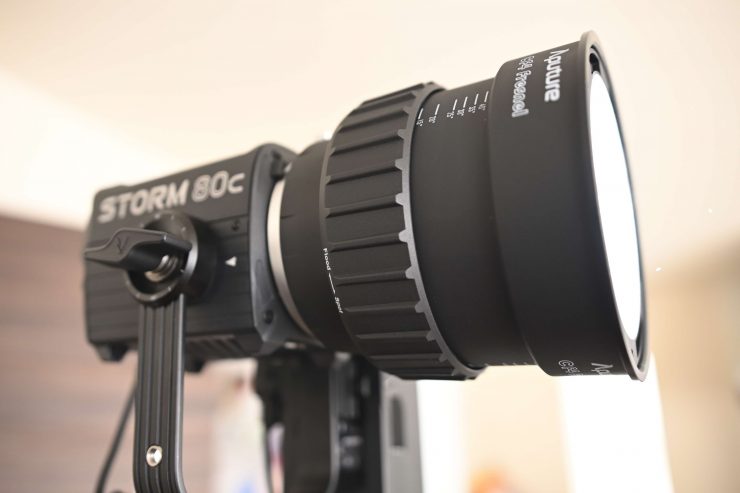
CF4 Fresnel @15 Degrees 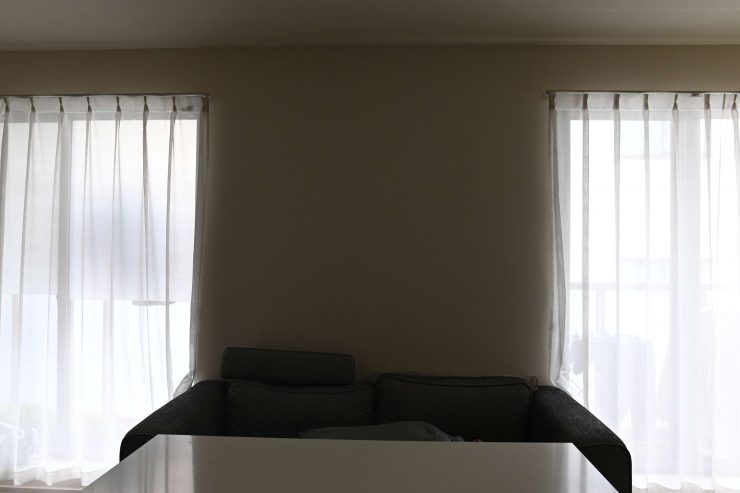
Light Off
Above you can see some photos I took when placing the light 3m / 9.9′ from a wall and using it open faced, with its Hyper Reflector, and with its Fresnel.

Above, you can see a shot where I have just used the STORM 80c with the optional Dome softbox and two layers of diffusion and an egg crate. While it isn’t going to have the punch or wrap of a larger, more powerful fixture, it still does a good job in controlled conditions.
Who is the Aputure STORM 80c aimed at?
This is certainly a fixture that could be used for lots of different applications, by lots of different people. Lights of this size and price appeal to a wide audience.
If you do a lot of travelling or run-and-gun work, then this light makes a lot of sense for certain applications. It could be used as a fill light or a harder, stronger source when coupled with the optional Fresnel or used with its included reflector. A spotlight attachment would make a lot of sense as well, but that will depend on whether or not Aputure makes one.
Price & Availability
The Aputure STORM 80c is now shipping for $599 USD.
- Aputure STORM 80c BLAIR-CG LED Monolight (US)
- Mini ProLock Hyper Reflector
- Mini Lantern Diffuser
- Mini ProLock Mount Protective Cover
- AC Power Adapter
- AC Power Cable (13.1′)
- Soft Carrying Case
- Limited 1-Year Manufacturer Warranty
- Registration Extension: 1-Year
Above, you can see what you get in the kit.
Aputure also sells a Storm 80c LED Monolight 3-Light Kit for $2,060 USD.
Competition
Competition arguably comes in the form of the Nanlite Forza 60c and some of the offerings from Neewer, COLBOR, and Hive Lighting.
Below, you can see how the price compares to some of the competition. I have included some other similar power draw spotlights, as there isn’t a lot of competition in this space.
| PRICE | |
| Aputure STORM 80c | $599 USD |
| Nanlite Forza 60C | $384.30 USD* |
| Neewer CB60 RGB | $160.99 USD |
| COLBOR CL60R RGB COB | $199 USD |
| COLBOR CL120R Lite | $249 USD |
| HIVE LIGHTING Wasp 100-CX | $525.79 USD |
| HIVE LIGHTING Wasp 100-C | $1,099 USD |
*Currently on sale at B&H (24th March 2025)
The price of the Aputure STORM 80 is more expensive than most of the competition, although it arguably has a better light engine than what its competitors are offering.
What accessories are available?
Conclusion
Aputure’s acquisition of Prolycht has certainly paid dividends. The new BLAIR and BLAIR CC light engines are very good and are arguably currently ahead of their competition. The light is well-made, and Aputure has paid a lot of attention to small details.
The STORM 80C is nice and small and compact, and it is easy to run from a flight-safe camera battery. It is quiet, has plenty of output, and Aputure has a large array of lighting modifiers for it.
When coupled with the optional Dome, you could potentially use it as a key light for an interview in controlled conditions. The Storm 80c LED Monolight 3-Light Kit would make for a pretty good run-and-gun or travel lighting kit if you need to reduce weight and size.
The ability to dial in a very wide array of CCT settings and have +/- G/M adjustments are features I personally look for. The Gels, Source Matching, HSI+, etc., are all nice to have and add to the versatility of the light.
The interface and operating system are easy to use, as is the app.
At least, in my opinion, the light is competitively priced given its feature set, output, build quality, and performance. It does, however, face stiff competition from the Nanlite Forza 60c, which is currently priced at $384.30 USD.
As I mentioned earlier in the review, people shouldn’t get caught up in wanting to buy the latest and greatest, because if you have older fixtures that are still working for you, then there really isn’t any need to upgrade.
The STORM 80c is a very solid fixture, and if you are in the market for a well-performing spotlight that draws under 100W, it is hard to beat.
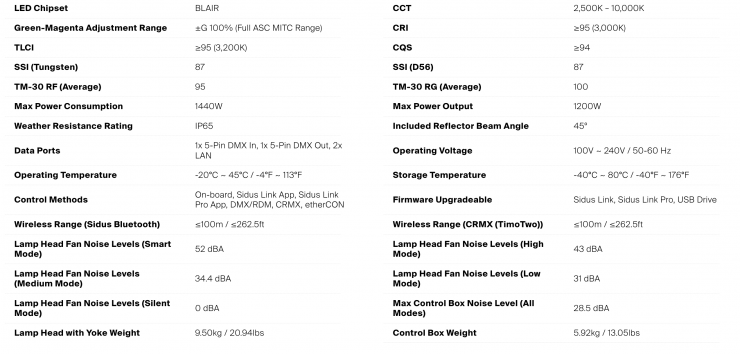
Technical Specifications
Like what we do and want to support Newsshooter? Consider becoming a Patreon supporter and help us to continue being the best source of news and reviews for professional tools for the independent filmmaker.